LOWER CONTROL ARM
DESCRIPTION
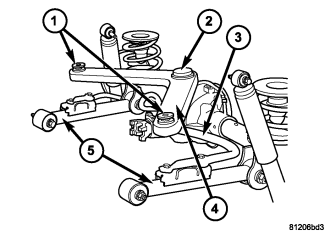
OPERATION
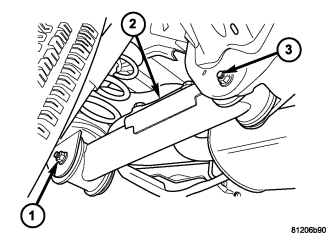
REMOVAL
1. Raise the vehicle and support the rear axle.
2. Remove the stabilizer bar (3) retaining bolts from the suspension arm (5).
3. Remove the lower suspension arm nut and bolt (1) from the axle bracket (1) .
NOTE: When removing the right side suspension arm from the frame rail it will be necessary to pry the exhaust over slightly to allow enough clearance to remove the bolt.
4. Remove the nut and bolt (3) from the frame rail (3) and remove the lower suspension arm (2).
INSTALLATION
1. Position the lower suspension arm (2) in the axle bracket and frame rail bracket (3).
NOTE: The end of the arm with the voided round bushing attaches to the axle bracket.
2. Install the axle bracket bolt (1) and nut finger tight .
NOTE: When installing the right side suspension arm to the frame rail it will be necessary to pry the exhaust over slightly to allow enough clearance to install the bolt.
3. Install the frame rail bracket bolt (3) and nut finger tight .
4. Install the stabilizer bar (3) retaining bolts to the suspension arm (5).
5. Remove the supports and lower the vehicle.
6. With the vehicle on the ground tighten the nut at the frame to 163 N·m (120 ft. lbs.). Tighten the nut at the axle bracket to 163 N·m (120 ft. lbs.).