WHEEL OPENING FLARE MOLDING
REMOVAL
Front
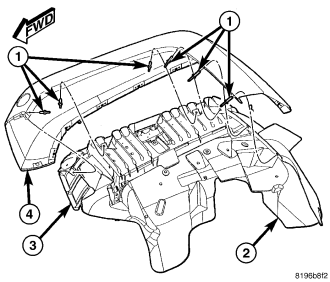
1. Remove the rivets (1) securing the fender flares (4) to the support (3).
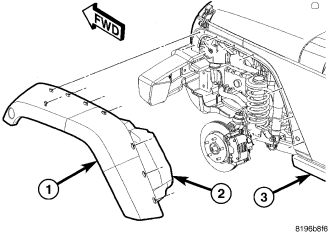
2. Using a trim stick C-4755 or equivalent, separate the clips attaching the flare (1) to the fender (3) and remove.
3. Disconnect the marker light electrical connector, if equipped.
Rear
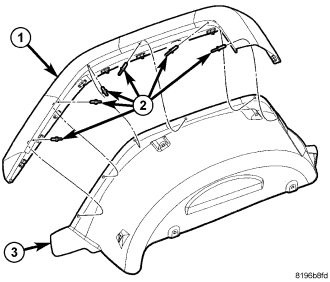
1. Remove the rivets (2) attaching the flare (1) to the wheelhouse liner (3).
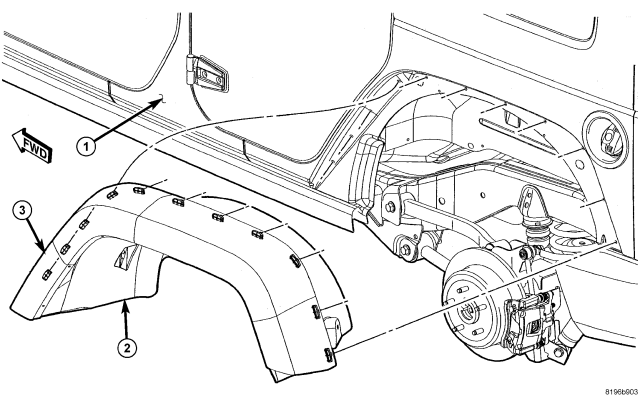
2. Using a trim stick C-4755 or equivalent, separate the clips attaching the flare (3) to the body (1).
INSTALLATION
Front
1. Connect the marker light electrical connector, if equipped.
2. Position the flare (1) onto the body (3) and seat the support clips fully.
3. Install rivets (1) attaching the flare (4) to the support (3).
Rear
1. Position the flare (3) onto the body (1) and seat the support clips fully.
2. Install rivets (2) attaching the flare (1) to the wheelhouse splash shield (3)