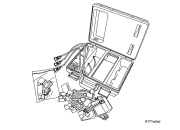
Using the wiring diagram/schematic as a guide, inspect the related wiring and harness connectors. Look for chafed, pierced, pinched, or partially broken wires and broken, bent, pushed out, spread, corroded, or contaminated terminals.
Turn the ignition on, then reconnect
the 12-volt battery and wait two minutes before proceeding. Failure
to follow these instructions may result in possible serious or fatal
injury.
1.
Disconnect the ORC harness connectors.
NOTE:
Check connectors - Clean and repair as necessary.
2.
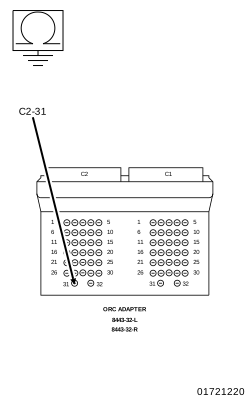
Connect the SRS Load Tool Adapter
8443-32-L
to the ORC harness connectors.
3.
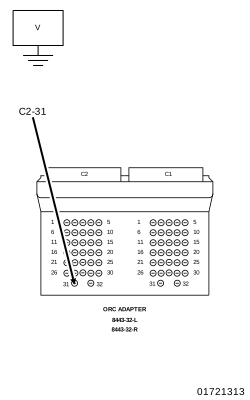
Measure the resistance of the (F100) Fused Run Relay Output (Run) circuit between SRS Load Tool Adapter
8443-32-L
cavity C2-31 and ground.
Is the resistance below 100.0 Ohms?
Yes
Repair the (F100) Fused Run Relay Output (Run) circuit for a short to ground.
If the Occupant Restraint Controller
(ORC) is dropped at any time, it must be replaced. Failure to follow
these instructions may result in possible serious or fatal injury.
Replace the ORC in accordance with the Service Information.
6.
CHECK (F100) FUSED RUN RELAY OUTPUT (RUN) OUTPUT CIRCUIT FOR AN OPEN
WARNING:
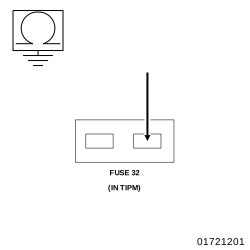
Turn the ignition off, disconnect
the 12-volt battery and wait two minutes before proceeding. Failure
to follow these instructions may result in possible serious or fatal
injury.
1.
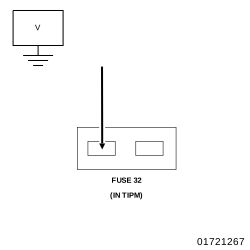
Reinstall the TIPM Fuse M32.
2.
Disconnect the ORC harness connectors.
NOTE:
Check connectors - Clean and repair as necessary.
3.
Connect the SRS Load Tool Adapter
8443-32-L
to the ORC harness connectors.
WARNING:
Turn the ignition on, then reconnect
the 12-volt battery and wait two minutes before proceeding. Failure
to follow these instructions may result in possible serious or fatal
injury.
4.
Measure the voltage of the (F100) Fused Run Relay Output (Run) circuit between the SRS Load Tool Adapter
8443-32-L
cavity C2-31 and ground.
Is the voltage above 6.0 volts?
Yes
Replace the ORC in accordance with the Service Information.
7.
CHECK FUSE M32 OUTPUT TO CAVITY 38 OF THE TIPM C6 CONNECTOR
WARNING:
Turn the ignition off, disconnect
the 12-volt battery and wait two minutes before proceeding. Failure
to follow these instructions may result in possible serious or fatal
injury.
1.
Disconnect the TIPM C6 harness connector.
NOTE:
Check connectors - Clean and repair as necessary.
2.
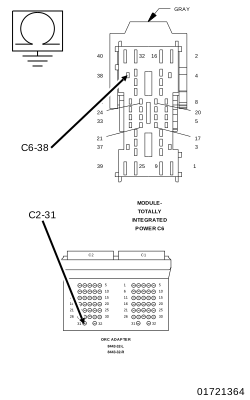
Measure the resistance of the (F100) Fused Run Relay Output (Run) circuit between the SRS Load Tool Adapter
8443-32-L
cavity C2-31 and TIPM cavity C6-38 harness connector.
Is the resistance below 5.0 Ohms?
Yes
WARNING:
If the Occupant Restraint Controller
(ORC) is dropped at any time, it must be replaced. Failure to follow
these instructions may result in possible serious or fatal injury.
Replace the Occupant Restraint Controller (ORC) in accordance with the Service Information.
With the scan tool, record and erase all DTC from all Airbag modules.
2.
If any ACTIVE codes are present they must be resolved before diagnosing any stored codes.
WARNING:
Turn the ignition off, disconnect
the 12-volt battery and wait two minutes before proceeding. Failure
to follow these instructions may result in possible serious or fatal
injury.
3.
Using the wiring diagram/schematic as a guide, inspect the wiring and harness connectors.
4.
Look for chafed, pierced, pinched, or partially broken wires and broken, bent, pushed out, spread, corroded, or contaminated terminals.
5.
The following additional checks may assist you in identifying a possible intermittent problem.
6.
Reconnect any disconnected components and harness connector.
WARNING:
Turn the ignition on, then reconnect
the 12-volt battery and wait two minutes before proceeding. Failure
to follow these instructions may result in possible serious or fatal
injury.
7.
With the scan tool, monitor active codes as you work through the following steps.
WARNING:
Maintain a safe distance from all
airbags while performing the following steps. Failure to follow these
instructions may result in possible serious or fatal injury.
8.
Wiggle the wiring harness and harness connectors of the related airbag circuit or component.
9.
If only stored codes return, continue the test until the problem area has been isolated.
10.
In the previous steps you have attempted to recreate the conditions responsible for setting the active DTC in question.