COIL, Ignition, 3.8L
REMOVAL
REMOVAL
 |
- Disconnect and isolate the negative battery cable.
-
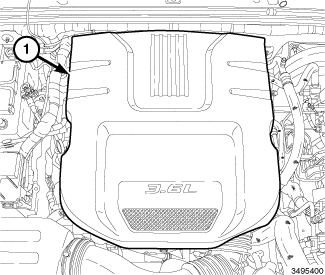
Remove the engine cover (1).
-
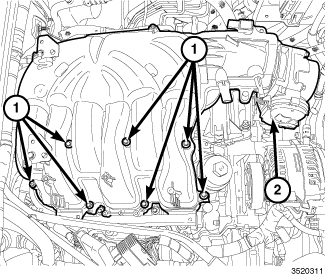
If removing the ignition coils from cylinders 2, 4 or 6 on the LH side of the engine, first remove the upper intake manifold (2) and insulator (Refer to 09 - Engine/Manifolds/MANIFOLD, Intake - Removal)
.
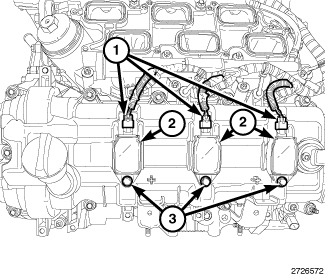
NOTE: The LH ignition coils are shown, the RH ignition coils are similar.
- Unlock and disconnect the electrical connector (1) from the ignition coil.
- Remove the ignition coil mounting bolt (3).
-
Pull the ignition coil (2) from cylinder head cover opening with a slight twisting action.
INSTALLATION
INSTALLATION
 |
- Using compressed air, blow out any dirt or contaminants from around the top of spark plug.
-
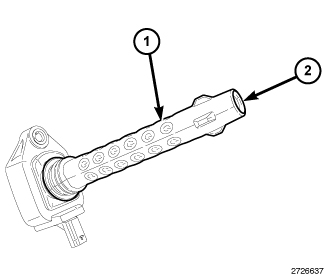
Check the condition of the ignition coil rubber boot (1). Inspect the opening of the boot (2) for any debris, tears or rips. Carefully remove any debris with a lint free cloth.
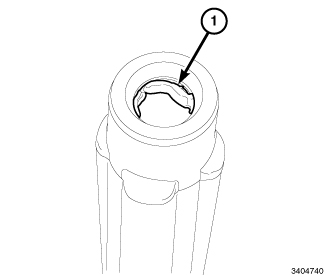
CAUTION: Do not apply a silicone based grease such as Mopar® Dielectric Grease to the ignition coil rubber boot. The silicone based grease will absorb into the boot causing it to stick and tear.
-
Place a small, 360° bead of Fluostar 2LF lubricant (1) along the inside opening of the coil boot approximately 1 to 2 mm from the chamfer edge but not on the chamfered surface.
NOTE: The LH ignition coils are shown, the RH ignition coils are similar.
- Position the ignition coil (2) into the cylinder head cover opening. Using a twisting action, push the ignition coil onto the spark plug.
- Install the ignition coil mounting bolt (3) and tighten to 8 N·m (71 in.lbs).
-
Connect and lock the electrical connector (1) to the ignition coil (2).
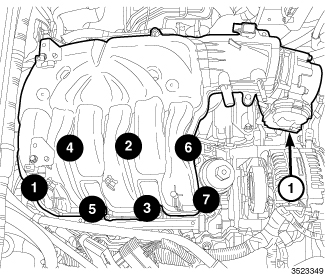
-
If removed, install the insulator, upper intake manifold (1) and air cleaner body (Refer to 09 - Engine/Manifolds/MANIFOLD, Intake - Installation)
.
- Install the engine cover (1).
-
Connect the negative battery cable and tighten nut to 5 N·m (45 in. lbs.).