END, Tie Rod
- DIAGNOSIS AND TESTING - TIE ROD
- STANDARD PROCEDURE - CHECKING TIE ROD ENDS
- TIE ROD TUBE
- TIE ROD END
- TIE ROD TUBE
- TIE ROD END
DIAGNOSIS AND TESTING - TIE ROD
DIAGNOSIS AND TESTING - TIE ROD
Tie rod free-play can be measured using the following method:
| NOTE: |
Always check and repair (if necessary) outer tie rod free-play before checking inner tie rod free-play. False results can otherwise be obtained. |
- Raise and support the vehicle (Refer to 04 - Vehicle Quick Reference/Hoisting - Standard Procedure) .
-
If necessary, remove the front wheel and install two standard wheel mounting nuts, flat side to rotor, diagonally opposite to each on the rotor.
NOTE: Make sure the tie rod end is straight (90°) in relation to the ball stud.
- Attach a magnetic dial indicator to the inside or outside of the brake rotor, then align the dial indicator's contact pointer with the direction of the stud axis and touch the outer tie rod.
-
Zero the dial indicator.
NOTE: When checking free-play, DO NOT rotate the tie rod. A tie rod that rotates easily, is not necessarily faulty.
- Grasp the outer tie rod near the ball stud and attempt to move the tie rod straight up and down using light hand pressure (less than 10 lbs. of force).
- Measure and record any tie rod free-play movement.
- Remove the magnetic dial indicator.
- Remove the standard wheel mounting nuts from the two studs.
- If the free-play in the tie rod exceeds 1.15 mm (.045 in.), replace the tie rod end (Refer to 19 - Steering/Linkage/END, Tie Rod - Removal) .
- Install the wheel (Refer to 22 - Tires and Wheels/Wheels - Standard Procedure) .
- Remove the supports and lower the vehicle.
STANDARD PROCEDURE - CHECKING TIE ROD ENDS
STANDARD PROCEDURE - CHECKING TIE ROD ENDS
Tie rod free-play can be measured using the following hand methods:
| NOTE: |
When checking free-play, DO NOT rotate the tie rod. Just because a tie rod rotates easily, it is not necessarily faulty. |
| NOTE: |
Always check and repair (if necessary) outer tie rod free-play before checking inner tie rod free-play. False results can otherwise be obtained. |
Grasp the outer tie rod near the ball stud and attempt to move the tie rod straight up and down. If any free-play is felt, replace the outer tie rod (Refer to 19 - Steering/Linkage/END, Tie Rod - Removal) . If no free-play is felt at the outer tie rod, attempt to move the inner tie rod in the same manner. Refer to the following procedure.
TIE ROD TUBE
TIE ROD TUBE
 |
- Raise and support the vehicle.
- Remove the tire and wheel assembly.
-
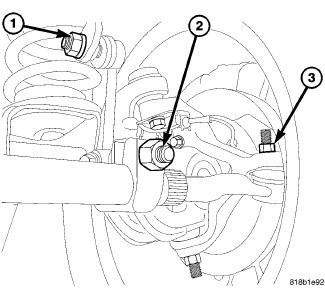
loosen the end clamp bolt (2).
-
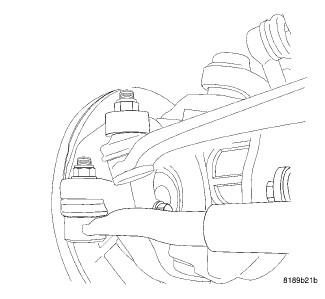
Remove the nut (3) at the steering knuckle.
-
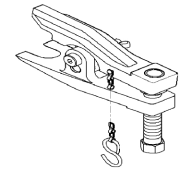
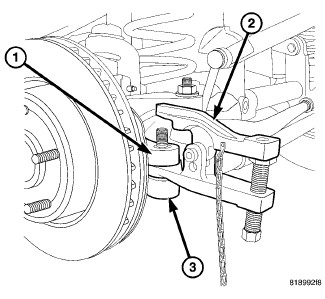
Separate the tie rod (3) from the knuckle (1) using special tool 9360 separator (2).
NOTE: Count the number of turns when removing the tie rod tube, This will give a good starting point when reassembiling and toe adjustment.
-
Unthread the tie rod tube from the adjuster.
TIE ROD END
TIE ROD END
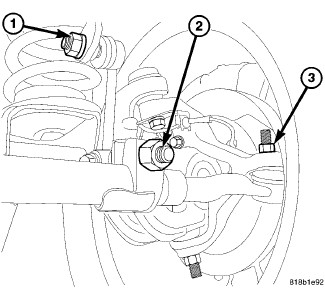 |
- Raise and support the vehicle.
- Remove the tire and wheel assembly.
- loosen the end clamp bolt (2).
- Remove the nut (3) at the steering knuckle.
-
Separate the tie rod from the knuckle using special tool 9360 separator.
NOTE: Count the number of turns when removing the tie rod end, This will give a good starting point when reassembling and toe adjustment.
-
Unthread the tie rod end from the tube.
TIE ROD TUBE
TIE ROD TUBE
| NOTE: |
All views typical. |
|
- Thread the tie rod tube onto the adjuster.
- Insert the tie rod in the steering knuckle.
- Install the tie rod ball stud nut (3) and tighten to 85 N·m (63 ft. lbs.).
- Position the tie rod clamp (2) and tighten to 46 N·m (34 ft. lbs.).
- Install the tire and wheel assembly.
- Remove the supports and lower the vehicle.
-
Set the toe, (Refer to 02 - Front Suspension/Wheel Alignment - Standard Procedure)
.
TIE ROD END
TIE ROD END
| NOTE: |
All views typical. |
|
- Thread the tie rod end in the tube.
- Insert the tie rod in the steering knuckle.
- Install the ball stud nut (3) and tighten to 85 N·m (63 ft. lbs.).
- Position the tie rod clamp (2) and tighten to 46 N·m (34 ft. lbs.).
- Install the tire and wheel assembly.
- Remove the supports and lower the vehicle.
-
Set the toe, (Refer to 02 - Front Suspension/Wheel Alignment - Standard Procedure)
.