BELT, Timing
REMOVAL
REMOVAL
 |
- Disconnect the negative battery cable.
- Remove the air cleaner body (Refer to 09 - Engine/Air Intake System/BODY, Air Cleaner - Removal) .
-
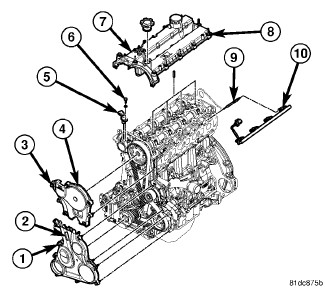
Remove the upper and
lower timing belt covers (Refer
to 09 - Engine/Valve Timing/COVER(S)
, Engine Timing - Removal).
-
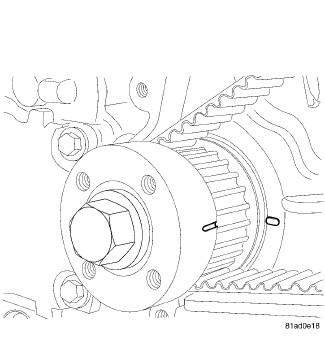
Rotate the engine until
the crankshaft 90° ATDC marks on the crankshaft timing belt drive
sprocket and timing cover are aligned.
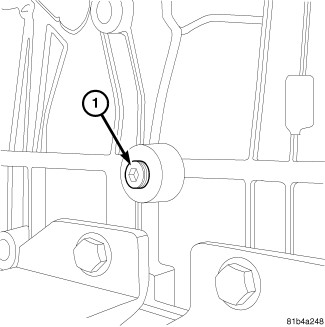
-
Remove the engine block
plug (1).
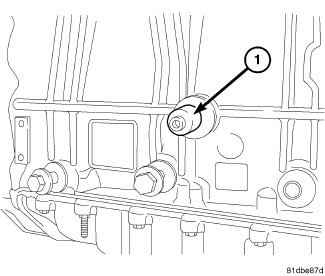
-
Install the
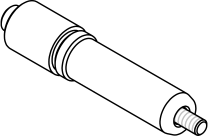
Adapter, 90 Degree ATDC VM.9992 (1).
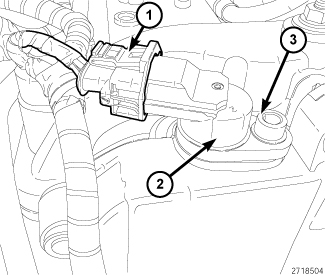
- Disconnect the Camshaft Position Sensor (CMP) harness connector (1).
-
Remove bolt (3) the
CMP sensor (2).
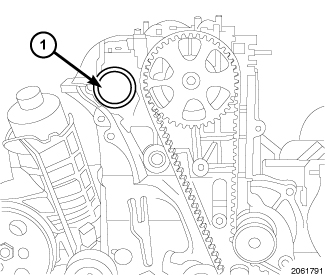
-
Remove the exhaust
camshaft oil seal (1) to expose the camshaft reluctor.
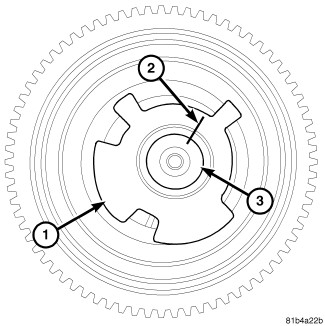
-
Use a paint pen to
mark the location of the reluctor wheel (1) on the camshaft (2).
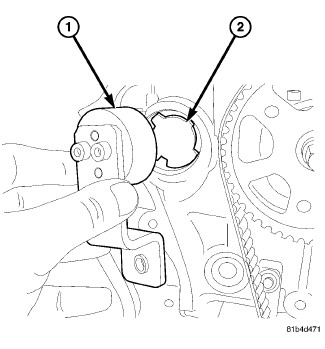
NOTE: Starting in model year 2013, the exhaust camshaft reluctor is now bolted on requiring a change in the Camshaft Sprocket Alignment Tool VM.9991. The new Camshaft Sprocket Alignment Tool number is VM.9991–1. This tool can be used on older models.
-
Install the
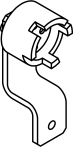
Alignment Tool, Camshaft Sprocket VM.9991 (1).
-
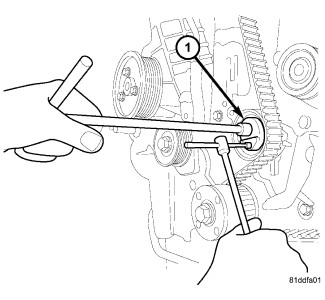
Loosen the timing belt
tensioner bolt (1), and remove the timing belt.
INSTALLATION
INSTALLATION
 |
-
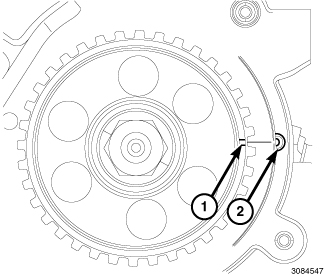
Align the high pressure fuel pump sprocket timing mark (1) with the timing mark (2) on the block.
-
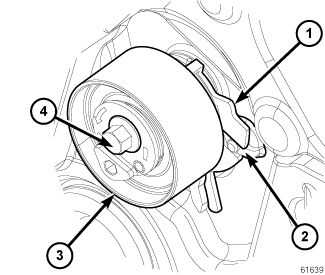
Verify that the bolt (4) is finger tight and tensioner alignment plate (1) is aligned with the boss (2) on the engine cover.
-
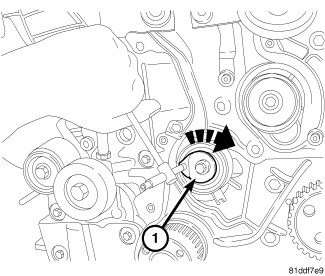
Turn the timing belt tensioner (1) clockwise to unload the tensioner enough for the timing belt to be installed.
NOTE: DO NOT remove the timing belt from the package until it is going to be installed. DO NOT expose timing belt to oil, grease or water contamination. DO NOT crimp belt at a sharp angle. DO NOT clean belt, pulleys or tensioner with solvent. Check that pulleys and bearings are not seized or damaged before installing belt.
-
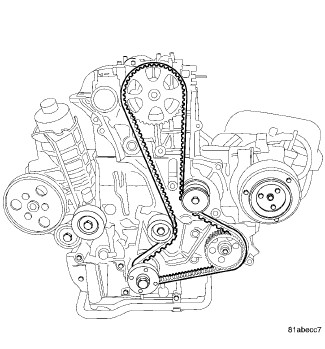
Install the timing belt on the components in the following order.
- Crankshaft sprocket (1).
- High pressure fuel pump (2).
- Water pump pulley (3).
- Intake camshaft pulley (4).
-
Timing belt tensioner (5).
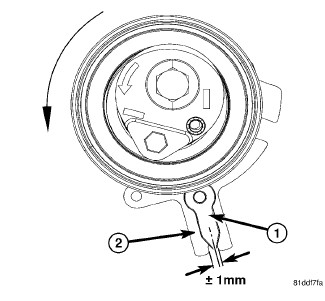
NOTE: Turning the belt tensioner counter clockwise moves the pointer in a clockwise direction. Also, if the tensioner bolt is too loose this will cause the tensioner alignment slot to jump off the alignment boss on timing cover.
-
Adjust timing belt tensioner by lining up the load indicator arrow (1) to the center of the tensioner load gage (2) as illustrated.
-
Tighten the timing belt tensioner bolt (1) to 28 N·m (21 ft. lbs.).
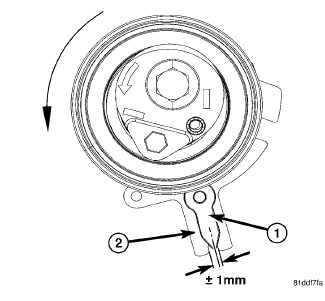
-
Verify the tensioner load indicator (1) is still centered in the tensioner load gage (2). If the indicator is not centered in the gage as shown, (Refer to 09 - Engine/Valve Timing/TENSIONER, Engine Timing - Adjustments)
.
-
Remove the
Alignment Tool, Camshaft Sprocket VM.9991 (1).
-
Remove the
Adapter, 90 Degree ATDC VM.9992 (1).
NOTE: In order to rotate the engine, the Alignment Tool, Camshaft Sprocket VM.9991 and the Adapter, 90 Degree ATDC VM.9992 needs to be removed.
-
Rotate engine 2 complete revolutions and then recheck tensioner alignment. Verify that the tension indicator (1) is centered in the slot on the tensioner gage (2) slot as shown. Readjust tensioner alignment is necessary.
-
Verify that the reluctor wheel (1) has not moved on the camshaft. If the witness marks are not aligned, the reluctor wheel (1) has spun on the camshaft (3) during the assembly process, and the exhaust camshaft must be replaced.
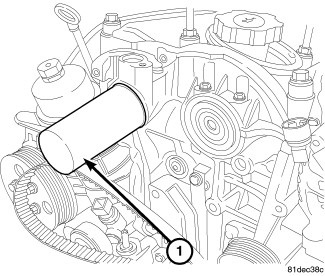
-
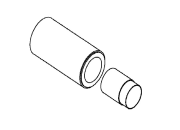
Use
Installer, Seal VM.1057 (1) to install the exhaust camshaft seal.
- Install the Camshaft Position Sensor CMP sensor (2). Tighten bolt (3) to 11 N·m (97 in. lbs.).
-
Connect the (CMP) wire harness connector (1).
-
Install the engine block plug (1). Tighten the engine block plug to 30 N·m (22 ft. lbs.).
- Install the upper and lower outer timing belt covers (Refer to 09 - Engine/Valve Timing/COVER(S) , Engine Timing - Installation).
- Install the air cleaner body (Refer to 09 - Engine/Air Intake System/BODY, Air Cleaner - Installation) .
-
Connect the negative battery cable.