SEAL, Fill Tube
REMOVAL
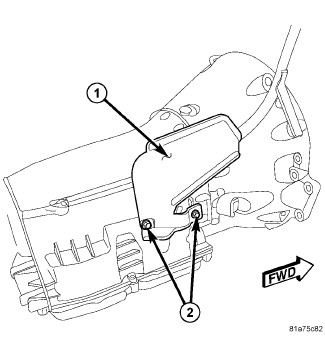 |
|
1 - WATER SHIELD 2 - WATER SHIELD BOLTS |
- Lift and support the vehicle.
-
Remove water shield bolts and water shield (if equipped).
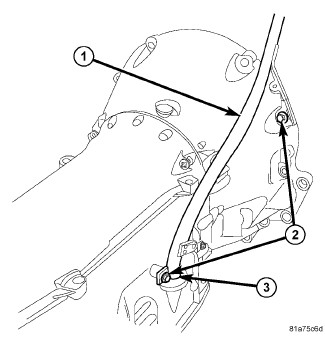
TYPICAL FILL TUBE BOLTS
1 - FILL TUBE
2 - FILL TUBE BOLTS
3 - FILL TUBE SEAL
- Remove the transmission fill tube bolts (2) .
- Lift the transmission fill tube out of the transmission case.
-
Using a small pry tool remove the transmission fill tube seal.
INSTALLATION
Special Tools: Click to display a list of tools used in this procedure
 |
-
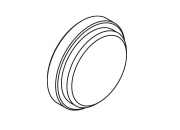
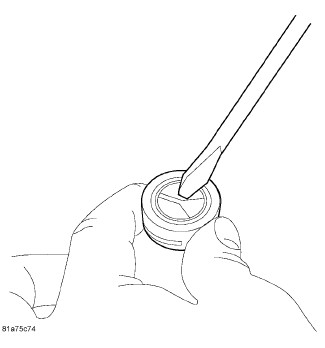
Pierce the new transmission fill tube seal along the molded “Y” from the outside.
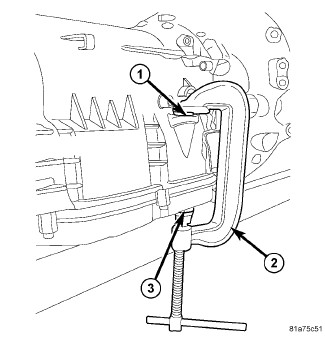
1 - SEAL INSTALLER DISC 9902
2 - “C” CLAMP
3 - SHIM STOCK
NOTE: If the new fill tube seal can not be fully installed into the transmission case fill tube bore by hand, a “C” clamp must be used.
CAUTION: Do not over tighten the “C” clamp during fill tube oil seal installation. Transmission oil pan damage or bending may occur.
-
Lubricate the new transmission fill tube seal with MOPAR® ATF+4 ATF and install the new fill tube seal into the transmission case fill tube bore.
- Position seal installer disc 9902 (1) between the “C” clamp (2) and the new transmission fill tube seal
- Position a shim stock (3) between the “C” clamp (2) and the edge of the transmission oil pan.
- Lightly tighten the “C” clamp until the fill tube seal is fully installed into the transmission case fill tube bore.
-
Clean and lubricate the end of the transmission fill tube with MOPAR® ATF+4 ATF and install the fill tube into the transmission case fill tube bore.
TYPICAL FILL TUBE BOLTS
1 - FILL TUBE
2 - FILL TUBE BOLTS
3 - FILL TUBE SEAL
- Loosely install the fill tube bolts (2) .
- Tighten the upper fill tube bolt to 39 N·m (29 ft.lbs.).
-
Tighten the lower fill tube bolt to 12 N·m (105 in.lbs.).
1 - WATER SHIELD
2 - WATER SHIELD BOLTS
- Install the water shield (1) and water shield bolts (2) (if equipped).
- Tighten the water shield bolts to 12 N·m (9 ft.lbs).
-
Lower vehicle to check and fill transmission as necessary.