BUSHING(S)
- STABILIZER BAR BUSHING
- AXLE BUSHING
- AXLE BRACKET BUSHING
- STABILIZER BAR BUSHING
- AXLE BUSHING
- AXLE BRACKET BUSHING
STABILIZER BAR BUSHING
- Raise and support the vehicle.
- Remove the left upper stabilizer bar link nut from the stabilizer bar.
- Remove the left lower stabilizer bar link bolt to the axle. This will allow clearance to remove the stabilizer bar from the right side link without removing the whole link.
- Remove the right upper stabilizer bar link nut from the stabilizer bar.
-
Remove the splash shield.
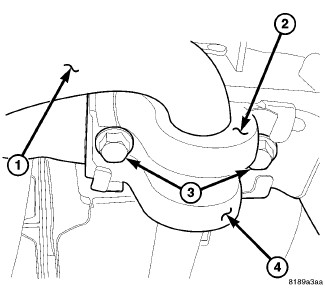
- Remove the right side stabilizer bar bracket bolts (3) to the frame.
- Remove the left side stabilizer bar bracket bolts (3) to the frame.
-
Remove the stabilizer bar (1) to the bench.
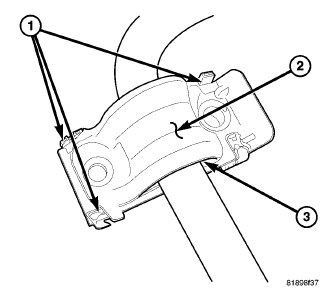
- Bend open the retaining tabs (1) on the bracket. If these tabs (1) break that is okay, they are used for the factory installation only.
- Remove the retainer bracket (2).
-
Slide the bushings (3) off the stabilizer bar with a mixture of soapy water.
AXLE BUSHING
Special Tools: Click to display a list of tools used in this procedure
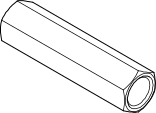
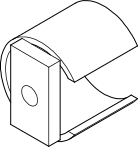
 |
- Remove the upper suspension arm from axle (Refer to 02 - Front Suspension/Front/ARM, Upper Control - Removal) .
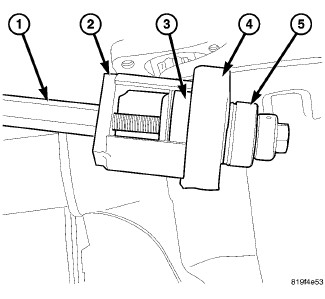
- Install the special tool 9948-3 Nut (1), 9948-1 Receiver (2) and 9948-2 Driver (4).
-
Press the bushing out of the axle housing.
AXLE BRACKET BUSHING
Special Tools: Click to display a list of tools used in this procedure
 |
- Remove the upper suspension arm from the axle (Refer to 02 - Front Suspension/Front/ARM, Upper Control - Removal) .
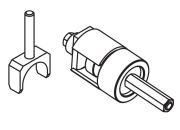
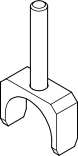
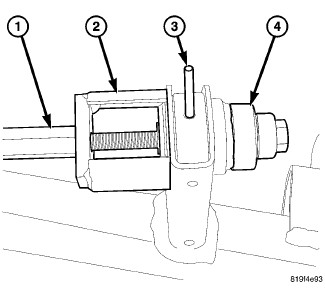
- Install the Bushing Remover/Installer 9948 through the bushing and bracket using the following:
-
Press the bushing out of the axle bracket.
STABILIZER BAR BUSHING
|
- Slide the bushings (3) on the stabilizer bar with a mixture of soapy water.
-
Install the retainer bracket (2).
NOTE: Be sure to install the shear plate bracket (1) with the down turned part facing forward in vehicle.
-
Bend the retaining tabs (1) back into place on the bracket if they didn't break off. If these tabs (1) break that is okay, they are used for the factory installation only and are not needed for proper operation.
-
Install the stabilizer bar (1) to the vehicle.
NOTE: Stabilizer bar link to axle bolt should be tightened with vehicle sitting on its tires
- Install the right side stabilizer bar bracket bolts (3) to the frame. Tighten to 61 N·m (45 ft.lbs).
- Install the left side stabilizer bar bracket bolts (3) to the frame. Tighten to 61 N·m (45 ft.lbs).
- Install the splash shield.
- Install the right upper stabilizer bar link nut to the stabilizer bar. Tighten to 61 N·m (45 ft.lbs).
- Install the left lower stabilizer bar link bolt to the axle. Tighten to 61 N·m (45 ft.lbs).
- Install the left upper stabilizer bar link nut to the stabilizer bar. Tighten to 61 N·m (45 ft.lbs).
-
Remove the support and lower the vehicle.
AXLE BUSHING
Special Tools: Click to display a list of tools used in this procedure
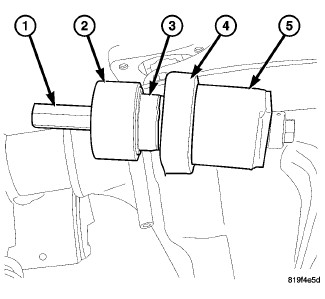 |
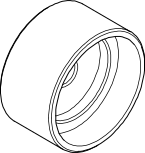
- Place special tool 9948-3 Nut (1), 9948-4 Driver (2), 9948-1 Receiver (5) and the press the bushing (3) in the axle housing (4).
-
Remove tools and install the upper suspension arm (Refer to 02 - Front Suspension/Front/ARM, Upper Control - Removal)
.
AXLE BRACKET BUSHING
Special Tools: Click to display a list of tools used in this procedure
 |
- Start the bushing in the axle bracket.
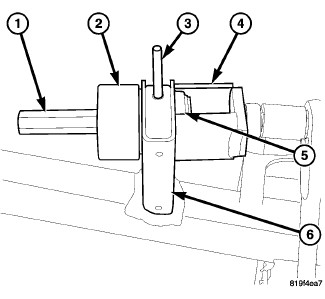
- Install the Bushing Remover/Installer 9948 through the bushing and bracket using the following:
- Press the bushing (5) into the axle bracket (6).
-
Remove tools and install the upper suspension arm (Refer to 02 - Front Suspension/Front/ARM, Upper Control - Installation)
.