A/C CLUTCH
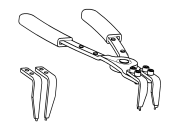
Special Tools: Click to display a list of tools used in this procedure
| NOTE: |
The A/C clutch assembly can be serviced with the refrigerant system fully-charged. |
| NOTE: |
Typical A/C compressor and clutch assembly shown in illustrations. |
 |
- Disconnect and isolate the negative battery cable.
- On 2.8L engiine models, remove the air cleaner housing (Refer to 09 - Engine/Air Intake System/BODY, Air Cleaner - Removal) .
- On 3.6L engine models, remove the coolant recovery container (Refer to 07 - Cooling/Engine/BOTTLE, Coolant Recovery - Removal) .
- Remove the accessory drive belt (Refer to 07 - Cooling/Accessory Drive/BELT, Serpentine - Removal) .
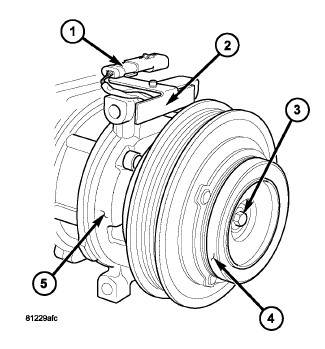
- Disconnect the engine wire harness from the A/C clutch coil connector (1).
-
If equipped, remove the screw that secures the connector bracket (2) to the A/C compressor (5) and position the bracket and wire lead out of the way.
NOTE: A band-type oil filter wrench or a strap wrench may be used to hold the clutch plate from turning during compressor shaft bolt removal.
-
Hold the clutch plate (4) from turning and remove the compressor shaft bolt (3).
CAUTION: Do not pry between the clutch plate and the pulley and bearing assembly to remove the clutch plate from the compressor shaft as this may damage the clutch plate.
NOTE: Use care not to lose any clutch shim(s) during removal of the clutch plate, as they may be reused during the clutch plate installation process.
-
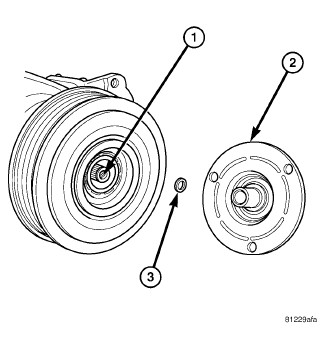
Tap the clutch plate (2) lightly with a plastic mallet to release it from the splines on the compressor shaft (1) and remove the clutch plate and shim(s) (3).
NOTE: The pulley and bearing assembly can be removed from the compressor by hand or, if required, with a two jaw puller.
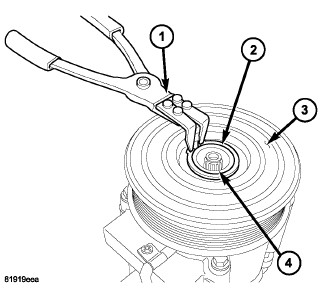
- Using A/C Snap Ring Pliers 9764 (1) or equivalent, remove the snap ring (2) that secures the pulley and bearing assembly (3) to the front of the A/C compressor (4).
-
Remove the pulley and bearing assembly from the front of the A/C compressor. If required, install a two jaw puller and turn the puller center-bolt clockwise until the pulley and bearing assembly is completely removed.
-
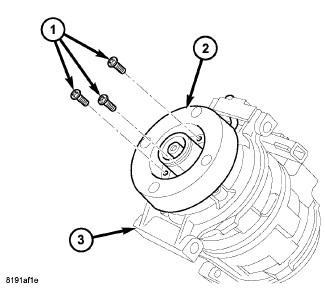
Remove the three screws (1) that secure the A/C clutch coil (2) to the front of the A/C compressor (3) and remove the coil.