COVER, Seat Back, Front
REMOVAL
-
Before proceeding with
the following repair procedure, review all warnings and cautions. (Refer to 23 - Body/Seats - Warning)
-
For appropriate seat
configuration illustrations, (Refer to 23 - Body/Seats/SEAT - Description)
.
-
Remove the front seat, (Refer to 23 - Body/Seats/SEAT - Removal)
.
-
Remove the seat recliner
easy entry levers, if equipped.
-
Position aside the
seat back cover and remove the seat back assembly bolts.
-
If equipped, disconnect
the electrical connectors and remove the seat back.
-
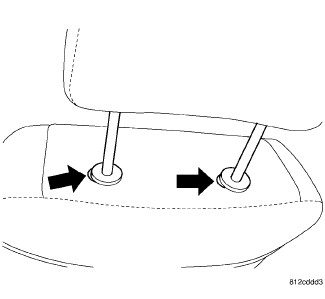
Push in the buttons
on both headrest sleeves, pull the headrest up and remove.
-
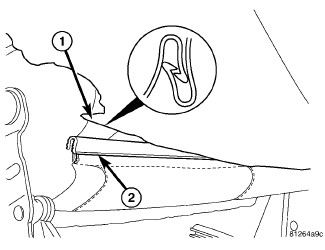
Separate the J-straps
(1 AND 2) and pull cover up over frame.
-
Unzip the cover zippers.
-
On vehicles equipped
with seat air bags, remove the air bag, (Refer to 10 - Restraints/AIR
BAG, Seat - Removal).
-
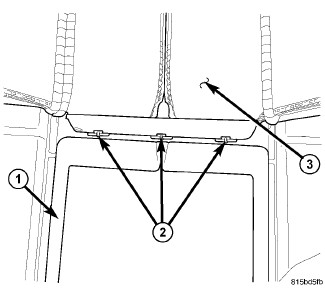
Cut off the hog rings
(2) attaching the cover (3) to the cushion (1).
-
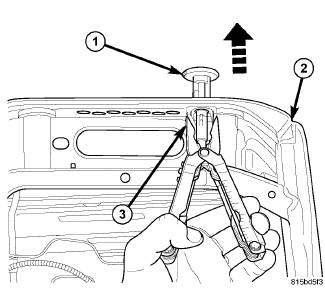
Squeeze the locking
tab (3) and remove the headrest sleeves (1) and remove the cover.
INSTALLATION
-
Before proceeding with
the following repair procedure, review all warnings and cautions. (Refer to 23 - Body/Seats - Warning)
-
For appropriate seat
configuration illustrations, (Refer to 23 - Body/Seats/SEAT - Description)
.
-
Position the seat back
cover over the seat back frame.
-
Position the seat back
cushion on the frame and position the cover over the cushion.
-
Attach the seat cover
(3) to the seat back cushion (1) and install new hog rings.
-
On vehicles equipped
with a seat airbag, install the airbag, (Refer to 10 - Restraints/AIR
BAG, Seat - Installation).
-
Zip the rear cover
zippers and connect the J-straps (1 AND 2).
-
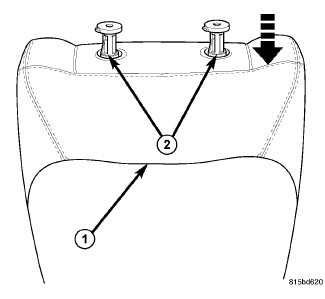
Position the headrest
sleeves (2) and seat into the seat back (1) frame fully.
-
Position the seat back
onto the seat cushion assembly and connect the electrical connectors
if equipped.
-
Install the seat back
assembly bolts and tighten to 47 N·m (34.5 ft. lbs.).
-
Connect the electrical
connectors, if equipped.
-
Install the front seat, (Refer to 23 - Body/Seats/SEAT - Installation)