Carpet Replacement (5D)
Carpet Replacement
SRS components are located in this area. Review the SRS component locations, and the precautions and procedures before performing repairs or service.NOTE:
- Put on gloves to protect your hands.
- Take care not to damage, wrinkle or twist the carpet.
- Be careful not to damage the dashboard or other interior trim pieces.
| 1. | Disconnect the negative battery cable, and wait at least 3 minutes before beginning work. |
| 3. | Remove these items: |
| 4. | Remove the front seat belt lower anchor bolt, both sides. |
| 5. | Push the knob (A) back to release the hook (B) then pull up the accel pedal (C).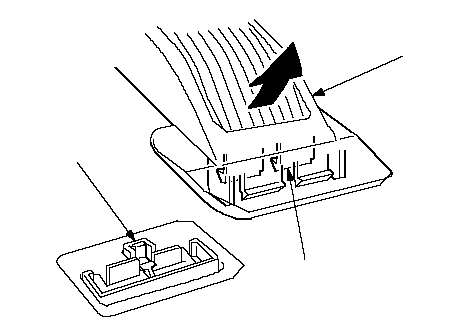 ABC ABC |
| 6. | Detach the clips, then remove the footrest (A). LHD is shown; RHD is similar. 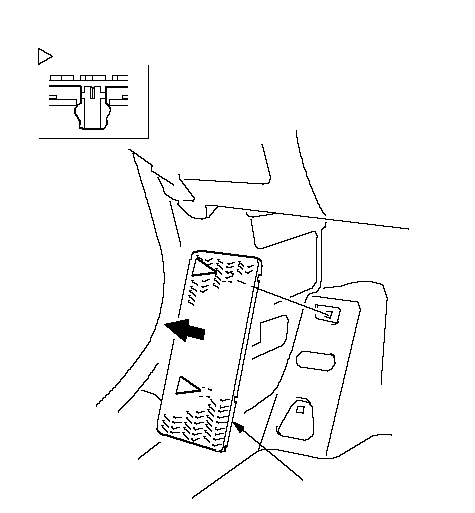 Fastener Locations: Clip, 2A Fastener Locations: Clip, 2A |
| 7. | M/T Model: Remove the bolts, then remove the center console bracket (A).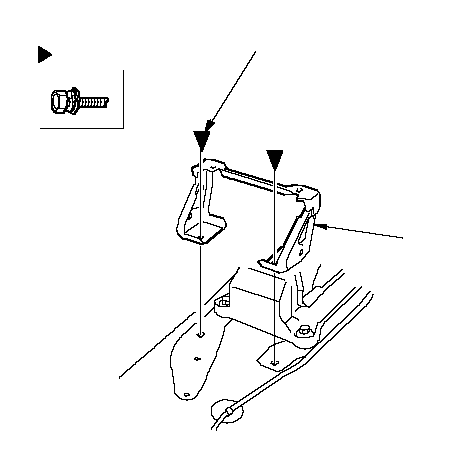 Fastener Locations: Bolt, 26 x 1.0 mm Fastener Locations: Bolt, 26 x 1.0 mm9.8 N·m (1.0 kgf·m, 7.2 lbf·ft)A |
| 8. | Disconnect the antenna lead (A) and antenna connector (B). Disconnect the side curtain airbag subharness connector (C), and release the harness clamp (D). Detach the harness clips (E), and on A/T model, harness clips (F). LHD (A/T): 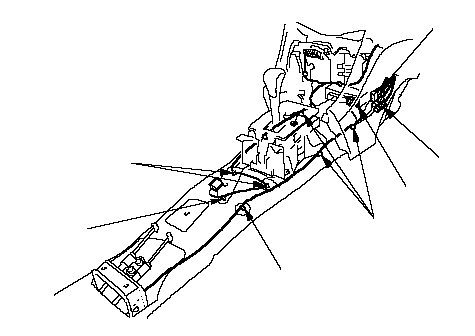 BACEEEF BACEEEFLHD (M/T): 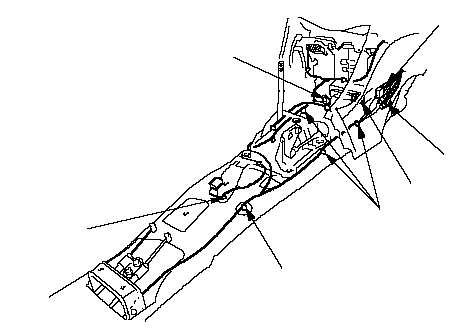 BACEEED BACEEEDRHD: 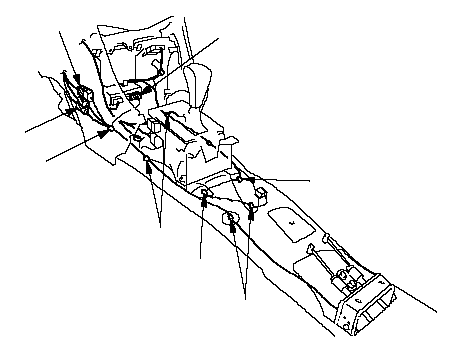 BAEEFEFC BAEEFEFC |
| 9. | Remove the bolts securing the change lever bracket or select lever bracket (A).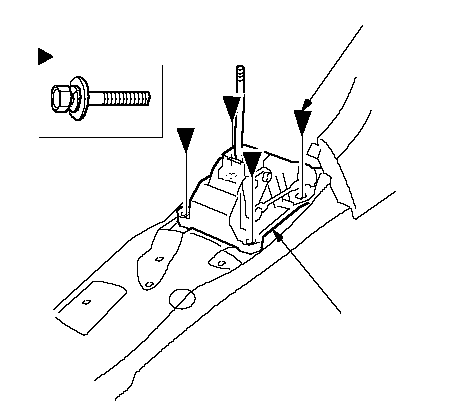 Fastener Locations: Bolt, 4A8 x 1.25 mm Fastener Locations: Bolt, 4A8 x 1.25 mm22 N·m (2.2 kgf·m, 16 lbf·ft) |
| 10. | Release the clips (A) from middle and rear of the carpet (B), and pull back the rear floor carpet (C).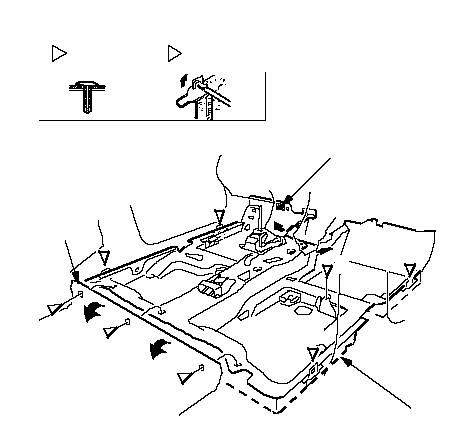 Fastener Locations: Clip, 4A: HOOK, 4DAAABEDDACDD Fastener Locations: Clip, 4A: HOOK, 4DAAABEDDACDD |
| 11. | Release the hooks (D) with a flat-tip screwdriver, and the fastener (E), then remove the carpet. |
| 12. | Install the carpet in the reverse order of removal, and note these items:
|