Headliner Removal/Installation (5D)
Headliner Removal/Installation
SRS components are located in this are. Review the SRS component locations, and the precautions and procedures before performing repairs or service.NOTE:
- When prying with a flat-tip screwdriver, wrap it with protective tape to prevent damage.
- Take care not to bend and scratch the headliner.
- Be careful not to damage the dashboard and other interior trim.
| 2. | From both sides, using a flat-tip screwdriver, release the tabs (A), then remove the sunvisor cap (B) from the bracket (C). Turn the cap, and remove it.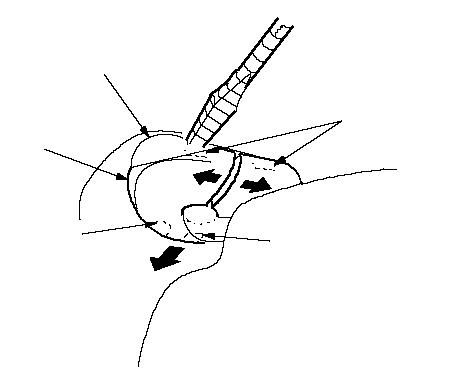 ABCAA ABCAA |
| 3. | From both sides, remove the sunvisor (A) and holder (B).
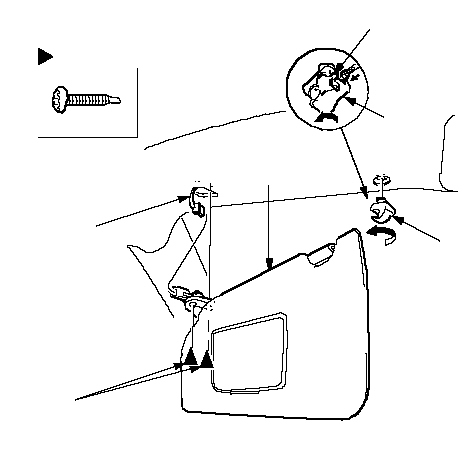 Fastener Locations: Screw, 4DBBA5 x 0.8 mm Fastener Locations: Screw, 4DBBA5 x 0.8 mm3.4 N·m (0.35 kgf·m, 2.5 lbf·ft)C |
| 4. | Lower the roof console (A).
Without U/S intrusion sensor: 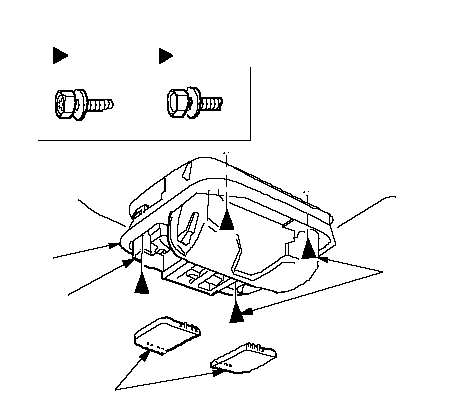 Fastener LocationsE: Bolt, 2G: Bolt, 25 x 0.8 mm Fastener LocationsE: Bolt, 2G: Bolt, 25 x 0.8 mm5 N·m (0.5 kgf·m, 4 lbf·ft)AEBFGEG With U/S intrusion sensor: 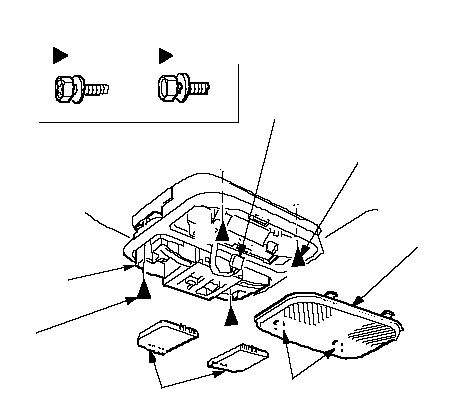 Fastener LocationsE: Bolt, 2G: Bolt, 25 x 0.8 mm Fastener LocationsE: Bolt, 2G: Bolt, 25 x 0.8 mm5 N·m (0.5 kgf·m, 4 lbf·ft)5 x 0.8 mm 5 N·m (0.5 kgf·m, 4 lbf·ft)FEBGGDHCE |
| 5. | Pass the individual map light (A) through the opening in the roof console (B), then remove the roof console.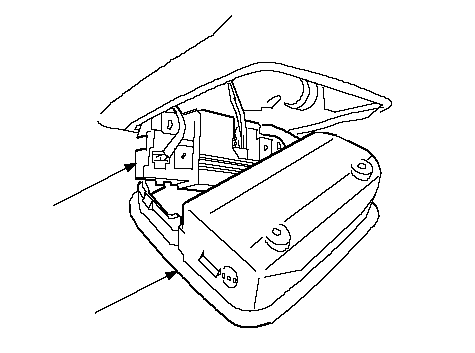 AB AB |
| 6. | Lower the grab handle, then pry out the lid (A). Unscrew the self-tapping ET screws to remove the grab handle (B). Remove the remaining grab handles. Do not remove a toothed washer (C) and a washer (D) on the ET screw.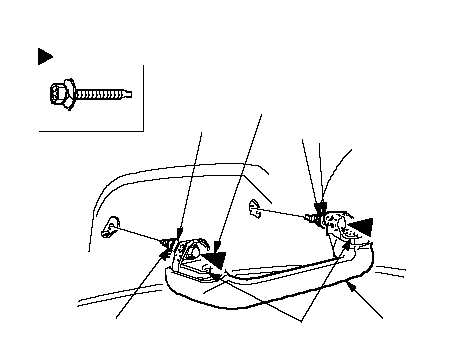 Fastener Locations: Screw, 8DCABCD5 x 0.8 mm Fastener Locations: Screw, 8DCABCD5 x 0.8 mm3.4 N·m (0.35 kgf·m, 2.5 lbf·ft) |
| 7. | Pry up on the lids (A) and remove the screws, then remove the cargo net hook covers (B) from each side (four places).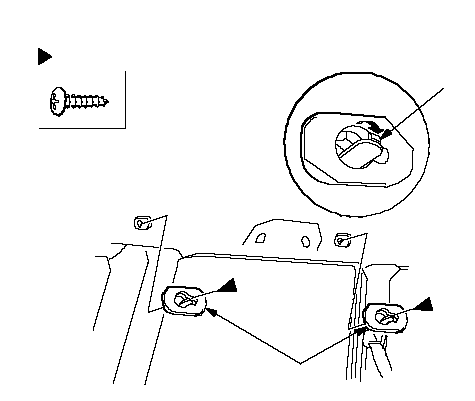 Fastener Locations: Screw, 4AB Fastener Locations: Screw, 4AB |
| 8. | With sunroof: Remove the headliner.
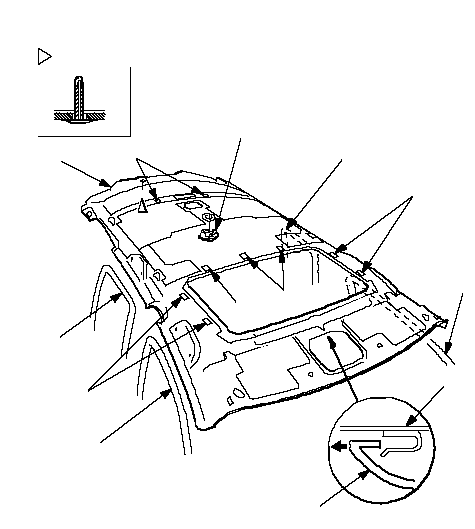 Fastener Location: Clip, 1EBFAHEDDDDBCC Fastener Location: Clip, 1EBFAHEDDDDBCC |
| 9. | Without sunroof: Remove the headliner.
LHD: 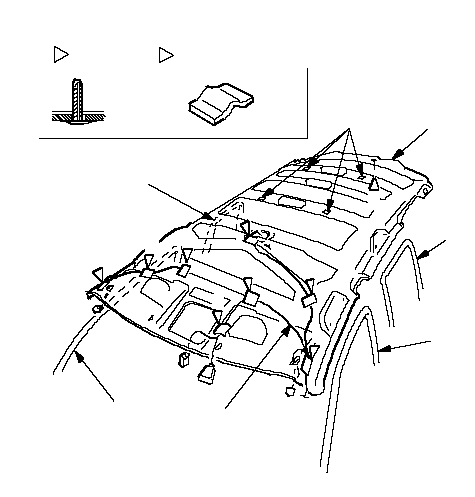 Fastener LocationsAGABEBDFFFFFFCFF: Clip, 1C: Cushion tape, 8F Fastener LocationsAGABEBDFFFFFFCFF: Clip, 1C: Cushion tape, 8FRHD: 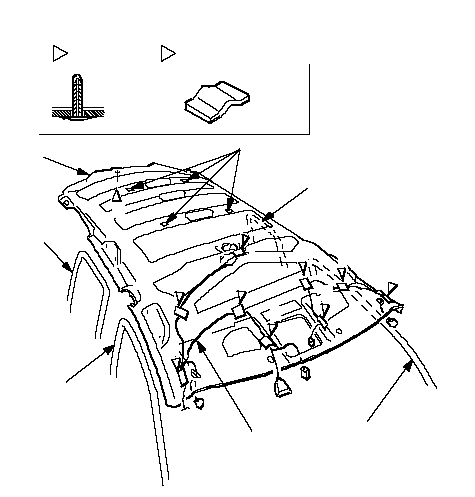 AGAEBDFFFFFFFBFFCFastener Locations: Clip, 1C: Cushion tape, 9F AGAEBDFFFFFFFBFFCFastener Locations: Clip, 1C: Cushion tape, 9F |
| 10. | If necessary, remove the bolts securing the cargo net hook (A), then remove it.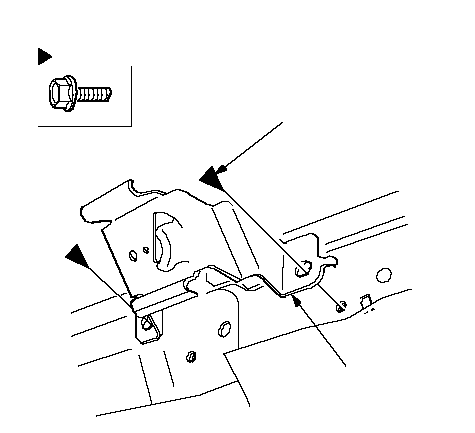 Fastener Locations: Bolt, 8A6 x 1.0 mm Fastener Locations: Bolt, 8A6 x 1.0 mm9.8 N·m (1.0 kgf·m, 7.2 lbf·ft) |
| 11. | With sunroof: If necessary, pull down the roof console bracket (A) to release the clip.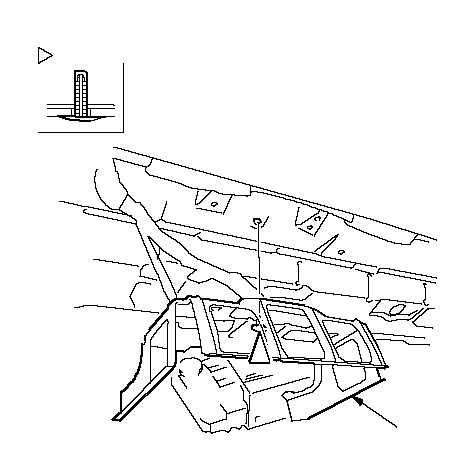 Fastener Location: Clip, 1A Fastener Location: Clip, 1A |
| 12. | Install the headliner in the reverse order of removal, and note these items:
|