 |
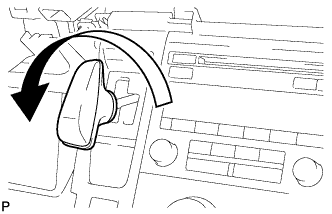
Turn the shift lever knob counterclockwise and remove the shift lever knob sub-assembly.
YAW RATE AND ACCELERATION SENSOR > REMOVAL |
| 1. PRECAUTION |
| 2. DISCONNECT CABLE FROM NEGATIVE AUXILIARY BATTERY TERMINAL |
| 3. REMOVE REAR CONSOLE BOX ASSEMBLY |
| 4. REMOVE SHIFT LEVER KNOB SUB-ASSEMBLY |
|
Turn the shift lever knob counterclockwise and remove the shift lever knob sub-assembly.
| 5. REMOVE INTEGRATION CONTROL AND PANEL ASSEMBLY |
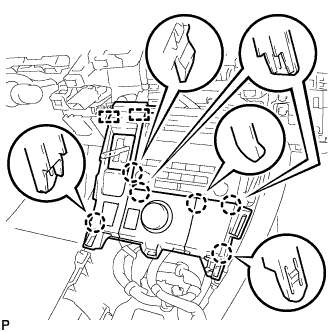 |
Disengage the 6 claws and 2 guides.
Disengage the clamp.
Disconnect each connector and remove the integration control and panel assembly.
| 6. REMOVE CONSOLE BOX INSERT |
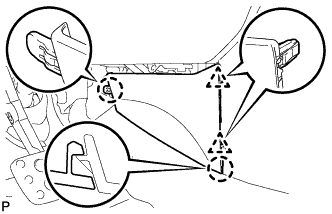 |
Disengage the 2 clips and 2 claws, and remove the console box insert.
| 7. REMOVE CONSOLE BOX LH |
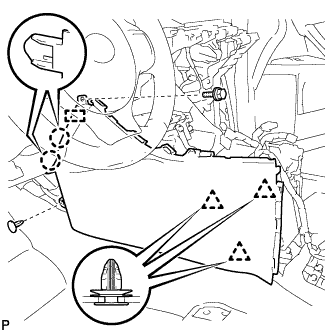 |
Remove the bolt <A>.
Using a clip remover, remove the clip.
Using a clip remover, disengage the 3 clips.
Disengage the 2 claws and guide, and remove the console box LH.
| 8. REMOVE FRONT NO. 2 CONSOLE BOX INSERT (w/ Navigation System for DVD) |
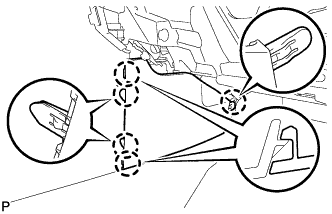 |
Disengage the 5 claws and remove the front No. 2 console box insert.
| 9. REMOVE CONSOLE BOX RH (w/ Navigation System for DVD) |
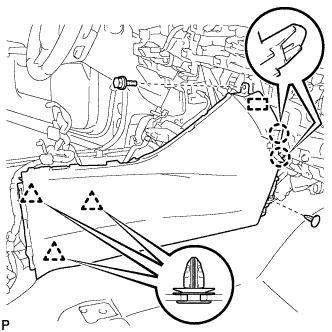 |
Remove the bolt <A>.
Using a clip remover, remove the clip.
Using a clip remover, disengage the 3 clips.
Disengage the 2 claws and guide, and remove the console box RH.
| 10. REMOVE NO. 3 CONSOLE BOX MOUNTING BRACKET (w/ Navigation System for DVD) |
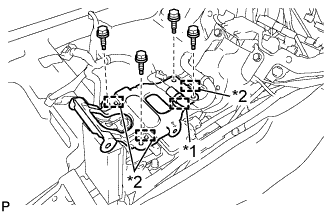 |
Disengage the clamp.
| *1 | Clamp |
| *2 | Guide |
Remove the 4 bolts <A>.
Disengage the 3 guides and remove the No. 3 console box mounting bracket.
| 11. REMOVE MULTI-MEDIA MODULE ASSEMBLY (w/ Navigation System for DVD) |
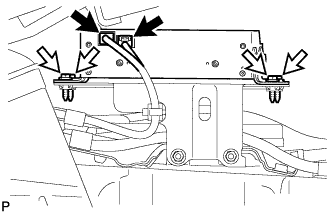 |
Disconnect the 2 connectors.
Remove the 4 bolts and multi-media module assembly.
| 12. REMOVE NO. 5 DISC PLAYER BRACKET (w/ Navigation System for DVD) |
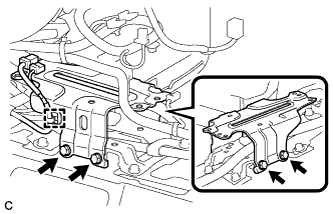 |
Disengage the clamp.
Remove the 4 bolts and No. 5 disc player bracket.
| 13. REMOVE YAW RATE AND ACCELERATION SENSOR |
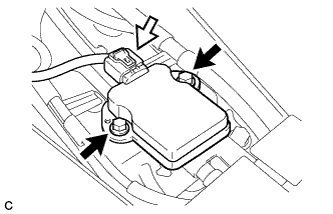 |
Remove the 2 bolts and yaw rate and acceleration sensor.
Disconnect the connector from the yaw rate and acceleration sensor.