 |
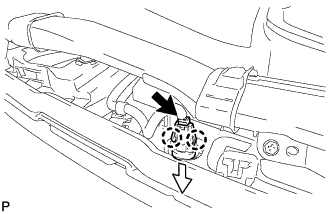
Disconnect the connector.
UPPER INSTRUMENT PANEL > DISASSEMBLY |
| 1. REMOVE AUTOMATIC LIGHT CONTROL SENSOR |
|
Disconnect the connector.
Disengage the 2 claws and remove the automatic light control sensor as shown in the illustration.
| 2. REMOVE NO. 1 DEFROSTER NOZZLE GARNISH |
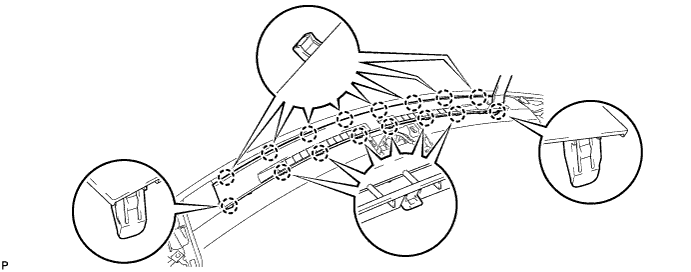
Using a moulding remover, disengage the 16 claws and remove the No. 1 defroster nozzle garnish.
| 3. REMOVE NO. 1 HEATER TO REGISTER DUCT SUB-ASSEMBLY |
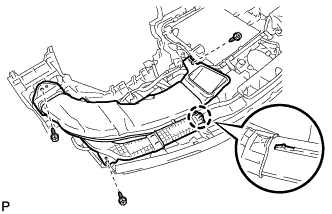 |
Remove the 3 screws <B>.
Disengage the claw and remove the No. 1 heater to register duct sub-assembly.
| 4. REMOVE NO. 3 HEATER TO REGISTER DUCT SUB-ASSEMBLY |
| 5. REMOVE DEFROSTER NOZZLE ASSEMBLY |
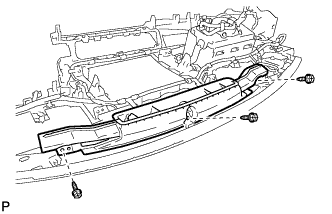 |
Remove the 3 screws <B> and defroster nozzle assembly.
| 6. REMOVE NAVIGATION ANTENNA ASSEMBLY (w/ Navigation System) |
| 7. REMOVE NO. 2 INSTRUMENT PANEL WIRE |
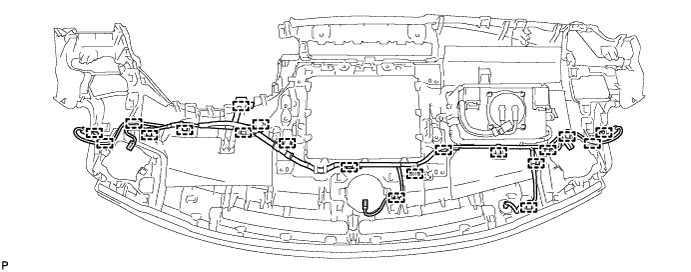
Using a clip remover, disengage each clamp and remove the No. 2 instrument panel wire.
| 8. REMOVE INSTRUMENT PANEL PASSENGER AIRBAG ASSEMBLY |
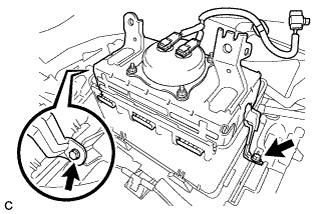 |
Remove the 2 screws.
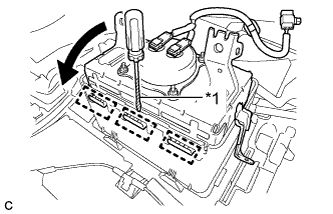 |
Using a screwdriver with the tip wrapped with protective tape, lean the instrument panel and disengage the 3 hooks as shown in the illustration.
| *1 | Protective Tape |
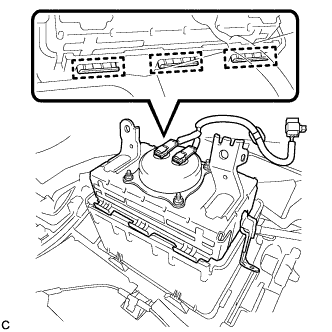 |
Disengage the 3 hooks to remove the instrument panel passenger airbag assembly from the upper instrument panel assembly.