INSTALLATION
Removal / installation
| 1. INSTALL ECM |

Install the ECM to the ECM box.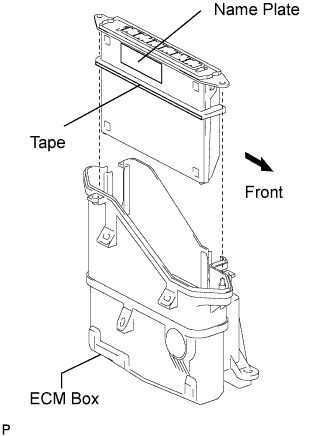

- NOTICE:
- Install the ECM on the ECM box with the name plate facing the inside of the vehicle.
- Make sure that there is no foreign matter on the gasket surface of the ECM box.
- Insert the stud bolt on the vehicle rear side to the ECM first.
- Make sure that stud bolts are securely installed into the front and rear bolt holes.
- Install the ECM on the ECM box with the name plate facing the inside of the vehicle.
Install the 2 nuts.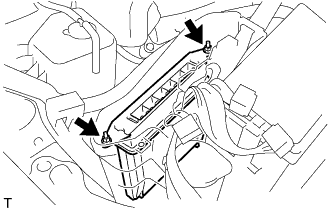
- Torque:
- 5.5 N*m{ 56 kgf*cm , 49 in.*lbf }
- NOTICE:
- Be sure to first tighten the nut on the vehicle rear.
Connect the ECM connectors.
Connect the 6 ECM connectors.
- NOTICE:
- Be sure to securely connect the connector.
Connect the connector holder to the ECM box.
| 2. INSTALL ECM COVER |
Install the ECM cover with the 3 bolts.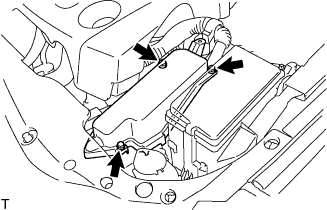
- Torque:
- 5.5 N*m{ 56 kgf*cm , 49 in.*lbf }
- NOTICE:
- Make sure that the wire harness does not get caught between the parts.
| 3. INSTALL ENGINE ROOM SIDE COVER LH |
Install the side cover with the 5 clips.
| 4. INSTALL COOL AIR INTAKE DUCT SEAL |
Install the intake duct seal with the 11 clips.