REMOVAL
Removal / installation
- CAUTION:
- Wear protective gloves when removing the exhaust pipe.
- Wear protective gloves when removing the exhaust pipe.
- The exhaust pipe is extremely hot immediately after the engine has stopped.
- The exhaust pipe is extremely hot immediately after the engine has stopped.
- Confirm that the exhaust pipe has cooled down before removing it.
- Confirm that the exhaust pipe has cooled down before removing it.
| 1. REMOVE REAR NO. 1 FLOOR PANEL BRACE |

Remove the 4 bolts and rear No. 1 floor panel brace.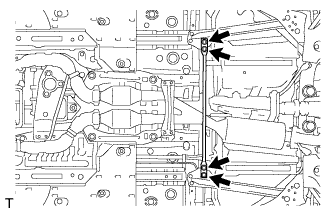

| 2. REMOVE FRONT CENTER FLOOR BRACE |
Remove the 4 bolts and front center floor brace .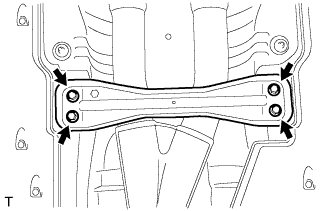
| 3. DISCONNECT HEATED OXYGEN SENSOR |
Remove the grommets of the heated oxygen sensors (BANK 1, BANK 2).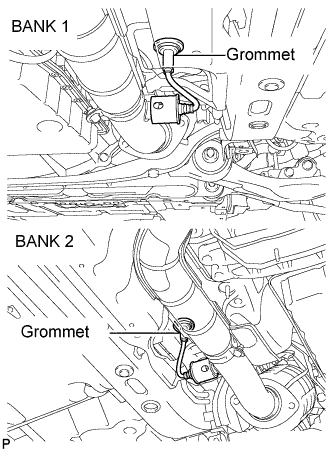
Using the SST, remove a oxygen sensors (BANK 1, BANK 2).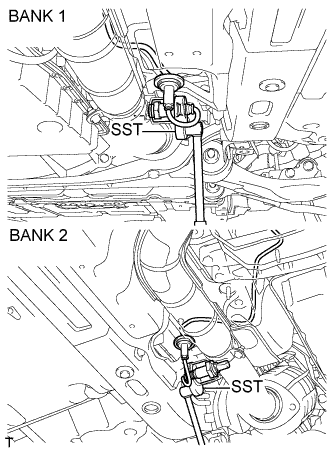
- SST
- 09224-00010
| 4. REMOVE FRONT EXHAUST PIPE ASSEMBLY |
Remove the 4 bolts and 4 nuts.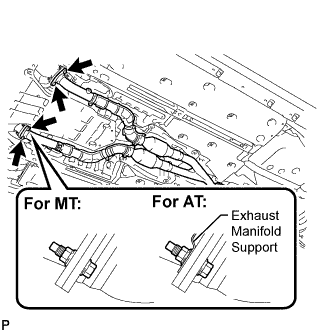
Remove the 2 bolts and 2 compression springs from the tail exhaust pipe assembly.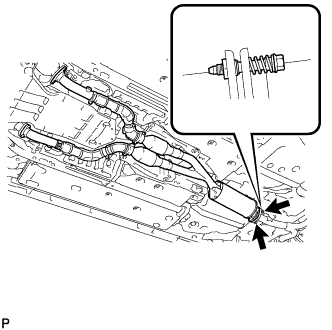
Remove the front exhaust pipe assembly and 3 gaskets.
| 5. REMOVE TAIL EXHAUST PIPE ASSEMBLY |
Disconnect the 6 exhaust pipe supports to remove the tail exhaust pipe assembly.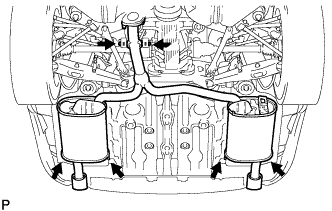
| 6. REMOVE EXHAUST PIPE DAMPER |
Remove the 2 bolts and exhaust pipe damper.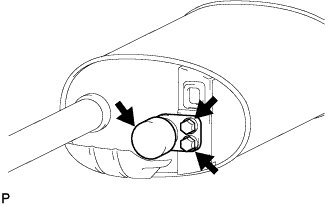
| 7. REMOVE TAIL EXHAUST PIPE BAFFLE SUB-ASSEMBLY |
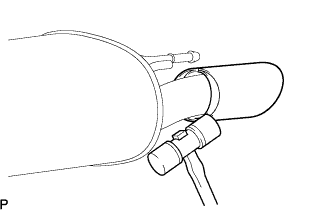
Using a plastic hammer, uniformly tap off the exhaust pipe baffle sub-assemblies.