INSTALLATION
Removal / installation
- HINT:
- Use the same procedures for the RH side and LH side.
- The procedures listed below are for the LH side.
- Use the same procedures for the RH side and LH side.
| 1. INSTALL SIDE AIRBAG SENSOR |

Check that the engine switch is off.
Check that the battery negative (-) terminal is disconnected.
- CAUTION:
- After disconnecting the negative battery terminal, wait for at least 90 seconds before starting the operation.
Install the side airbag sensor with the nut.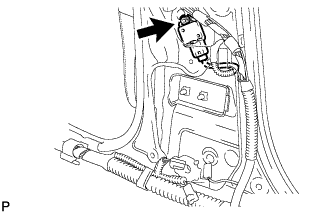

- Torque:
- 9.0 N*m{ 92 kgf*cm , 80 in.*lbf }
- NOTICE:
- If the side airbag sensor has been dropped, or there are any cracks, dents or other defects in the case, bracket or connector, replace it with a new one.
- When installing the side airbag sensor, be careful that the SRS wiring does not interfere with other parts and that it is not pinched between other parts.
- If the side airbag sensor has been dropped, or there are any cracks, dents or other defects in the case, bracket or connector, replace it with a new one.
Check that there is no looseness in the installation parts of the side airbag sensor.
Connect the connetor.
| 2. INSTALL FRONT SEAT BELT RETRACTOR COVER |
Engage the claw and install the front seat belt retractor cover to the body.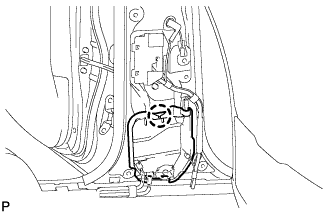
| 3. INSTALL FRONT SEAT OUTER BELT ASSEMBLY |
Check the degree of tilt when the ELR begins to lock.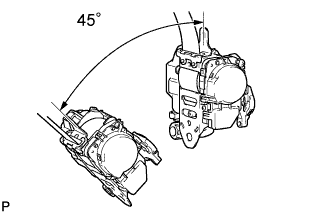
Check that the belt does not lock at less than 15 degrees of tilt in any direction but locks at over 45 degrees of tilt while gently pulling the belt.
- NOTICE:
- Do not disassemble the retractor.
Temporarily install the front seat outer belt assembly with the 2 bolts.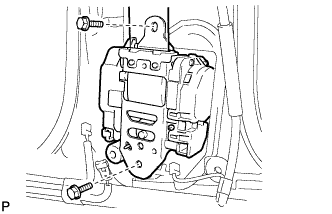
Fully tighten the upper side bolt first, then the lower side bolt to install the front seat outer belt assembly.
- Torque:
- For upper bolt:
- 7.5 N*m{ 77 kgf*cm , 66 in.*lbf }
- For lower bolt:
- 42 N*m{ 428 kgf*cm , 31 ft.*lbf }
Connect the pretensioner connector and lock the locking button as shown in the illustration.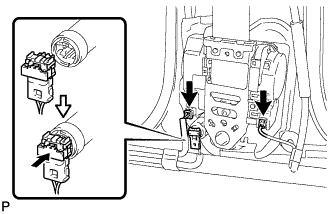
- NOTICE:
- Securely lock the locking button.
Connect the connectors.
| 4. INSTALL CENTER LOWER PILLAR GARNISH |
Engage the 5 clips and 3 claws, and install the lower center pillar garnish LH.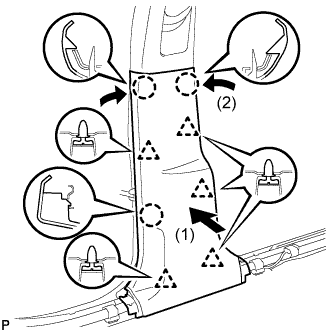
| 5. INSTALL FRONT DOOR SCUFF PLATE (w/o Illumination) |
Engage the 4 clips.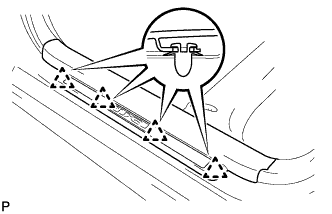
Engage the 7 claws, and install the front door scuff plate LH.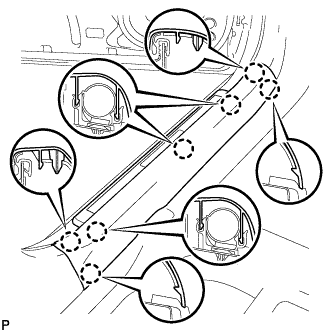
| 6. INSTALL FRONT DOOR SCUFF PLATE (w/ Illumination) |
Connect the connector.
Engage the 4 clips.
Engage the 7 claws, and install the front door scuff plate LH.
| 7. INSTALL REAR DOOR SCUFF PLATE |
Engage the 2 clips.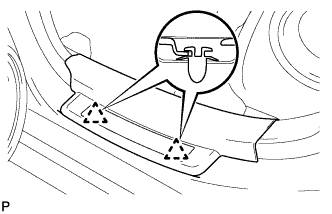
Engage the 5 claws and install the rear door scuff plate LH.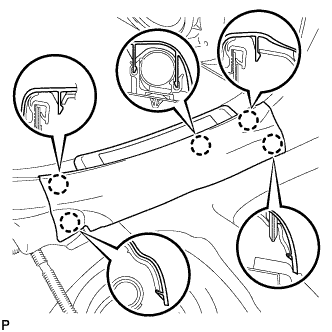
| 8. CONNECT CABLE TO NEGATIVE BATTERY TERMINAL |
| 9. PERFORM INITIALIZATION |
Perform initialization (Click here).
- HINT:
- Some systems need initialization when disconnecting the cable from the negative battery terminal.
| 10. INSPECT SRS WARNING LIGHT |
Inspect the SRS warning light (Click here).