REMOVAL
Removal / installation
- HINT:
- Use the same procedures for the RH side and LH side.
- The procedures listed below are for the LH side.
- Use the same procedures for the RH side and LH side.
| 1. PRECAUTION |

- CAUTION:
- Be sure to read "PRECAUTION" thoroughly before servicing (Click here).
| 2. DISCONNECT CABLE FROM NEGATIVE BATTERY TERMINAL |
- NOTICE:
- Wait for 90 seconds after disconnecting the cable to prevent the airbag working.
| 3. REMOVE FRONT DOOR SCUFF PLATE (w/ Illumination) |
Put protective tape around the front door scuff plate.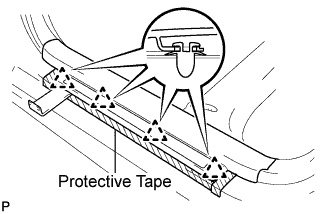

Using a moulding remover, disengage the 4 clips.
Disengage the 7 claws and remove the front door scuff plate LH.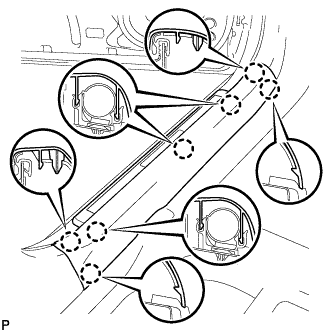
| 4. REMOVE FRONT DOOR SCUFF PLATE (w/o Illumination) |
Put protective tape around the front door scuff plate.
Using a moulding remover, disengage the 4 clips.
Disengage the 7 claws and remove the front door scuff plate LH.
Disconnect the connector.
| 5. REMOVE REAR DOOR SCUFF PLATE |
Put protective tape around the rear door scuff plate.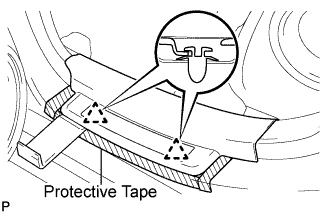
Using a moulding remover, disengage the 2 clips.
Disengage the 5 claws and remove the the rear door scuff plate LH.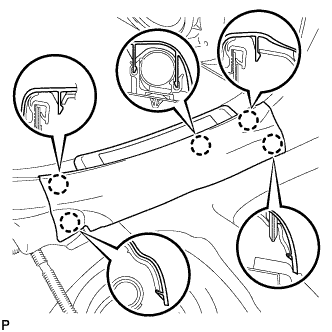
| 6. REMOVE CENTER LOWER PILLAR GARNISH |
Disengage the 3 claws and 5 clips, and remove the lower center pillar garnish LH.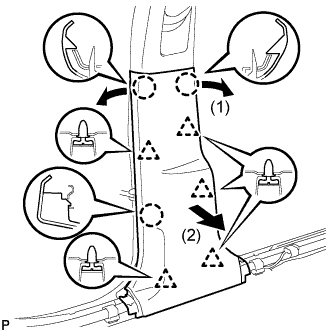
| 7. SEPARATE FRONT SEAT OUTER BELT ASSEMBLY |
Using a screwdriver, pull out the locking button in the direction shown by the arrow to release the lock, and disconnect the pretensioner connector as shown in the illustration.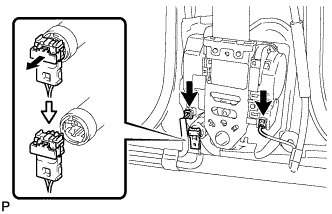
- HINT:
- Tape the screwdriver tip before use.
Disconnect the connectors.
Remove the 2 bolts and separate the front seat outer belt assembly.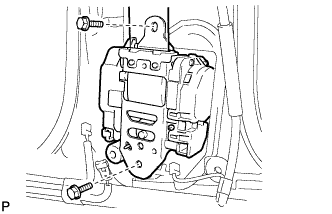
| 8. REMOVE FRONT SEAT BELT RETRACTOR COVER |
Disengage the claw and remove the front seat belt retractor cover from the body.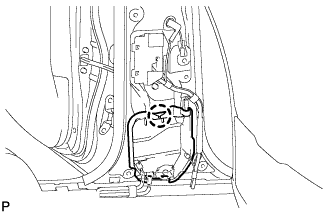
| 9. REMOVE SIDE AIRBAG SENSOR |
Remove the nut and side airbag sensor from the body.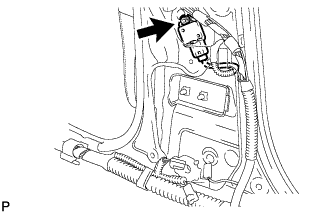
Disconnect the connector.