INSTALLATION
Removal / installation
| 1. INSTALL REAR AIRBAG SENSOR |

Check that the engine switch is off.
Check that the battery negative (-) terminal is disconnected.
- CAUTION:
- After disconnecting the negative battery terminal, wait for at least 90 seconds before starting the operation.
Install the rear airbag sensor with the bolt.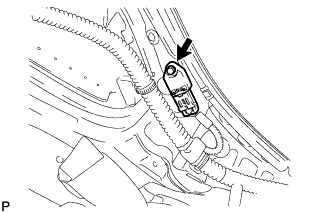

- Torque:
- 9.0 N*m{ 92 kgf*cm , 80 in.*lbf }
- NOTICE:
- If the rear airbag sensor has been dropped, or there are any cracks, dents or other defects in the case, bracket or connector, replace it with a new one.
- When installing the rear airbag sensor, be careful that the SRS wiring does not interfere with other parts and that it is not pinched between other parts.
- If the rear airbag sensor has been dropped, or there are any cracks, dents or other defects in the case, bracket or connector, replace it with a new one.
Check that there is no looseness in the installation parts of the rear airbag sensor.
Connect the connector.
| 2. INSTALL REAR SEAT SIDE GARNISH |
Engage the 5 claws and install the rear seat side garnish LH.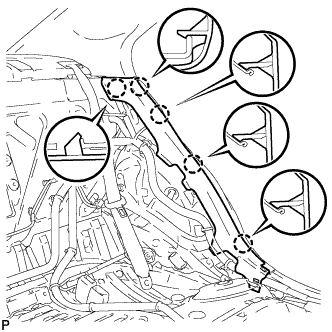
| 3. INSTALL REAR DOOR SCUFF PLATE |
Engage the 2 clips.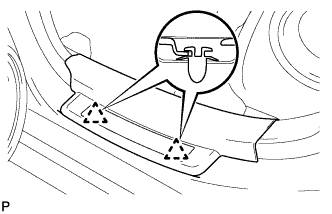
Engage the 5 claws and install the rear door scuff plate LH.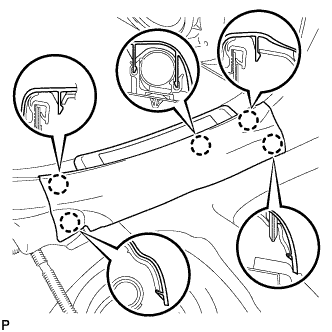
| 4. INSTALL REAR SEATBACK ASSEMBLY |
Place the seatback in the cabin.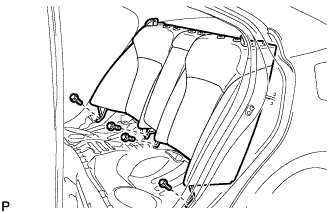
- NOTICE:
- Be careful not to damage the vehicle body.
Install the seatback with the 4 bolts.
- Torque:
- 18 N*m{ 184 kgf*cm , 13 ft.*lbf }
Pass the 3 seat belts through and close the cap of the 2 rear seat shoulder belt guides.
Install the floor anchor part with the bolt.
| 5. INSTALL REAR SEAT CENTER HEADREST ASSEMBLY |
| 6. INSTALL REAR SEAT HEADREST ASSEMBLY |
| 7. INSTALL REAR SEAT CUSHION ASSEMBLY |
Attach the 2 rear hooks of the seat cushion to the seatback.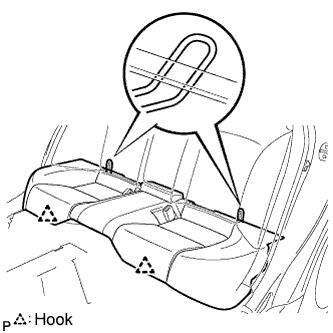
Attach the 2 front hooks of the seat cushion to the vehicle body.
Confirm that the seat cushion is firmly installed.
- NOTICE:
- When installing the seat cushion, make sure the seat belt buckle is not under the seat cushion.
| 8. CONNECT CABLE TO NEGATIVE BATTERY TERMINAL |
| 9. PERFORM INITIALIZATION |
Perform initialization (Click here).
- HINT:
- Some systems need initialization when disconnecting the cable from the negative battery terminal.
| 10. INSPECT SRS WARNING LIGHT |
Inspect the SRS warning light (Click here).