REMOVAL
Removal / installation
| 1. DISCONNECT CABLE FROM NEGATIVE BATTERY TERMINAL |
| 2. REMOVE COOL AIR INTAKE DUCT SEAL |

Remove the 11 clips and intake duct seal.

| 3. REMOVE ENGINE ROOM SIDE COVER LH |
Remove the 5 clips and side cover.
| 4. REMOVE V-BANK COVER SUB-ASSEMBLY |
Raise the V-bank cover to disengage the clip on the rear of the cover. Raise the cover again to disengage the 2 clips on the front of the cover and remove the cover.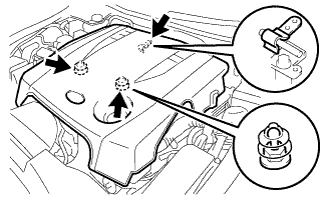
- NOTICE:
- Attempting to disengage both front and rear clips at the same time may cause the cover to break.
| 5. REMOVE NO. 1 INLET AIR CLEANER |
Remove the bolt, clip and inlet air cleaner.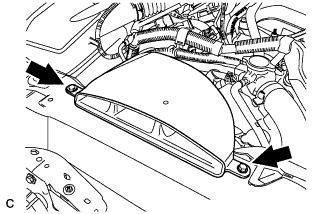
| 6. REMOVE V-RIBBED BELT |
While releasing the belt tension by turning the belt tensioner counterclockwise, and remove the V-ribbed belt from the belt tensioner.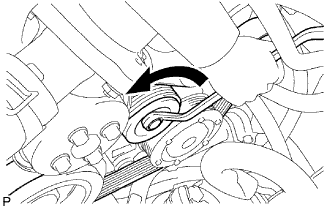
While turning the belt tensioner counterclockwise, align with its holes, and then insert the 5 mm bi-hexagon wrench into the holes to fix the belt tensioner.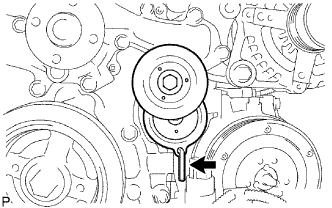
| 7. DRAIN ENGINE COOLANT |
- NOTICE:
- Do not remove the radiator cap while the engine and radiator are still hot. Pressurized, hot engine coolant and steam may be released and cause serious burns.
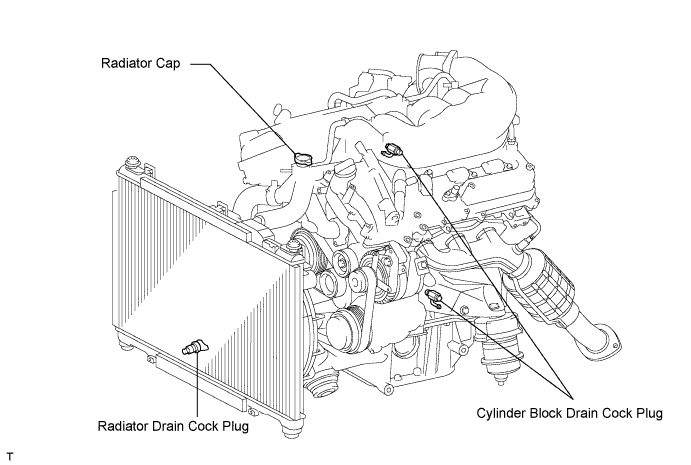
Remove the radiator cap and reservoir tank cap.
Loosen the radiator drain cock plug and 2 cylinder block drain cock plugs. Then drain the coolant.
- HINT:
- Collect the coolant in a container and dispose of it according to the regulations in your area.
| 8. REMOVE RADIATOR INLET HOSE |
Remove the 2 clips and the radiator inlet hose from the radiator assembly.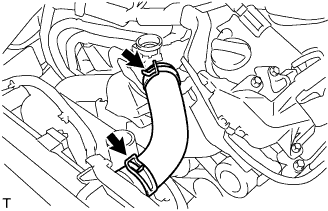
| 9. REMOVE NO. 2 ENGINE COVER |
Remove the 3 clips and clamp, then remove the No. 2 engine cover.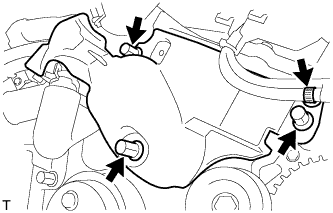
| 10. REMOVE NO. 2 IDLER PULLEY SUB-ASSEMBLY |
Remove the bolt, idler pulley cover plate No.2 and No.2 idler pulley sub-assembly.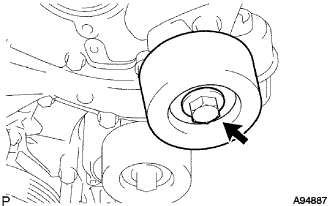
| 11. DISCONNECT WIRE HARNESS |
Remove the 3 nuts (A) and disconnect wire harness.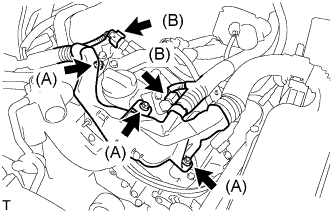
Disconnect the 2 connectors (B).
| 12. REMOVE GENERATOR ASSEMBLY |
Remove the terminal cap.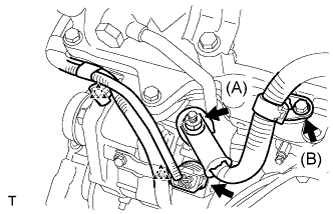
Remove the nut (A) and disconnect the wire harness from terminal B.
Remove the bolt (B) and clamp bracket.
Disconnect the generator connector, and detach the 2 clamps.
Remove the nut, and disconnect the generator bracket.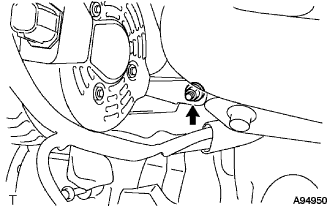
Remove the 2 bolts and generator.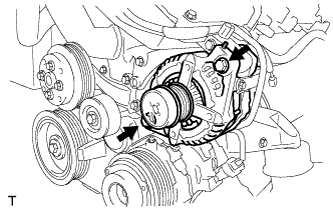
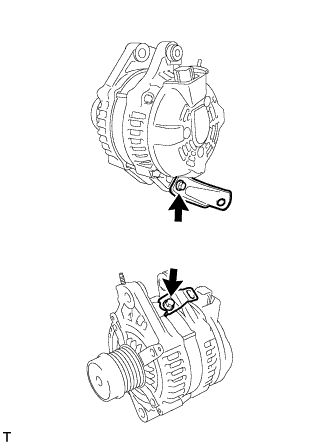
Remove the 2 bolts and 2 generator brackets.