INSTALLATION
Removal / installation
| 1. INSTALL FRONT SHOCK ABSORBER |

Install the front lower coil spring insulator to the front shock absorber so that both recessed parts are aligned.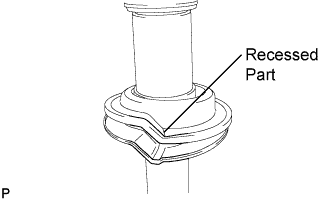

Using SST, compress the front coil spring.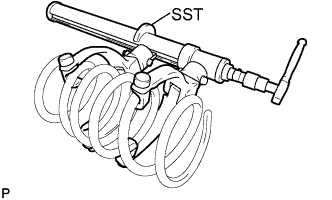
- SST
- 09727-30021
(09727-00010, 09727-00021, 09727-00031)
- NOTICE:
- Do not use an impact wrench. It will damage the SST.
Install the front coil spring so that the end comes to the stepped portion of the lower spring seat.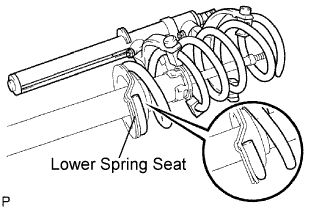
Install the front spring bumper on the front suspension support assembly.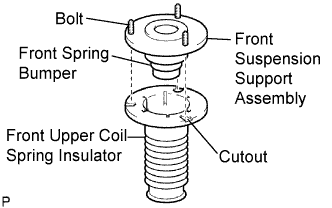
Align the bolt of the front suspension support assembly with the cutout of the front upper coil spring insulator, and install the front upper coil spring insulator on the front suspension support assembly.
Match the shape of the piston rod end to the shape of the front suspension support assembly to install the front shock absorber.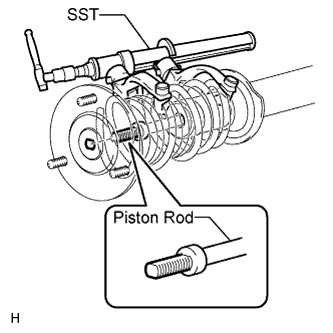
Temporarily tighten a new lock nut to the front shock absorber.
Adjust the front suspension support assembly so that the bolts come to the positions shown in the illustration, and remove the SST from the front coil spring.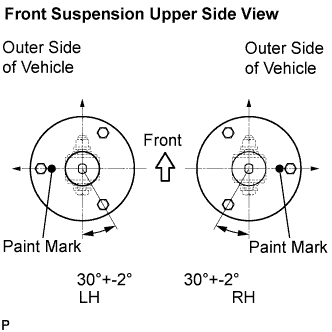
- NOTICE:
- Do not use an impact wrench.
- Make sure of the direction of the front suspension support assembly when removing the SST.
- Do not use an impact wrench.
| 2. TEMPORARILY TIGHTEN FRONT SHOCK ABSORBER WITH COIL SPRING |
Install the front shock absorber with front coil spring on the vehicle by tightening the 3 nuts on the suspension support side.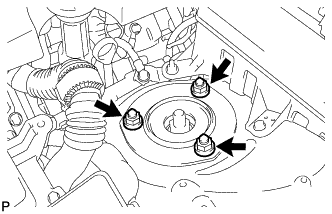
- Torque:
- 67 N*m{ 683 kgf*cm , 49 ft.*lbf }
Insert the bolt from the rear of the vehicle, and install the front shock absorber lower side on the front lower suspension arm.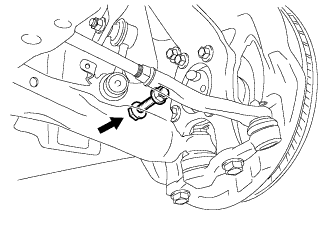
Temporarily tighten the nut while holding the bolt.
- HINT:
- Fully tighten the nut after stabilizing the suspension.
Tighten a new lock nut.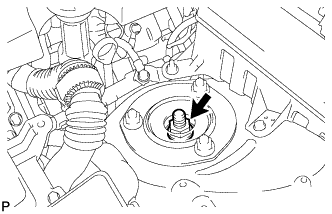
- Torque:
- 28 N*m{ 286 kgf*cm , 21 ft.*lbf }
| 3. CONNECT FRONT UPPER SUSPENSION ARM |
Install the steering knuckle to the front upper suspension arm, and secure them with the nut.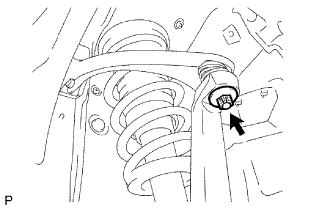
- Torque:
- 87 N*m{ 887 kgf*cm , 64 ft.*lbf }
Install a new clip to the steering knuckle.
- NOTICE:
- Further tighten the nut up to 60° if the holes for the cotter pin are not aligned.
- Do not loosen the nut to align the holes for the cotter pin.
- Further tighten the nut up to 60° if the holes for the cotter pin are not aligned.
| 4. CONNECT FRONT SPEED SENSOR |
Install the front speed sensor to the front shock absorber with coil spring with the 2 bolts.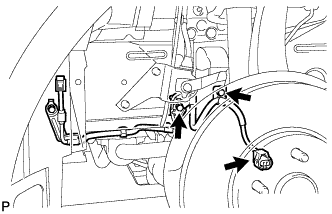
- Torque:
- 6.0 N*m{ 61 kgf*cm , 4.4 ft.*lbf }
- NOTICE:
- Do not twist the front speed sensor while installing it.
- Be careful not to deform the bracket of the front shock absorber with coil spring when installing the bolts.
- Do not twist the front speed sensor while installing it.
| 5. CONNECT FRONT STABILIZER LINK ASSEMBLY |
Connect the front stabilizer link assembly with the nut.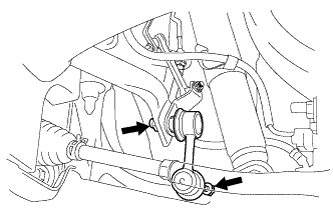
- Torque:
- 5.4 N*m{ 55 kgf*cm , 48 in.*lbf }
| 6. STABILIZE SUSPENSION |
Install the front wheel.
- Torque:
- 103 N*m{ 1,050 kgf*cm , 76 ft.*lbf }
Lower the vehicle and bounce it up and down several times to stabilize the front suspension. Raise the vehicle.
Remove the front wheel.
Jack up the front lower suspension arm placing a wooden block in between. Apply a load to the front suspension so that the front lower suspension arm is placed in a horizontal position.
| 7. FULLY TIGHTEN FRONT SHOCK ABSORBER WITH COIL SPRING |
Fully tighten the bolt on the lower side of the front shock absorber while holding the nut.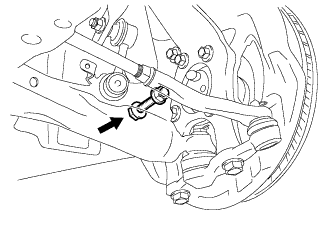
- Torque:
- 157 N*m{ 1,600 kgf*cm , 116 ft.*lbf }
| 8. INSTALL ENGINE ROOM SIDE COVER |
| 9. INSTALL FRONT TIRE |
- Torque:
- 103 N*m{ 1,050 kgf*cm , 76 ft.*lbf }
| 10. INSPECT AND ADJUST FRONT WHEEL ALIGNMENT |