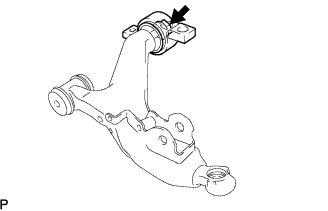
REMOVAL
Removal / installation
| 1. REMOVE FRONT WHEEL |
| 2. SEPARATE FRONT SPEED SENSOR |

Remove the 2 bolts and separate the front speed sensor from the front shock absorber with coil spring.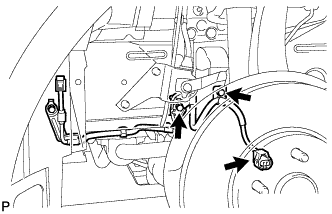

- HINT:
- Be careful not to deform the bracket of the front shock absorber with coil spring when removing the bolt.
| 3. SEPARATE TIE ROD ASSEMBLY |
Remove the clip and the nut.
Using SST, separate the tie rod end LH from the steering knuckle.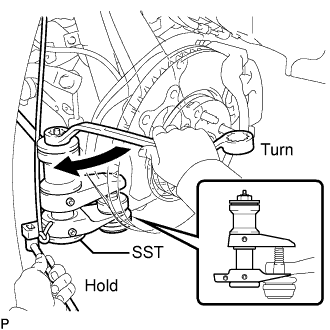
- SST
- 09628-00011
- NOTICE:
- Hang SST with a string, etc. to prevent it from falling.
- Do not damage the front disc brake dust cover.
- Do not damage the ball joint dust cover.
- Do not damage the steering knuckle.
- Hang SST with a string, etc. to prevent it from falling.
| 4. SEPARATE HEIGHT CONTROL SENSOR LINK ASSEMBLY |
Remove the nut and separate the front stabilizer link from the front lower suspension arm.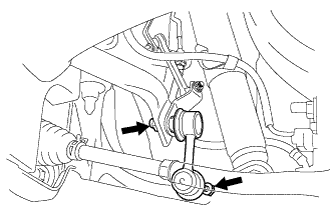
| 5. SEPARATE FRONT SHOCK ABSORBER WITH COIL SPRING |
Loosen the nut while holding the bolt.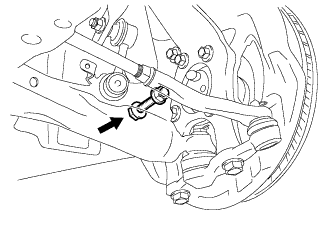
- NOTICE:
- Do not remove the bolt.
Separate the lower part of the front shock absorber from the front lower suspension arm.
| 6. REMOVE FRONT STABILIZER LINK ASSEMBLY |
Remove the 2 nuts and the front stabilizer link assembly LH.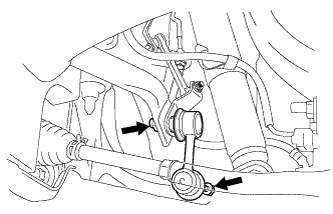
- HINT:
- If the ball joint turns together with the nut, use a hexagon (6 mm) wrench to hold the stud.
| 7. REMOVE ENGINE UNDER COVER |
| 8. REMOVE FRONT LOWER SUSPENSION ARM |
Support the front suspension crossmember with a transmission jack.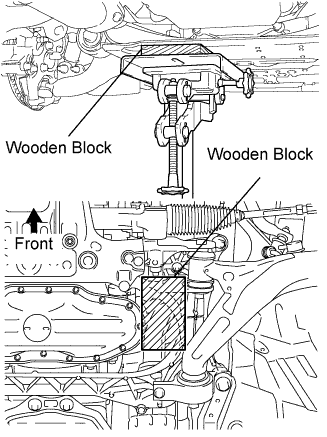
- NOTICE:
- Be sure to place a wooden block between the front suspension crossmember and transmission jack.
Remove the 2 bolts from the front lower ball joint.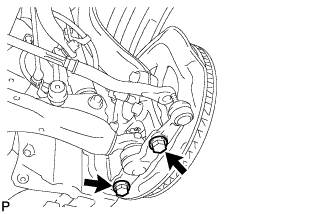
Loosen the nut of the lower No. 2 arm bracket assembly.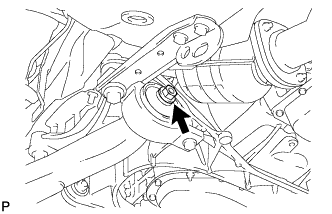
- NOTICE:
- Do not remove the nut.
Remove the bolt, washer, and nut on the front of the front lower suspension arm.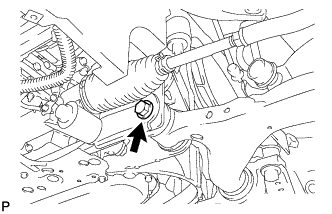
Remove the 4 bolts, side rail plate, and front lower suspension arm with the lower No. 2 arm bracket assembly.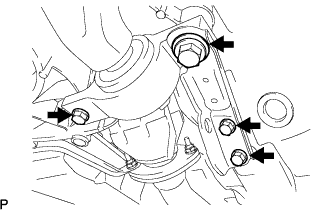
| 9. REMOVE FRONT LOWER BALL JOINT |
Fix the front lower suspension arm in a vise using aluminium plates.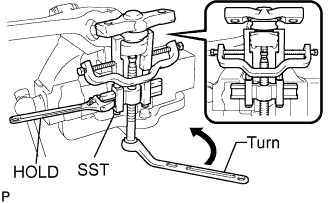
Remove the clip and castle nut.
Use SST to remove the front lower ball joint from the front lower suspension arm.
- SST
- 09950-40011
(09951-04010, 09952-04010, 09953-04020, 09954-04010, 09955-04051, 09957-04010, 09958-04011)
- NOTICE:
- Do not damage the front lower suspension arm.
- Do not damage the lower ball joint dust boots.
- Do not damage the front lower suspension arm.
| 10. REMOVE LOWER NO. 2 ARM BRACKET ASSEMBLY |
Remove the nut, washer, and lower No. 2 arm bracket assembly from the front lower suspension arm.