REMOVAL
Removal / installation
| 1. REMOVE COOL AIR INTAKE DUCT SEAL |

Remove the 11 clips and intake duct seal.

| 2. REMOVE ENGINE ROOM SIDE COVER |
Remove the 5 clips and side cover.
| 3. REMOVE FRONT UPPER FENDER PROTECTOR |
Using a clip remover, separate the clip on the rubber portion of the cowl top ventilator louver sub-assembly from the front upper fender protector LH.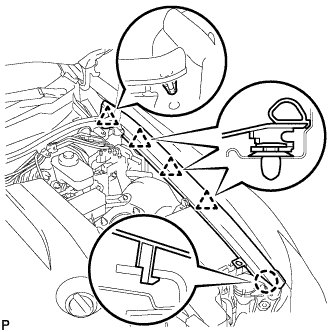
Disengage the 3 clips and the claw to remove the front fender protector upper LH.
| 4. REMOVE FRONT BUMPER ASSEMBLY |
Using a screwdriver, turn the pin 90 degrees and remove the 2 pin hold clips.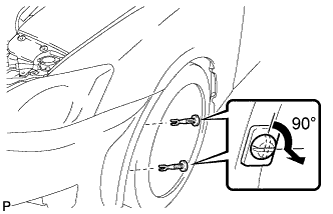
- HINT:
- Tape the screwdriver tip before use.
- Use the same procedures for the RH side and LH side.
- Tape the screwdriver tip before use.
Put protective tape around the front bumper assembly.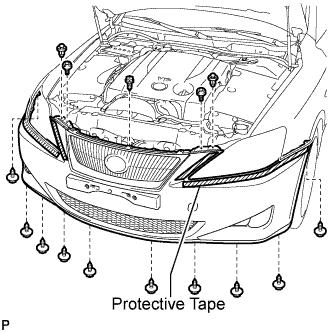
Using a clip remover, remove the 2 clips
Remove the 2 radiator grille protectors.
Remove the bolt and 10 screws.
Disengage the 5 claws and disconnect the front bumper assembly as shown in the illustration.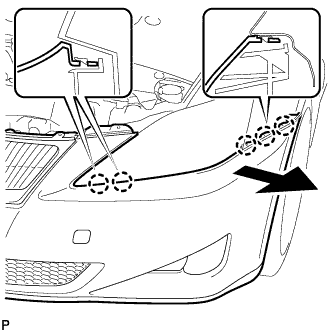
- HINT:
- Use the same procedures for the RH side and LH side.
Disconnect the headlight washer hose. (w/ headlight cleaner system)
Disconnect the connector and remove the front bumper assembly.
| 5. REMOVE MILLIMETER WAVE RADAR SENSOR ASSEMBLY (w/ Dynamic Radar Cruise Control System) |
Disconnect the connector.
Remove the 3 bolts and the millimeter wave radar sensor assembly.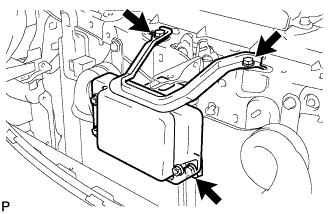
| 6. REMOVE LOW PITCHED HORN ASSEMBLY |
Disconnect the connector.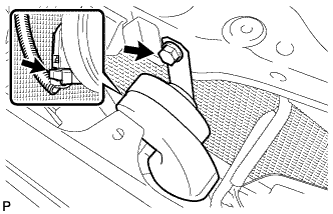
Remove the bolt and the low pitched horn.
| 7. REMOVE HOOD LOCK CONTROL CABLE COVER |
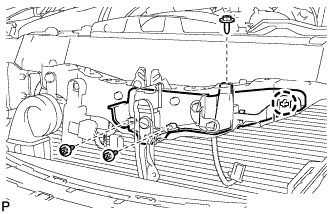 |
Remove the 3 screws.
Detach the claw and remove the hood lock control cable cover.
| 8. REMOVE HOOD LOCK ASSEMBLY |
Using a screwdriver, remove the hood lock nut cap as shown in the illustration.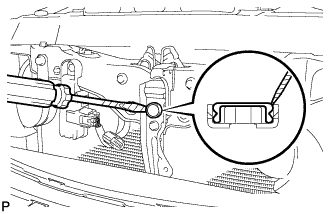
- HINT:
- Tape the screwdriver tip before use.
Remove the 2 bolts and nut.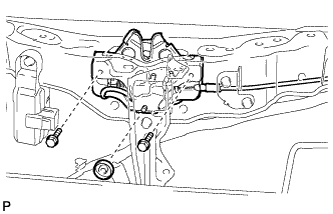
Disconnect the hood lock control cable and connector.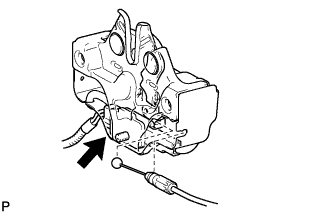
Remove the hood lock assembly.
| 9. REMOVE HOOD LOCK CONTROL LEVER SUB-ASSEMBLY (for LHD) |
Detach the 3 claws.
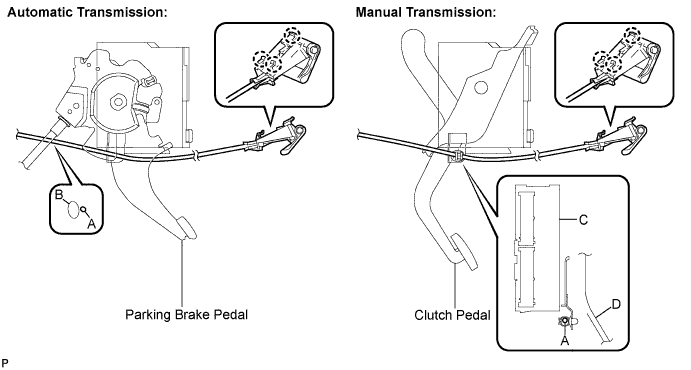
Area
Part Name
Area
Part Name
A
Hood lock control cable
C
Junction block
B
Parking brake cable
D
Clutch pedal
Disconnect the hood lock control cable and remove the hood lock control lever.
| 10. REMOVE HOOD LOCK CONTROL LEVER SUB-ASSEMBLY (for RHD) |
Detach the 3 claws.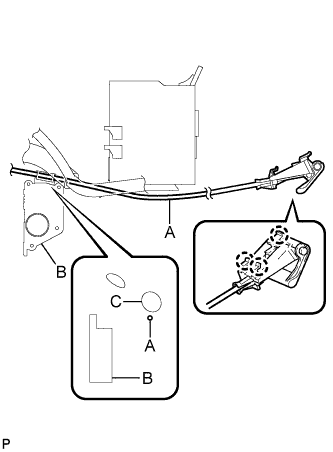
Area
Part Name
A
Hood lock control cable
B
Accelerator pedal
C
Wire harness
Disconnect the hood lock control cable and remove the hood lock control lever.
| 11. REMOVE HOOD LOCK CONTROL CABLE ASSEMBLY (for LHD) |
Using a screwdriver, disconnect the clamps shown in the illustration.
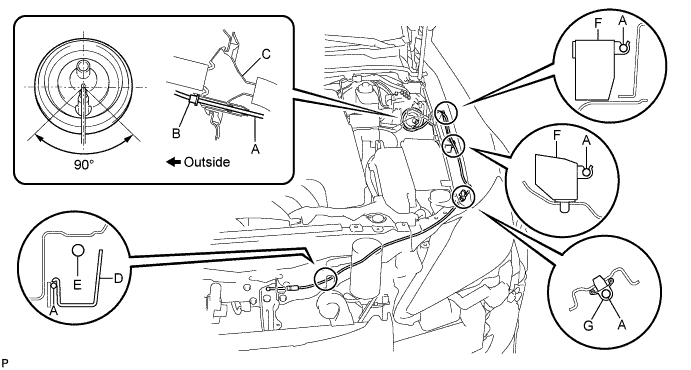
Area
Part Name
Area
Part Name
A
Hood lock control cable
E
Wire harness
B
Stopper
F
Wire harness protector
C
Grommet
G
Clamp
D
Hood lock cable cover
-
-
- HINT:
- Tape the screwdriver tip before use.
Pull the cable from the engine compartment and remove it.
| 12. REMOVE HOOD LOCK CONTROL CABLE ASSEMBLY (for RHD) |
Using a screwdriver, disconnect the clamps shown in the illustration.
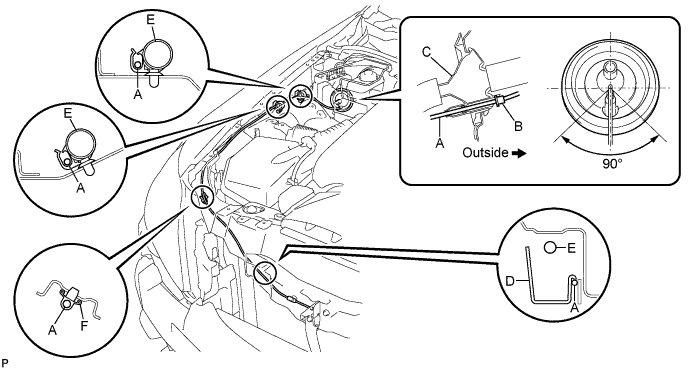
Area
Part Name
Area
Part Name
A
Hood lock control cable
D
Hood lock cable cover
B
Stopper
E
Wire harness
C
Grommet
F
Clamp
- HINT:
- Tape the screwdriver tip before use.
Pull the cable from the engine compartment and remove it.