INSTALLATION
Removal / installation
| 1. INSTALL REAR SUNSHADE RELAY |

- NOTICE:
- When reassembling the rear sunshade assembly, eliminate static electricity by touching the vehicle body to prevent the components from being damaged.
Install the rear sunshade relay with the 2 screws.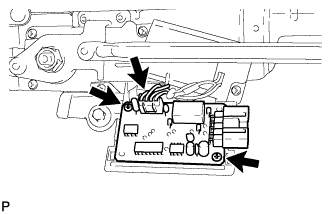

Connect the connector.
Engage the 4 claws and install the rear sunshade relay cover.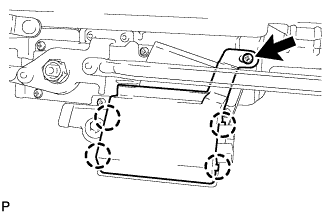
Install the screw.
| 2. INSTALL REAR WINDOW SHADE ASSEMBLY |
Install the rear window shade assembly, and temporarily tighten 4 bolts <A> and <B>.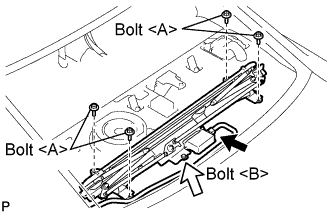
Fully tighten the 5 bolts.
Connect the connector.
| 3. INSTALL NO. 2 PACKAGE TRAY TRIM PANEL ASSEMBLY |
Engage the 5 claws and 3 clips, and install the No. 2 package tray trim panel assembly.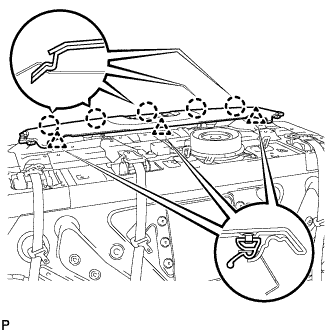
| 4. INSTALL HIGH MOUNTED STOP LIGHT SET |
Connect the connector.
Install the high mounted stop light set with the 4 claws.
| 5. INSTALL PACKAGE TRAY TRIM PANEL ASSEMBLY |
Thread the 3 rear seat belt floor anchors into the package tray trim panel assembly.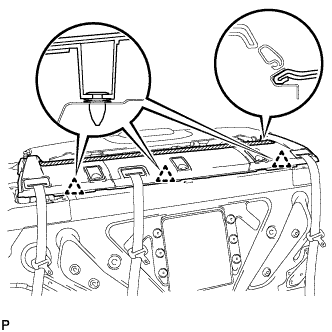
Insert the rear end of the package tray trim panel assembly into the rear window shade assembly.
Engage the 3 clips and install the package tray trim panel assembly.
Engage the 2 claws and install the rear seat shoulder belt cover.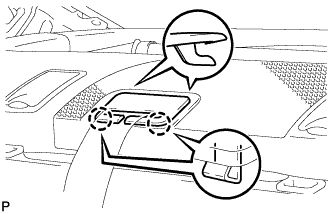
- HINT:
- Use the same procedure for the other 2 rear seat shoulder belt covers.
Connect the floor side of the rear seat inner with center belt assembly RH with the bolt.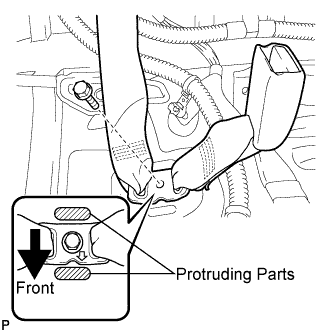
- Torque:
- 42 N*m{ 428 kgf*cm , 31 ft.*lbf }
- NOTICE:
- Do not allow the anchor part of the rear seat inner with center belt assembly RH and the protruding parts of the floor panel to overlap.
Check if the ELR locks.
- NOTICE:
- The check should be performed with the outer belt assembly installed.
With the belt assembly installed, check that the belt locks when the belt is pulled out quickly.
Connect the floor side of the rear seat 3 point type belt assembly LH with the bolt.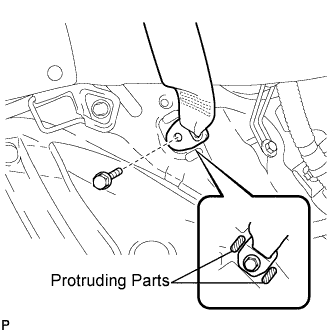
- Torque:
- 42 N*m{ 428 kgf*cm , 31 ft.*lbf }
- NOTICE:
- Do not allow the anchor part of the rear seat 3 point type belt assembly LH and the protruding parts of the floor panel to overlap.
- HINT:
- Use the same procedures for the RH side and the LH side.
Check if the ELR locks.
- NOTICE:
- The check should be performed with the outer belt assembly installed.
With the belt assembly installed, check that the belt locks when the belt is pulled out quickly.
| 6. INSTALL ROOF SIDE INNER GARNISH LH |
Engage the claw and 4 clips, and install the roof side garnish inner LH.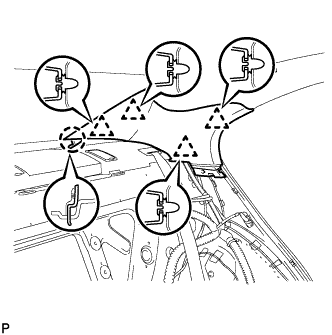
| 7. INSTALL ROOF SIDE INNER GARNISH RH |
| 8. INSTALL REAR SEAT SIDE GARNISH LH |
Engage the 5 claws and install the rear seat side garnish LH.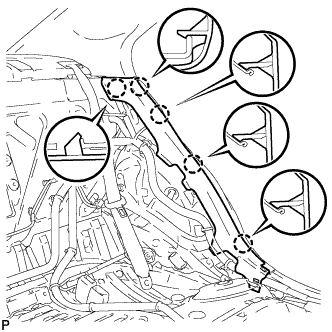
| 9. INSTALL REAR SEAT SIDE GARNISH RH |
| 10. INSTALL REAR DOOR SCUFF PLATE LH |
Engage the 2 clips.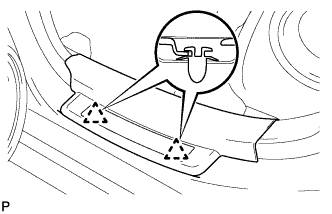
Engage the 5 claws and install the rear door scuff plate LH.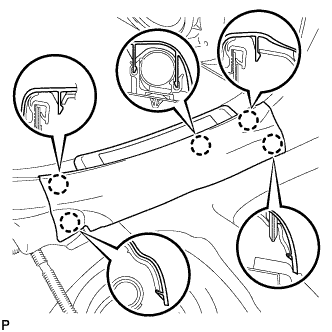
| 11. INSTALL REAR DOOR SCUFF PLATE RH |
| 12. INSTALL REAR SEATBACK ASSEMBLY |
Place the seatback in the cabin.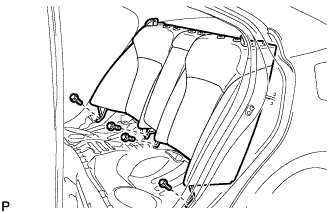
- NOTICE:
- Be careful not to damage the vehicle body.
Install the seatback with the 4 bolts.
- Torque:
- 18 N*m{ 184 kgf*cm , 13 ft.*lbf }
Pass the 3 seat belts through and close the cap of the 2 rear seat shoulder belt guides.
Install the floor anchor part with the bolt.
| 13. INSTALL REAR CENTER SEAT HEADREST ASSEMBLY |
| 14. INSTALL REAR SEAT HEADREST ASSEMBLY |
| 15. INSTALL REAR SEAT CUSHION ASSEMBLY |
Attach the 2 rear hooks of the seat cushion to the seatback.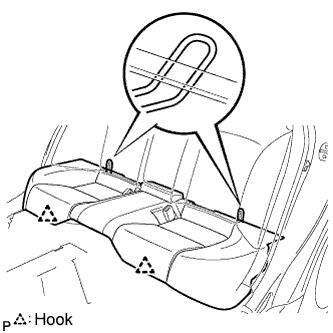
Attach the 2 front hooks of the seat cushion to the vehicle body.
Confirm that the seat cushion is firmly installed.
- NOTICE:
- When installing the seat cushion, make sure the seat belt buckle is not under the seat cushion.