REMOVAL
Removal / installation
| 1. REMOVE REAR SEAT CUSHION ASSEMBLY |

Detach the 2 front hooks of the seat cushion from the vehicle body.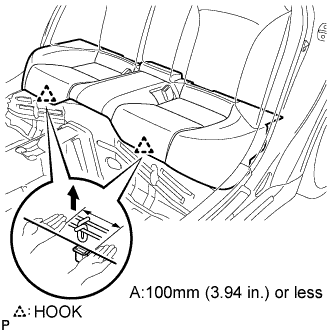

- NOTICE:
- Follow the instructions below carefully as the cushion frame deforms easily.
Choose a hook to detach first. Place your hands near the hook as shown in the illustration. Then lift the seat cushion to detach the hook.
Repeat for the other hook.
Detach the 2 rear hooks of the seat cushion from the seatback.
Remove the seat cushion.
| 2. REMOVE REAR SEAT HEADREST ASSEMBLY |
| 3. REMOVE REAR CENTER SEAT HEADREST ASSEMBLY |
| 4. REMOVE REAR SEATBACK ASSEMBLY |
Using a screwdriver, detach the claws to open the cap of the 3 rear seat shoulder belt guides.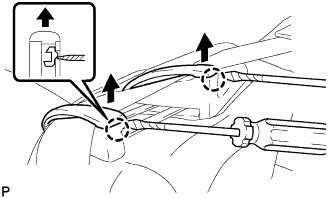
Using a screwdriver, detach the claw to open the cap of the 3 rear seat shoulder belt guides.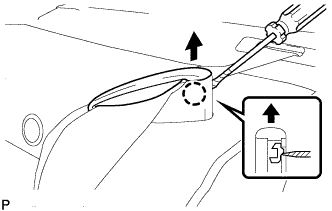
Remove the 4 bolts and rear seatback assembly.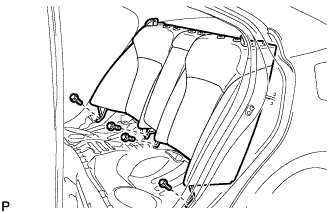
| 5. REMOVE REAR DOOR SCUFF PLATE LH |
Put protective tape around the rear door scuff plate.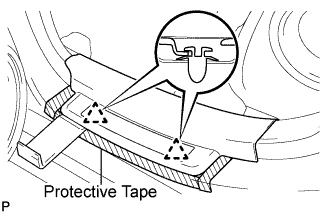
Using a moulding remover, disengage the 2 clips.
Disengage the 5 claws and remove the the rear door scuff plate LH.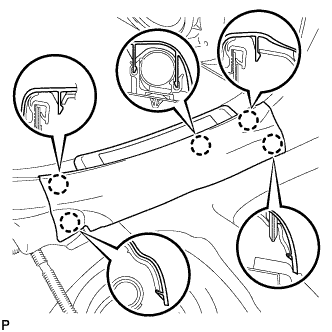
| 6. REMOVE REAR DOOR SCUFF PLATE RH |
| 7. REMOVE REAR SEAT SIDE GARNISH LH |
Disengage the 5 claws and remove the rear seat side garnish LH.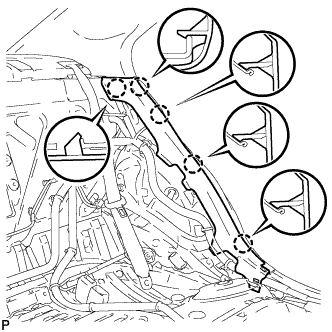
| 8. REMOVE REAR SEAT SIDE GARNISH RH |
| 9. REMOVE ROOF SIDE INNER GARNISH LH |
Disengage the 4 clips and claw, and remove the roof side inner garnish LH.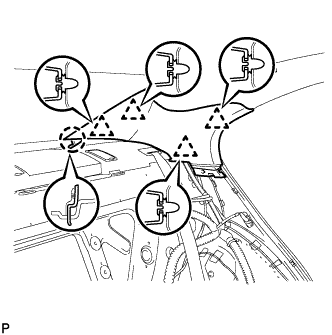
| 10. REMOVE ROOF SIDE INNER GARNISH RH |
| 11. REMOVE PACKAGE TRAY TRIM PANEL ASSEMBLY |
Remove the bolt and separate the floor side of the rear seat 3 point type belt assembly LH.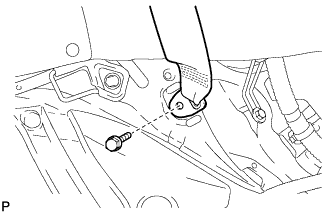
- HINT:
- Use the same procedures for the RH side and the LH side.
Remove the bolt and separate the floor side of the rear seat inner with center belt assembly RH.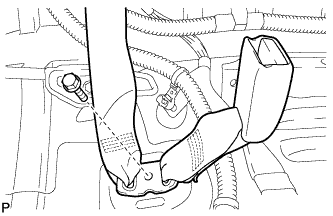
Disengage the 3 clips and raise the front portion of the package tray trim panel assembly.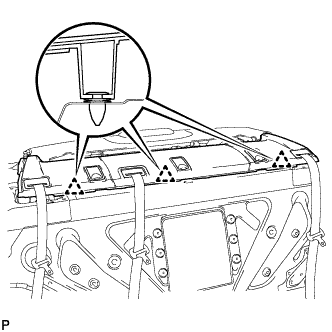
Disengage the 2 claws and remove the rear seat shoulder belt covers.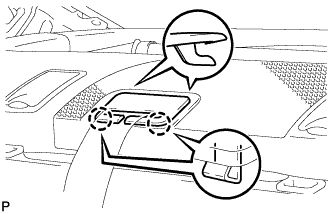
- HINT:
- Use the same procedure for the other 2 rear seat shoulder belt covers.
Pass the 3 rear seat belt floor anchors through the holes in the package tray trim panel assembly.
Remove the package tray trim panel assembly.
| 12. REMOVE HIGH MOUNTED STOP LIGHT SET |
Disengage the 4 claws and disconnect the high mounted stop light set as shown in the illustration.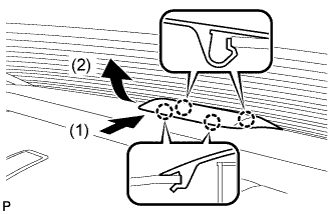
Disconnect the connector and remove the high mounted stop light set.
| 13. REMOVE NO. 2 PACKAGE TRAY TRIM PANEL ASSEMBLY |
Disengage the 3 clips and 5 claws, and remove the No. 2 package tray trim panel assembly.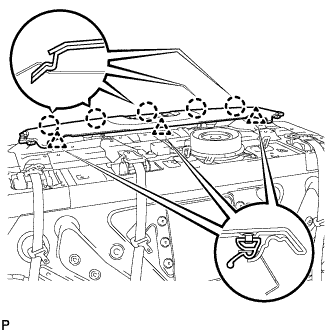
| 14. REMOVE REAR WINDOW SHADE ASSEMBLY |
Disconnect the connector.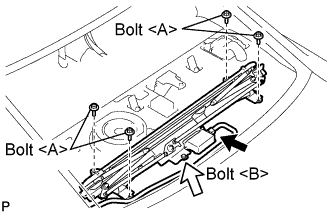
Remove the 4 bolts <A>.
Loosen the bolt <B> and remove the rear window shade assembly.
- NOTICE:
- Bolt <B> cannot be removed from the rear window shade assembly.
| 15. REMOVE REAR SUNSHADE RELAY |
- NOTICE:
- When disassembling the rear sunshade assembly, eliminate static electricity by touching the vehicle body to prevent the components from being damaged.
Remove the screw.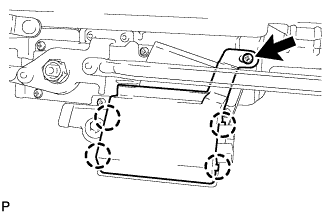
Disengage the 4 claws and remove the rear sunshade relay cover.
Disconnect the connector.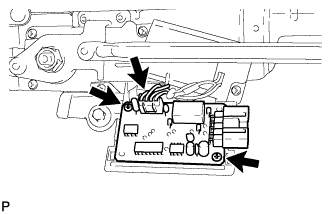
Remove the 2 screws and the rear sunshade relay.