INSTALLATION
Removal / installation
| 1. INSTALL FRONT SEAT ASSEMBLY |

Place the front seat assembly in the vehicle and align the adjuster pin with the hole on the vehicle side.
- NOTICE:
- When installing the passenger side front seat assembly, be careful not to step on the yaw rate sensor mounted on the floor under the seat.
Connect the connector.
Move the front seat assembly to the rearmost position by operating the slide handle.
- NOTICE:
- Check that the seat is locked.
Temporarily install the front seat track bracket with the 2 bolts.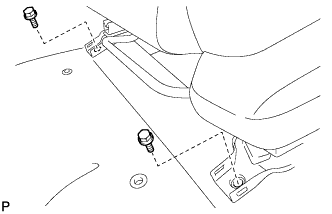

Move the front seat assembly fully forward by operating the slide handle.
- NOTICE:
- Check that the seat is locked.
Temporarily install the rear seat track bracket with the 2 bolts.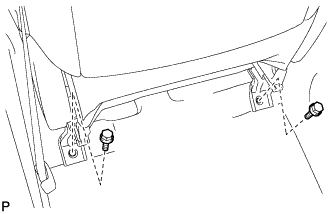
Move the front seat assembly to the rearmost position by operating the slide handle.
- NOTICE:
- Check that the seat is locked.
Fully tighten the 2 bolts on the front seat track bracket in the order of the inner side bolt and then the outer side bolt.
- Torque:
- 37 N*m{ 377 kgf*cm , 27 ft.*lbf }
Move the front seat assembly fully forward by operating the slide handle.
- NOTICE:
- Check that the seat is locked.
Fully tighten the 2 bolts on the rear seat track bracket in the order of the inner side bolt and then the outer side bolt.
- Torque:
- 37 N*m{ 377 kgf*cm , 27 ft.*lbf }
| 2. INSTALL REAR INNER SEAT TRACK BRACKET COVER LH |
Engage the 2 claws and install the rear inner seat track bracket cover.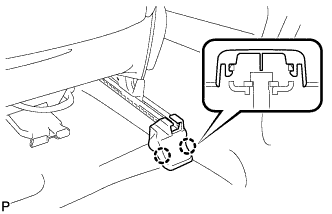
| 3. INSTALL REAR OUTER SEAT TRACK BRACKET COVER LH |
Engage the 2 claws and install the rear outer seat track bracket cover.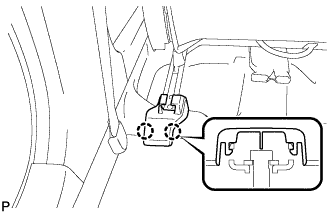
| 4. INSTALL FRONT OUTER SEAT TRACK BRACKET COVER LH |
Engage the 2 claws and install the front outer seat track bracket cover.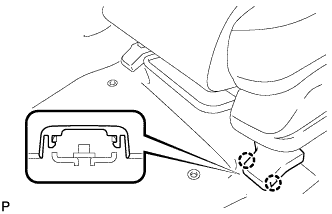
| 5. INSTALL FRONT INNER SEAT TRACK BRACKET COVER LH |
Engage the 2 claws and install the front inner seat track bracket cover.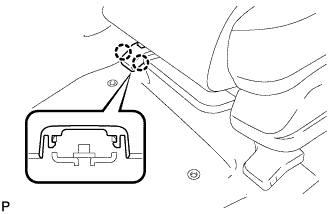
| 6. INSTALL FRONT SEAT HEADREST ASSEMBLY |
| 7. CONNECT CABLE TO NEGATIVE BATTERY TERMINAL |
| 8. PERFORM INITIALIZATION |
- NOTICE:
- Some systems need initialization when disconnecting the cable from the negative battery terminal (Click here).
| 9. INSPECT SLIDE ADJUSTER LOCK |
| 10. INSPECT SRS WARNING LIGHT |