REASSEMBLY
Removal / installation
| 1. INSTALL VERTICAL ADJUSTER SPACER |

Engage the clip and install the vertical adjuster spacer.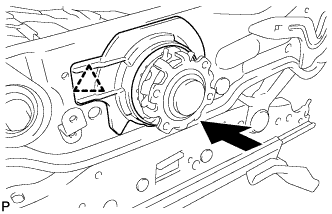

| 2. INSTALL SEAT POSITION AIRBAG SENSOR (for Driver Side) |
Install the seat position sensor, but do not fully tighten it yet.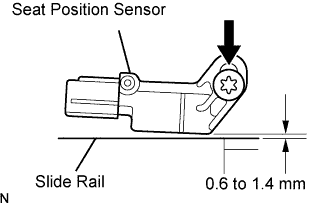
Install a 1 mm (0.04 in.) feeler gauge between the slide rail and sensor.
- HINT:
- Make sure that the clearance between the seat position sensor and the slide rail is within 0.6 to 1.4 mm (0.023 to 0.055 in.).
- CAUTION:
- If the seat position sensor has been dropped, or there are any cracks or other defects in the case, bracket or connector, replace the seat position sensor with a new one.
- When installing the seat position sensor, make sure that the SRS wiring does not interfere with other parts and is not pinched between other parts.
- If the seat position sensor has been dropped, or there are any cracks or other defects in the case, bracket or connector, replace the seat position sensor with a new one.
Hold down the top of the sensor and tighten the sensor using a T30 "torx" socket.
- Torque:
- 8.0 N*m{ 82 kgf*cm , 71 in.*lbf }
Remove the feeler gauge.
Install the seat slide position sensor protector.
Connect the wire harness connector.
| 3. INSTALL FRONT SEAT CUSHION SHIELD LOWER LH |
Engage the claw and install the seat cushion shield lower LH.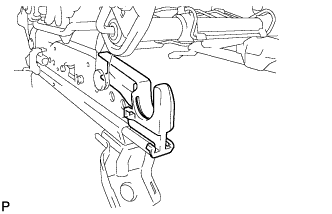
| 4. INSTALL FRONT SEAT CUSHION SHIELD LOWER RH |
- HINT:
- Use the same procedures described for the LH side.
| 5. INSTALL RECLINING ADJUSTER INSIDE COVER LH |
Install the reclining adjuster inside cover LH with the screw.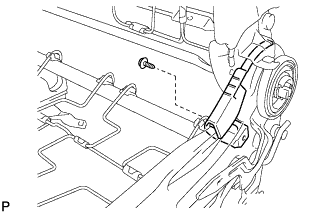
| 6. INSTALL RECLINING ADJUSTER INSIDE COVER RH |
- HINT:
- Use the same procedures described for the LH side.
| 7. INSTALL SEAT RECLINING ADJUSTER INSIDE COVER LH |
Engage the claw.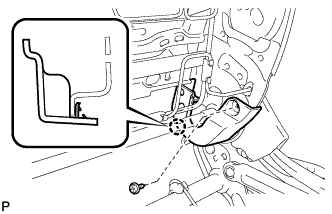
Install the reclining adjuster inside cover LH with the screw.
| 8. INSTALL SEAT RECLINING ADJUSTER INSIDE COVER RH |
- HINT:
- Use the same procedures described for the LH side.
| 9. INSTALL FRONT SEAT BACK HEATER ASSEMBLY (w/ Seat Heater System) |
Using a tacker, install the front seatback heater to the end of the seat cover with the tack pins.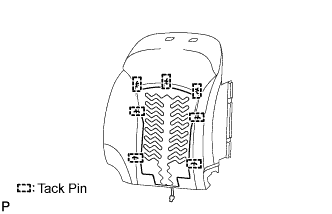
| 10. INSTALL FRONT SEATBACK CUSHION COVER |
Using hog ring pliers, install the front seatback cover to the front seatback pad with new hog rings.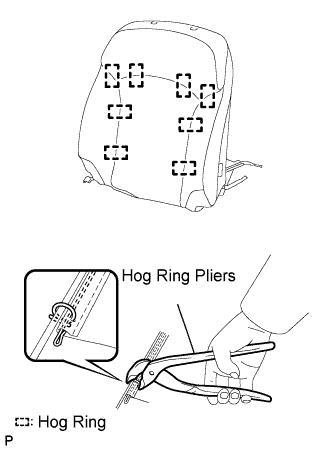
- NOTICE:
- Be careful not to damage the cover.
- When installing the hog rings, take care to minimize wrinkles as much as possible.
- Be careful not to damage the cover.
| 11. INSTALL FRONT SEATBACK COVER WITH PAD |
| 12. INSTALL FRONT SEAT HEADREST SUPPORT ASSEMBLY |
Engage the 4 claws and install the front seat headrest support assemblies.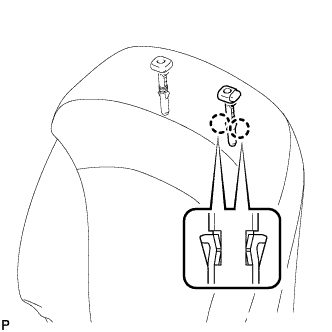
| 13. INSTALL FRONT SEAT CUSHION HEATER ASSEMBLY (w/ Seat Heater System) |
Using a tacker, install the front seat cushion heater to the end of the seat cover with the tack pins.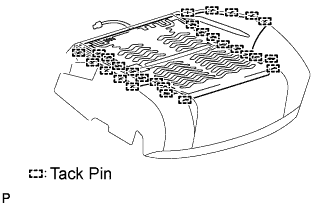
| 14. INSTALL FRONT SEAT CUSHION COVER |
Using hog ring pliers, install new hog rings.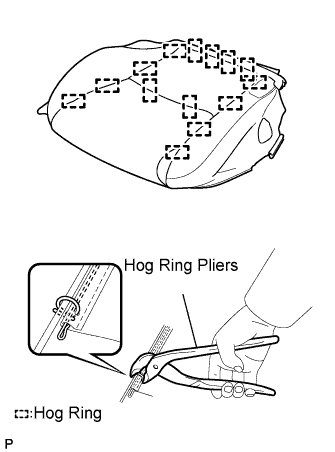
- NOTICE:
- Be careful not to damage the cover.
- When installing the hog rings, take care to minimize wrinkles as much as possible.
- Be careful not to damage the cover.
Using hog ring pliers, install the front seat cushion cover with new hog rings.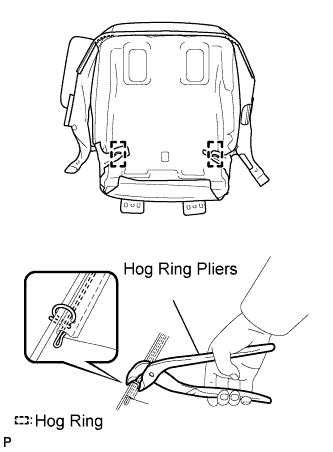
- NOTICE:
- Be careful not to damage the cover.
- When installing the hog rings, take care to minimize wrinkles as much as possible.
- Be careful not to damage the cover.
| 15. INSTALL FRONT SEAT CUSHION COVER WITH PAD |
Install the hooks and front seat cushion cover with pad.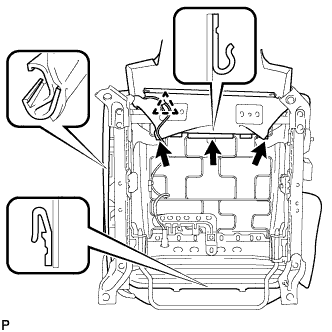
Passenger seat only: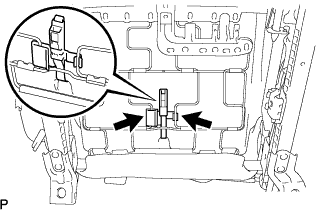
Install the seat position airbag sensor connector.
| 16. INSTALL FRONT SEAT INNER CUSHION SHIELD |
Engage the 2 claws and clip.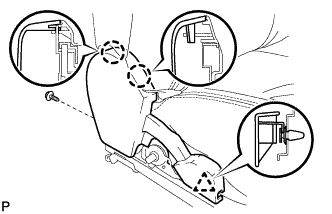
Install the front seat inner cushion shield with the screw.
| 17. INSTALL FRONT SEAT INNER BELT ASSEMBLY |
Install the front seat inner belt assembly with the nut.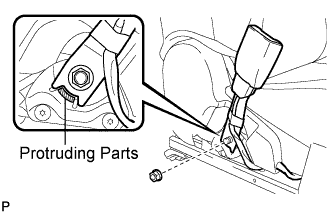
- Torque:
- 42 N*m{ 428 kgf*cm , 31 ft.*lbf }
- NOTICE:
- Do not allow the anchor part of the front seat inner belt assembly to overlap the protruding parts of the front seat adjuster.
Connect the connector and attach the 3 clamps.
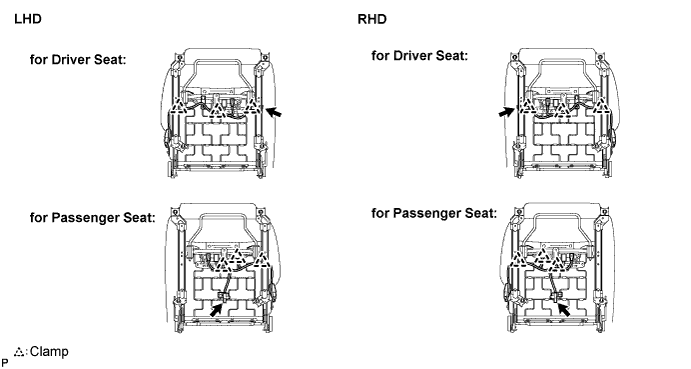
| 18. INSTALL FRONT SEAT CUSHION SHIELD (for Driver Seat) |
Engage the claw and clip.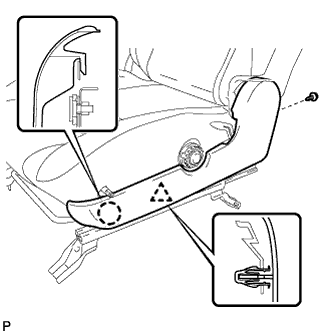
Install the front seat cushion shield with the screw.
| 19. INSTALL RECLINING ADJUSTER RELEASE HANDLE |
Engage the claw and install the reclining adjuster release handle.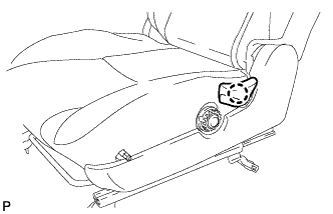
| 20. INSTALL VERTICAL ADJUSTING HANDLE (for Driver Seat) |
Install the vertical adjusting handle with the 2 screws.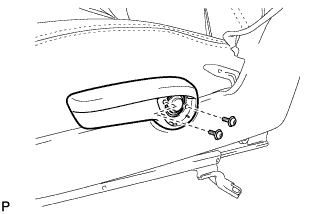
| 21. INSTALL VERTICAL SEAT ADJUSTER KNOB CAP (for Driver Seat) |
Engage the 3 claws and install the vertical seat adjuster knob cap.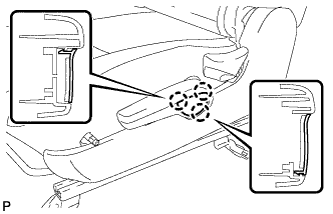
| 22. INSTALL VERTICAL SEAT ADJUSTER KNOB (for Driver Seat) |