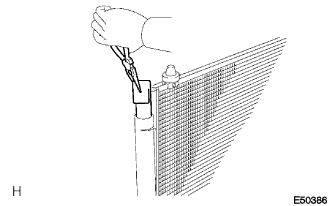
REMOVAL
Removal / installation
| 1. REMOVE COOL AIR INTAKE DUCT SEAL |

Using a clip remover, remove the 11 clips and cool air intake duct seal.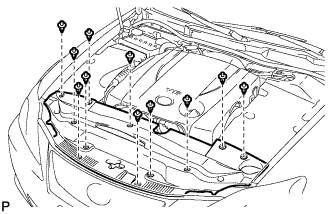

| 2. REMOVE SIDE ENGINE ROOM COVER LH |
Remove the 5 clips and side cover.
| 3. REMOVE SIDE ENGINE ROOM COVER RH |
Remove the 2 clips and side cover.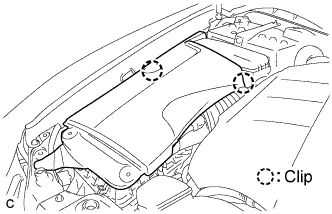
| 4. REMOVE V-BANK COVER SUB-ASSEMBLY |
Raise the V-bank cover to disengage the clip on the rear of the cover. Raise the cover again to disengage the 2 clips on the front of the cover and remove the cover.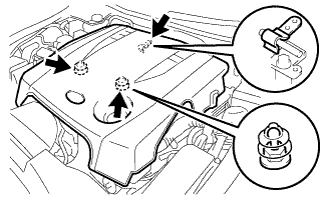
- NOTICE:
- Attempting to disengage both front and rear clips at the same time may cause the cover to break.
| 5. DISCHARGE REFRIGERANT FROM REFRIGERATION SYSTEM |
Start up the engine.
Turn the A/C switch on.
Operate the cooler compressor at an engine rpm of approximately 1,000 for 5 to 6 minutes to circulate the refrigerant and collect compressor oil remaining in each component into the cooler compressor as much as possible.
Stop the engine.
Using SST, let the refrigerant gas out.
- SST
- 07110-58060
(07117-58060, 07117-58070, 07117-58080, 07117-58090, 07117-78050, 07117-88060, 07117-88070, 07117-88080)
| 6. REMOVE NO. 1 INLET AIR CLEANER |
Remove the bolt, clip and inlet air cleaner.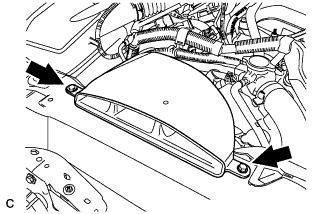
| 7. REMOVE UNDER ENGINE COVER |
| 8. REMOVE FRONT BUMPER ASSEMBLY |
Using a screwdriver, turn the pin 90 degrees and remove the 2 pin hold clips.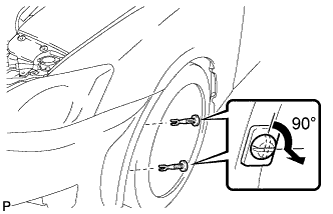
- HINT:
- Tape the screwdriver tip before use.
- Use the same procedures for the RH side and LH side.
- Tape the screwdriver tip before use.
Put protective tape around the front bumper assembly.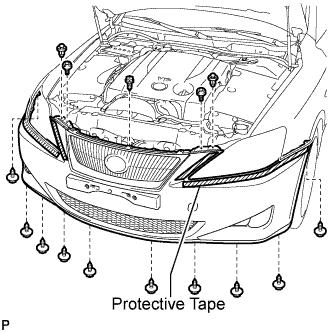
Using a clip remover, remove the 2 clips
Remove the 2 radiator grille protectors.
Remove the bolt and 10 screws.
Disengage the 5 claws and disconnect the front bumper assembly as shown in the illustration.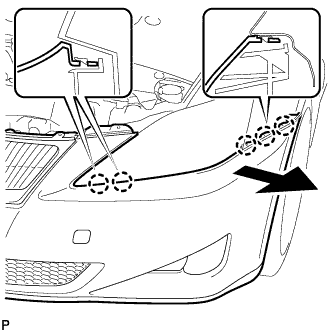
- HINT:
- Use the same procedures for the RH side and LH side.
Disconnect the headlight washer hose. (w/ headlight cleaner system)
Disconnect the connector and remove the front bumper assembly.
| 9. REMOVE FRONT BUMPER ENERGY ABSORBER |
| 10. REMOVE RADIATOR SUPPORT OPENING COVER |
Disengage the 2 clips and remove the radiator support opening cover.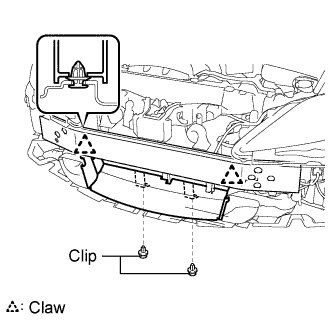
| 11. REMOVE MILLIMETER WAVE RADAR SENSOR ASSEMBLY (w/ Dynamic Radar Cruise Control System) |
Disconnect the connector.
Remove the 3 bolts and the millimeter wave radar sensor assembly.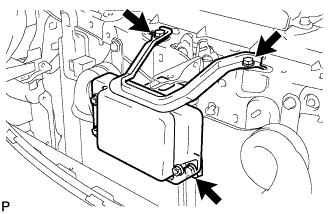
| 12. REMOVE HOOD LOCK CONTROL CABLE COVER |
RHD
Remove the 3 screws, clamp and the hood lock control cable cover.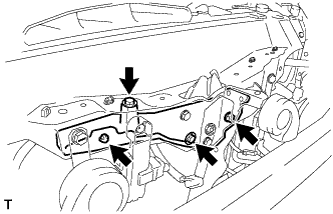
LHD
Remove the 3 screws, clamp and the hood lock control cable cover.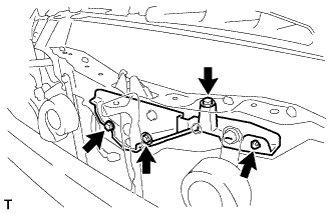
| 13. DISCONNECT HOOD LOCK ASSEMBLY |
Disconnect the connector.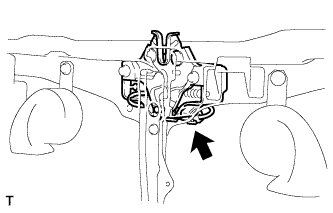
Remove the hood lock nut cap and the hood lock nut.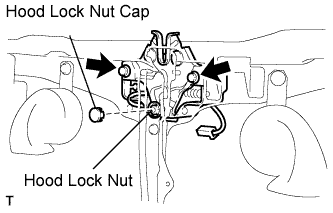
Remove the 2 bolts, and separate the hood lock assembly from the radiator support upper.
- NOTICE:
- Do not forcibly bend the hood lock control cable.
| 14. REMOVE RADIATOR SUPPORT UPPER |
Separate the 4 wire harness clamps and the 3 connectors.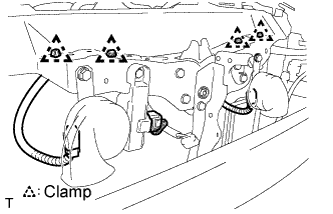
Separate the clamp and the cooling fan motor connector.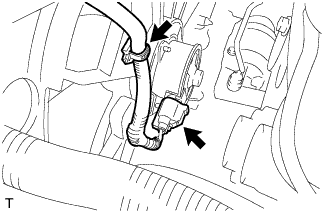
Separate the clamp and the No.2 cooling fan motor connector.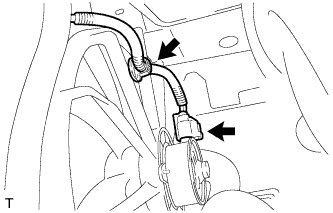
Separate the 6 clamps and the No.2 engine room wire.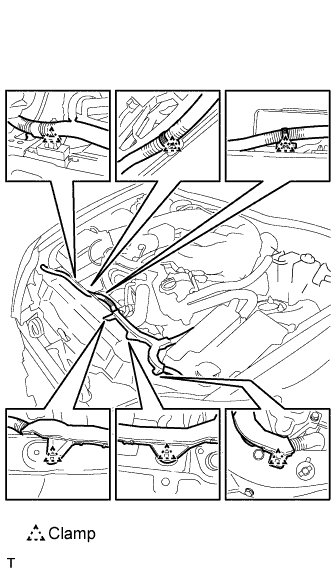
Remove the 5 bolts and the upper radiator support.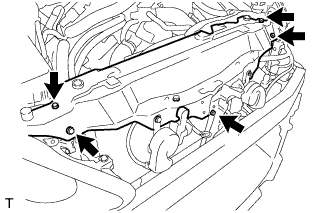
| 15. DISCONNECT LIQUID TUBE SUB-ASSEMBLY |
Remove the 2 bolts and disconnect the liquid tube sub-assembly from the cooler condenser assembly.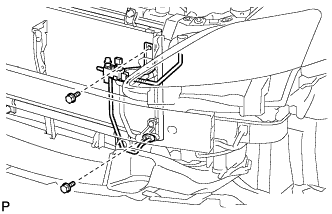
Remove the O-ring from the liquid tube sub-assembly.
- NOTICE:
- Seal the openings of the disconnected parts using vinyl tape to prevent moisture and foreign matter from entering.
| 16. DISCONNECT DISCHARGE HOSE SUB-ASSEMBLY |
Remove the bolt and disconnect the discharge hose sub-assembly from the cooler condenser assembly.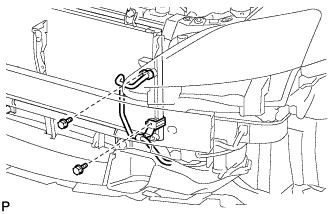
Remove the O-ring from the discharge hose sub-assembly.
- NOTICE:
- Seal the openings of the disconnected parts using vinyl tape to prevent moisture and foreign matter from entering.
| 17. REMOVE COOLER CONDENSER ASSEMBLY |
Remove the 4 bolts and cooler condenser assembly.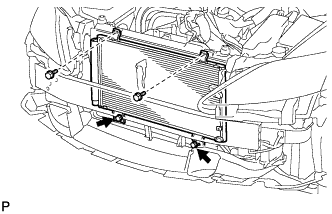
| 18. REMOVE COOLER DRYER |
Using a straight hexagon wrench 14 mm, remove the cap from the modulator.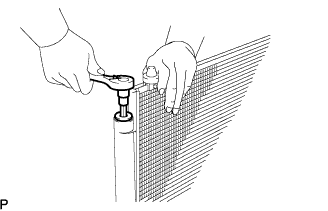
Using pliers, remove the cooler dryer.