REMOVAL
Removal / installation
| 1. REMOVE FRONT DOOR INSIDE HANDLE BEZEL PLUG |

Using a screwdriver wrapped with protective tape, disengage the 3 claws, and remove the front door inside handle bezel plug.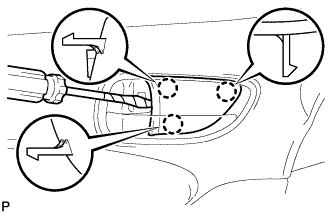

| 2. REMOVE POWER WINDOW REGULATOR MASTER SWITCH ASSEMBLY |
Using a screwdriver wrapped with protective tape, disengage the 4 claws and the 2 clips.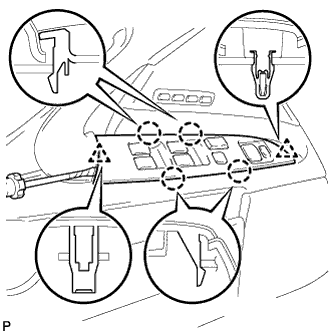
Disconnect the connector and remove the power window regulator master switch assembly.
| 3. REMOVE COURTESY LIGHT ASSEMBLY |
Disengage the claw and remove the courtesy light assembly.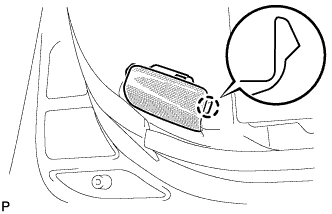
Disconnect the connector.
| 4. REMOVE FRONT DOOR TRIM BOARD SUB-ASSEMBLY |
Remove the 2 screws.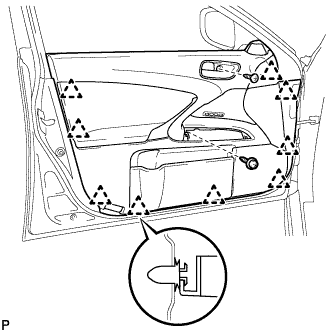
Using the clip remover, disengage the 9 clips.
Pull out the front door trim board in the direction indicated by the arrow.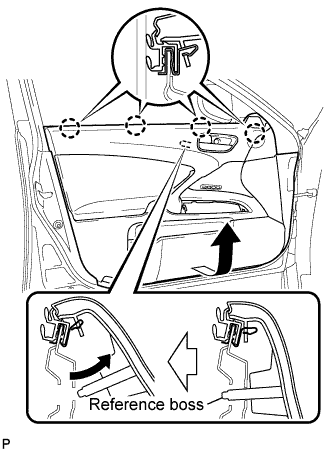
Remove the reference bosses from the front door panel.
Raise the front door trim board to disengage the 4 claws and remove the front door trim board together with the front door inner glass weatherstrip.
Disconnect the cables and each connector from the back side of the inside handle and remove the front door trim board sub-assembly.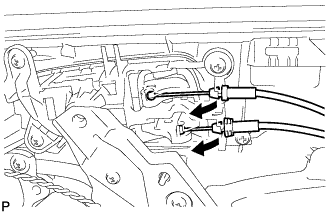
Remove the 2 front door trim board retainers (green) from the front door trim board.
| 5. REMOVE FRONT DOOR TRIM COVER |
Remove the screw.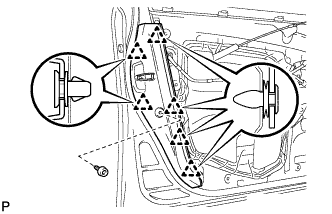
Using the clip remover, disengage the 6 clips and remove the front door trim cover.
| 6. REMOVE FRONT DOOR SERVICE HOLE COVER |
Disconnect each connector and each clamp, and remove the front door service hole cover.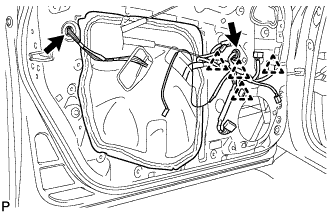
- HINT:
- Remove the remaining butyl tape on the door side.
| 7. REMOVE FRONT DOOR GLASS SUB-ASSEMBLY |
Remove the hole plug.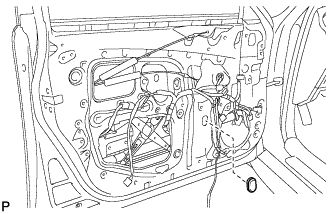
Connect the power window regulator master switch assembly and move the front door glass sub-assembly so that the door glass bolts can be seen.
Remove the 2 bolts.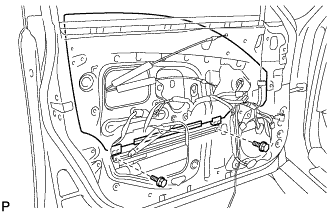
- NOTICE:
- After the bolts are removed, the door glass may fall and become deformed.
Remove the front door glass sub-assembly as shown in the illustration.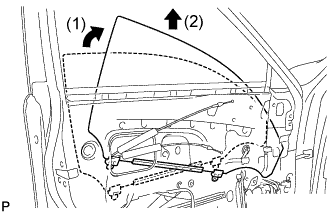
- NOTICE:
- Do not damage the door glass.
Disconnect the power window regulator master switch assembly.
| 8. REMOVE FRONT DOOR OUTSIDE HANDLE COVER |
Using an emergency key, disengage the 2 claws and remove the front door outside handle cover.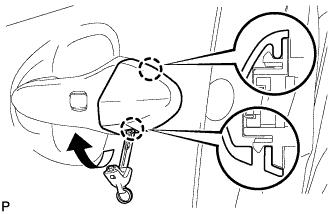
| 9. REMOVE FRONT DOOR OUTSIDE HANDLE SUB-ASSEMBLY |
Remove the hole plug.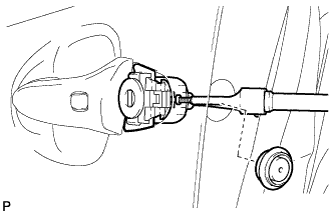
Using a "torx" socket wrench (T30), loosen the screw and remove the front door outside handle cover and the door lock key cylinder as a unit.
- HINT:
- The screw cannot be removed because it is integrated into the front door outside handle frame sub-assembly.
Disconnect the connector.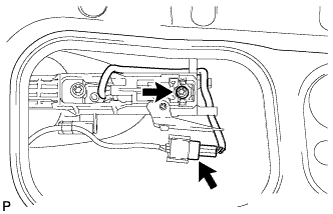
Using a "torx" socket wrench (T30), loosen the screw.
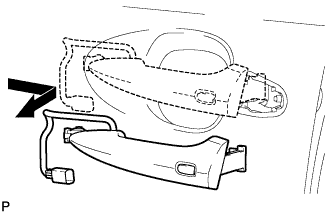
Remove the front door outside handle sub-assembly as shown in the illustration.