REMOVAL
Removal / installation
| 1. REMOVE REAR DOOR INSIDE HANDLE BEZEL PLUG |

Using a screwdriver wrapped with protective tape, disengage the 3 claws and remove the rear door inside handle bezel plug.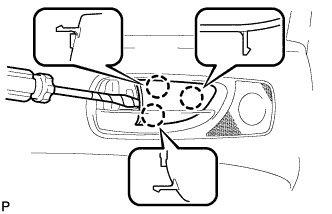

| 2. REMOVE REAR POWER WINDOW REGULATOR SWITCH ASSEMBLY |
Using a screwdriver wrapped with protective tape, disengage the 2 claws and 2 clips.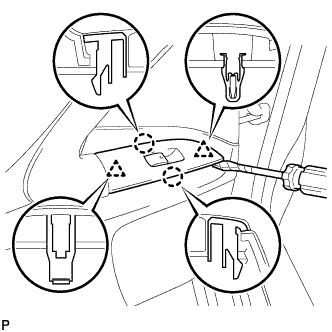
Disconnect the connector and remove the rear power window regulator switch assembly.
| 3. REMOVE REAR DOOR TRIM BOARD SUB-ASSEMBLY |
Remove the 2 screws.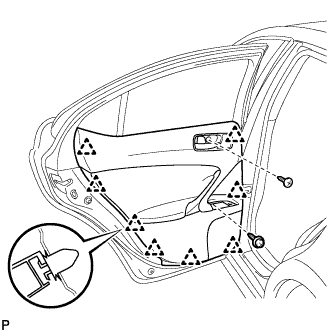
Using the clip remover, disengage the 8 clips.
Pull out the rear door trim board in the direction indicated by the arrow.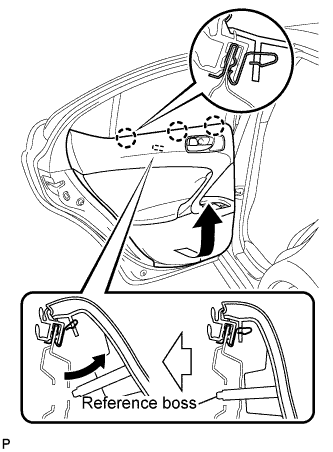
Remove the reference bosses from the rear door panel.
Raise the rear door trim board to disengage the 3 claws and remove the rear door trim board together with the rear door inner glass weatherstrip.
Disconnect the cables and each connector from the back side of the inside handle and the rear door trim board sub-assembly, remove the rear door trim board sub-assembly.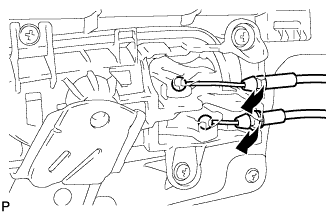
Remove the 2 rear door trim board retainers (green) from the rear door trim board.
| 4. REMOVE REAR DOOR INNER GLASS WEATHERSTRIP |
Disengage the 3 clips as shown in the illustration and remove the rear door inner glass weatherstrip from the rear door trim board.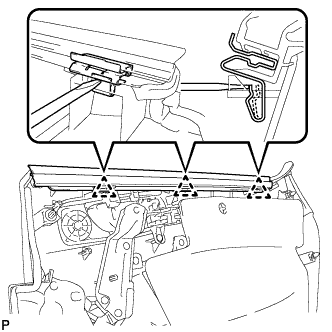
| 5. REMOVE REAR SPEAKER ASSEMBLY |
Disconnect the connector.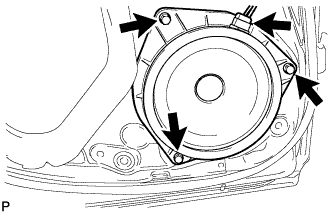
Remove the 3 bolts and the rear speaker assembly.
- NOTICE:
- Do not touch the cone part of the speaker.
| 6. REMOVE REAR NO. 2 SPEAKER ASSEMBLY |
Disengage the speaker connector clamp.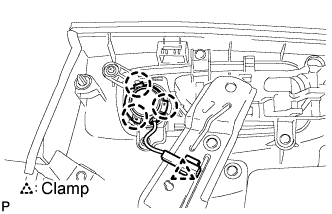
Disengage the 3 claws and remove the rear No. 2 speaker assembly.
- NOTICE:
- Do not touch the cone part of the speaker.
| 7. REMOVE REAR NO. 3 SPEAKER ASSEMBLY (w/o Front Center Speaker) |
Disconnect the connector.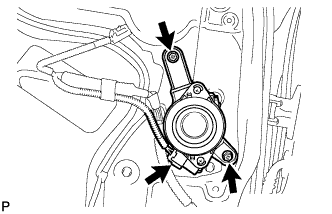
Remove the 2 bolts and the rear No. 3 speaker assembly.
- NOTICE:
- Do not touch the cone part of the speaker.