REMOVAL
Removal / installation
| 1. DISCONNECT CABLE FROM NEGATIVE BATTERY TERMINAL (for Discharge Headlight) |
| 2. REMOVE COOL AIR INTAKE DUCT SEAL |

Using a clip remover, remove the 11 clips and cool air intake duct seal.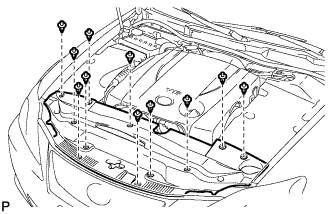

| 3. REMOVE FRONT BUMPER ASSEMBLY |
Using a screwdriver, turn the pin 90 degrees and remove the 2 pin hold clips.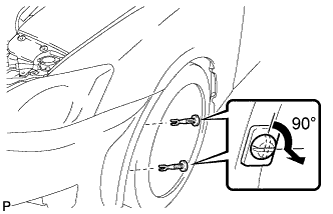
- HINT:
- Tape the screwdriver tip before use.
- Use the same procedures for the RH side and LH side.
- Tape the screwdriver tip before use.
Put protective tape around the front bumper assembly.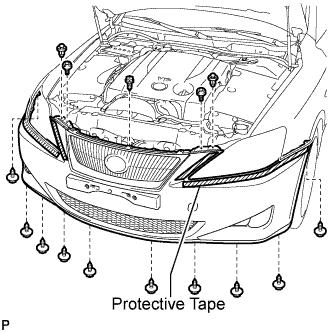
Using a clip remover, remove the 2 clips
Remove the 2 radiator grille protectors.
Remove the bolt and 10 screws.
Disengage the 5 claws and disconnect the front bumper assembly as shown in the illustration.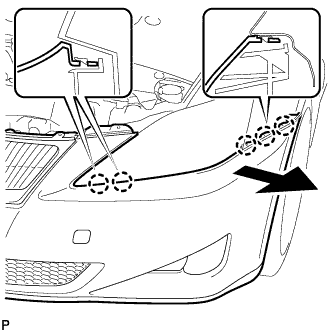
- HINT:
- Use the same procedures for the RH side and LH side.
Disconnect the headlight washer hose. (w/ headlight cleaner system)
Disconnect the connector and remove the front bumper assembly.
| 4. REMOVE FRONT BUMPER ENERGY ABSORBER |
Remove the front bumper energy absorber.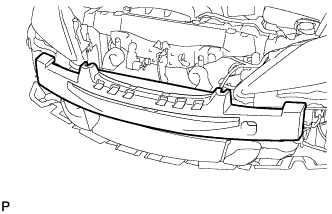
| 5. REMOVE ENGINE ROOM SIDE COVER |
Using a clip remover, remove the 4 clips.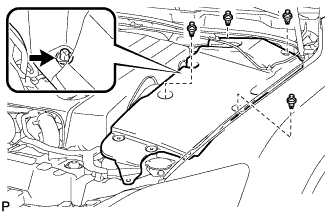
Disengage the nut and remove the engine room side cover.
| 6. REMOVE FRONT UPPER FENDER PROTECTOR |
Disengage the 2 claws and 3 clips and remove the front upper fender protector.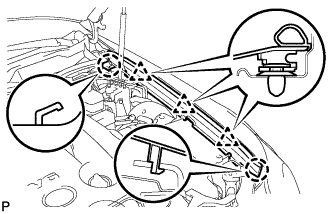
| 7. REMOVE HEADLIGHT ASSEMBLY |
Disconnect the connector as shown in the illustration.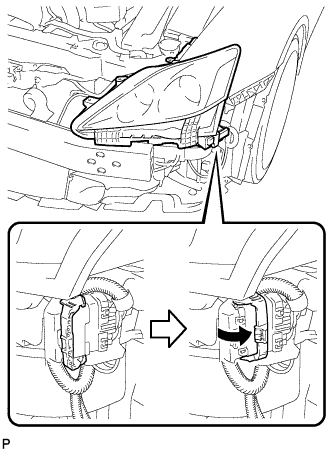
Remove the 3 bolts.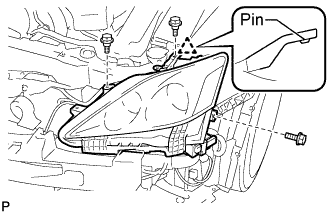
Disengage the headlight bracket pin and remove the headlight assembly.