DISASSEMBLY
Removal / installation
| 1. REMOVE NO. 1 HEADLIGHT BULB (for Halogen Headlight) |

Remove the headlight socket cover as shown in the illustration.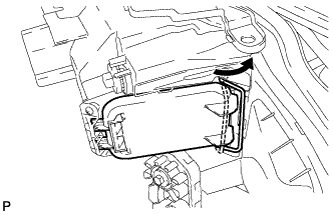

Remove the headlight gasket.
- NOTICE:
- After the headlight gasket is removed, be sure to replace it with a new one. Failure to do this may cause water ingress.
Disconnect the connector.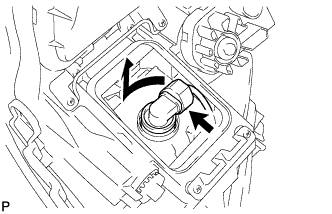
Remove the No. 1 headlight bulb as shown in the illustration.
| 2. REMOVE DISCHARGE HEADLIGHT BULB (for Discharge Headlight) |
Remove the headlight socket cover as shown in the illustration.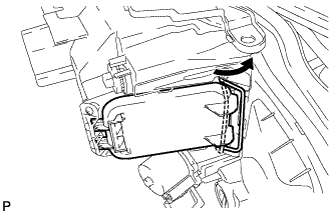
Remove the headlight gasket.
- NOTICE:
- After the headlight gasket is removed, be sure to replace it with a new one. Failure to do this may cause water ingress.
Separate the light control ECU socket as shown in the illustration.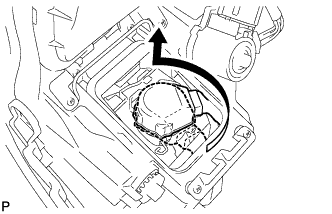
Release the set spring and remove the discharge headlight bulb as shown in the illustration.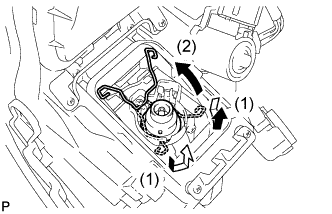
| 3. REMOVE NO. 2 HEADLIGHT BULB |
Remove the headlight socket cover as shown in the illustration.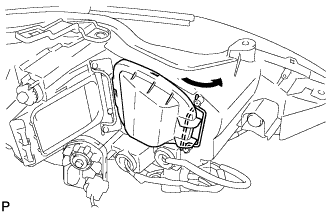
Remove the headlight gasket.
- NOTICE:
- After the headlight gasket is removed, be sure to replace it with a new one. Failure to do this may cause water ingress.
Disconnect the connector.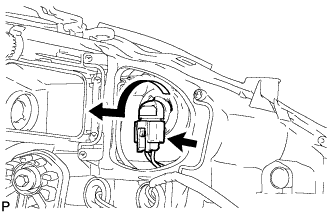
Remove the No. 2 headlight bulb as shown in the illustration.
| 4. REMOVE PARKING LIGHT BULB |
Turn the parking light bulb and the parking light socket in the direction indicated by the arrow and remove them as a unit.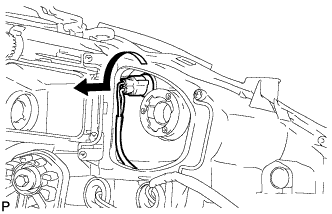
Remove the parking light bulb from the parking light socket.
| 5. REMOVE PARKING LIGHT SOCKET |
Disconnect the connector and remove the parking light socket.
| 6. REMOVE FRONT TURN SIGNAL LIGHT BULB |
Turn the front turn signal light bulb and the front turn signal lights socket in the direction indicated by the arrow and remove them as a unit.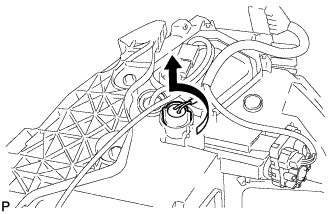
Turn the front turn signal light bulb and the front turn signal light socket in the direction indicated by the arrow and remove them as a unit.
Remove the front turn signal light bulbs from the front turn signal light socket.
| 7. REMOVE HEADLIGHT WIRE HARNESS |
Disconnect the connector and remove the headlight wire harness.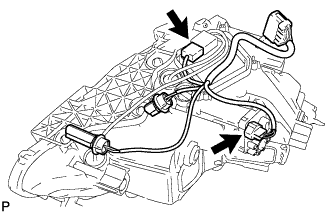
| 8. REMOVE FRONT BUMPER SIDE SUPPORT |
Remove the 3 screws and front bumper side support.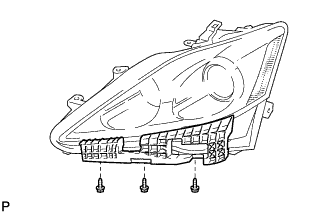
| 9. REMOVE HEADLIGHT LEVELING MOTOR (for Halogen Headlight) |
Align the notches of the headlight leveling motor and the housing, and pull out the headlight leveling motor slightly.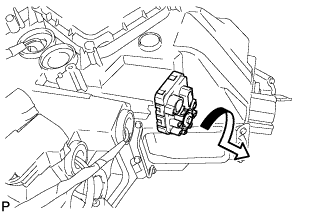
Lower the tip of the headlight leveling motor to disengage it from the reflector and remove the headlight leveling motor.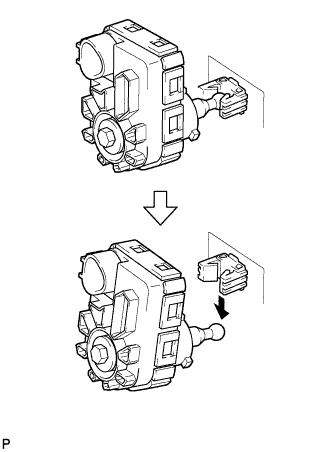
| 10. REMOVE HEADLIGHT LEVELING MOTOR (for Discharge Headlight) |
Align the notches of the headlight leveling motor and the housing, and pull out the headlight leveling motor slightly.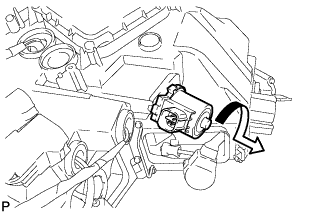
Lower the tip of the headlight leveling motor to disengage it from the reflector and remove the headlight leveling motor.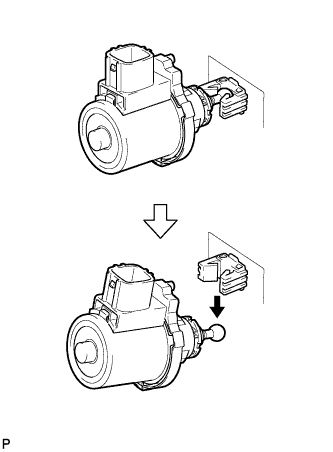
| 11. REMOVE HEADLIGHT LEVELING MOTOR BASE PACKING |
Remove the headlight leveling motor base packing.
- NOTICE:
- After the headlight leveling motor base packing is removed, be sure to replace it with a new one. Failure to do this may cause water ingress.
| 12. REMOVE HEADLIGHT SWIVEL MOTOR (for Discharge Headlight) |
Remove the 4 screws.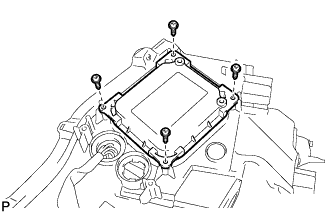
Install a drill bit into a drill.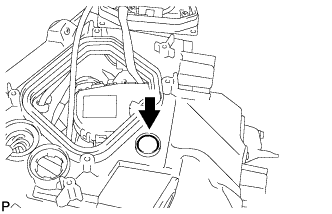
Wrap the drill bit of the drill with tape.
- HINT:
- Tape is used to prevent drilling too deeply into the headlight unit.
Press the drill lightly against the point shown by the arrow and drill into the headlight unit.
Using a file, enlarge the hole in the headlight using the groove as a guideline.
Remove the 3 screws.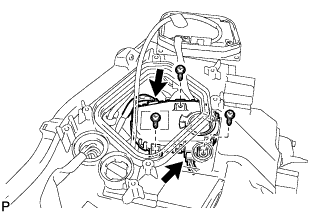
Disconnect the connector and remove the washer and headlight swivel motor.
| 13. REMOVE LIGHT CONTROL ECU SUB-ASSEMBLY (for Discharge Headlight) |
Disconnect the connector and remove the light control ECU sub-assembly.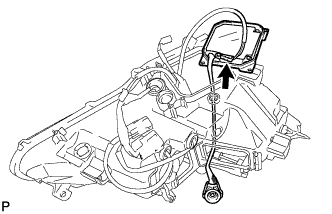
- NOTICE:
- The light control ECU sub-assembly cannot be removed unless the headlight swivel motor is removed.
| 14. REMOVE HEADLIGHT GASKET |
Remove the headlight gasket.
- NOTICE:
- After the headlight gasket is removed, be sure to replace it with a new one. Failure to do this may cause water ingress.