REASSEMBLY
Removal / installation
| 1. INSTALL RADIAL BALL BEARING INNER RACE |

Using SST and a press, install a new needle roller bearing inner race.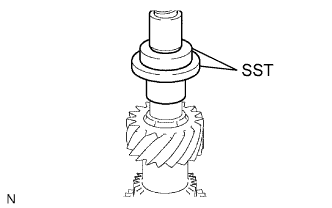

- SST
- 09950-60010
(09951-00540)
| 2. INSTALL SNAP RING COUNTER GEAR REAR BEARING |
Select a snap ring that will allow minimum axial play.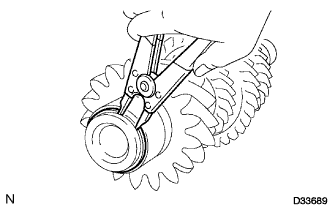
- Standard clearance:
- 0.1 mm (0.004 in.) or less
- Snap ring thickness:
Part No.
Thickness: mm (in.)
Mark
90520-31015
2.35 to 2.40
(0.0925 to 0.0945)
A
90520-31016
2.40 to 2.45
(0.0945 to 0.0965)
B
90520-31017
2.45 to 2.50
(0.0965 to 0.0984)
C
90520-31018
2.50 to 2.55
(0.0984 to 0.1004)
D
90520-31019
2.55 to 2.60
(0.1004 to 0.1024)
E
90520-31020
2.60 to 2.65
(0.1024 to 0.1043)
F
90520-31021
2.65 to 2.70
(0.1043 to 0.1063)
G
90520-31022
2.70 to 2.75
(0.1063 to 0.1083)
H
90520-31023
2.75 to 2.80
(0.1083 to 0.1102)
J
90520-31024
2.80 to 2.85
(0.1102 to 0.1122)
K
90520-31025
2.85 to 2.90
(0.1122 to 0.1142)
L
90520-31033
2.90 to 2.95
(0.1142 to 0.1161)
M
Using a snap ring expander, install the snap ring onto the counter gear.
| 3. INSTALL NO. 1 TRANSMISSION CLUTCH HUB |
Apply a light coat of gear oil to the sleeve and hub.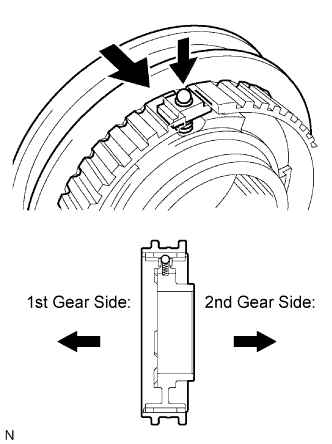
Install the clutch hub sleeve onto the clutch hub.
Install the 3 shifting keys onto the clutch hub.
Install the 3 shifting key springs onto the clutch hub.
Place the ball in the hole of the shifting key, and install the hub sleeve while pushing in the ball.
- NOTICE:
- Take care to prevent the ball from flying off.
| 4. INSTALL 2ND GEAR NEEDLE ROLLER BEARING |
Coat the 2nd gear needle roller bearing with gear oil, then install it onto the counter gear.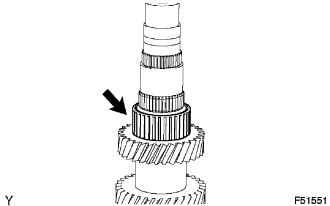
| 5. INSTALL COUNTER SHAFT 2ND SPEED GEAR |
Coat the counter shaft 2nd speed gear with gear oil, then install it onto the counter gear.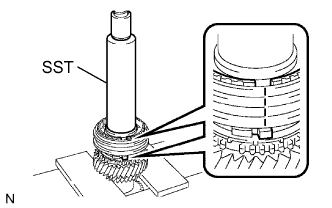
Coat the No. 1 synchronizer ring set with gear oil, then install it onto the counter gear.
Using SST and a press, install the No. 1 transmission clutch hub onto the counter gear.
- SST
- 09308-14010
- HINT:
- Align the convex portion of the synchronizer ring with the groove of the clutch hub.
Install the clutch hub and confirm that the gear and synchronizer ring move smoothly.
| 6. INSTALL CLUTCH HUB NO. 1 SHAFT SNAP RING |
Select a snap ring that will allow minimum axial play.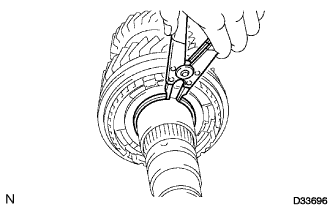
- Standard clearance:
- 0.1 mm (0.004 in.) or less
- Snap ring thickness:
Part No.
Thickness: mm (in.)
Mark
90520-45013
2.28 to 2.33
(0.0898 to 0.0917)
A
90520-45014
2.33 to 2.38
(0.0917 to 0.0937)
B
90520-45015
2.38 to 2.43
(0.0937 to 0.0957)
C
90520-45016
2.43 to 2.48
0.0957 to 0.0976)
D
90520-45017
2.48 to 2.53
(0.0976 to 0.0996)
E
90520-45018
2.53 to 2.58
(0.0996 to 0.1016)
F
90520-45019
2.58 to 2.63
(0.1016 to 0.1035)
G
Using a snap ring expander, install the snap ring onto the counter gear.
| 7. INSTALL NO. 1 SYNCHRONIZER RING SET |
Coat the No. 1 synchronizer ring set with gear oil, then install it onto the counter gear.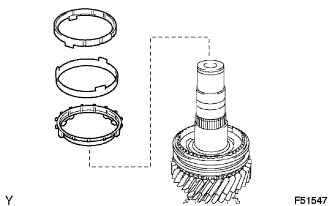
| 8. INSTALL 1ST GEAR NEEDLE ROLLER BEARING |
Coat the 1st gear needle roller bearing with gear oil, then install it onto the counter gear.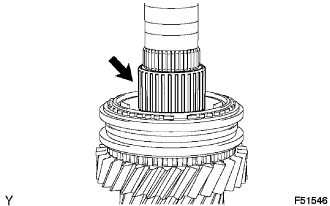
| 9. INSTALL COUNTER SHAFT GEAR 1ST SPEED |
Coat the counter shaft gear 1st speed with gear oil, and install it onto the counter gear.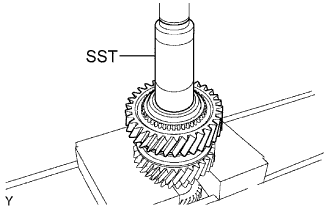
Using SST and a press, install the reverse gear spline piece.
- SST
- 09309-37010
| 10. INSTALL DETENT BALL |
Install the ball into the counter gear.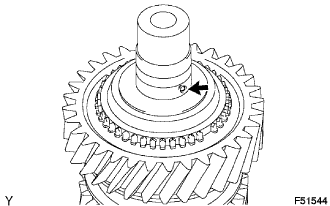
| 11. INSTALL NO. 4 SYNCHRONIZER RING |
Coat the No. 4 synchronizer ring with gear oil, and install it onto the counter gear.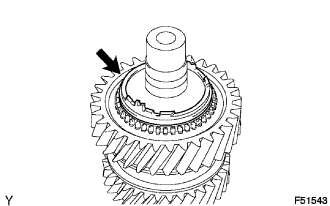
| 12. INSTALL REVERSE GEAR NEEDLE ROLLER BEARING |
Coat the reverse gear needle roller bearing with gear oil, and install it onto the counter gear.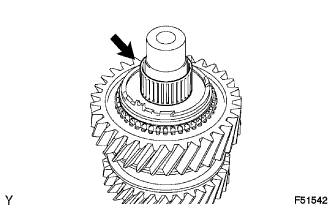
| 13. INSTALL COUNTER SHAFT REVERSE GEAR |
Install the key spring and 2 shifting keys onto the reverse gear.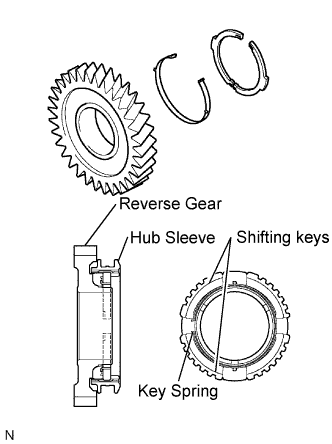
- HINT:
- Install the shifting key with its groove on the reverse gear side.
- Install the key spring with its claw on the reverse gear side.
- Refer to the illustration when installing the key spring.
- Install the shifting key with its groove on the reverse gear side.
Install the hub sleeve onto the reverse gear.
Coat the counter shaft reverse gear with gear oil, then install it onto the counter gear.
| 14. INSTALL REVERSE GEAR BEARING RACE INNER |
Align the groove of the reverse gear bearing race inner with the ball, and install them.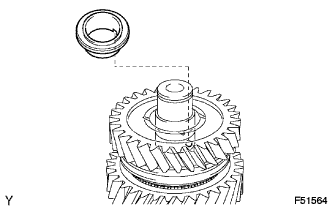
| 15. INSTALL COUNTER GEAR FRONT BEARING |
Using SST and a press, install counter gear front bearing onto the counter gear.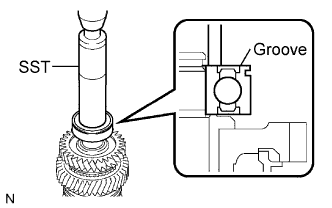
- SST
- 09608-06041
- HINT:
- Make sure that the groove of the bearing faces the correct direction as shown in the illustration.
| 16. REMOVE NO. 1 COUNTER GEAR FRONT BEARING SNAP RING |
Select a snap ring that will allow minimum axial play.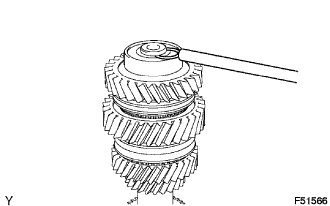
- Standard clearance:
- 0.1 mm (0.004 in.) or less
- Snap ring thickness:
Part No.
Thickness: mm (in.)
Mark
90520-31015
2.35 to 2.40
(0.0925 to 0.0945)
A
90520-31016
2.40 to 2.45
(0.0945 to 0.0965)
B
90520-31017
2.45 to 2.50
(0.0965 to 0.0984)
C
90520-31018
2.50 to 2.55
(0.0984 to 0.1004)
D
90520-31019
2.55 to 2.60
(0.1004 to 0.1024)
E
90520-31020
2.60 to 2.65
(0.1024 to 0.1043)
F
90520-31021
2.65 to 2.70
(0.1043 to 0.1063)
G
90520-31022
2.70 to 2.75
(0.1063 to 0.1083)
H
90520-31023
2.75 to 2.80
(0.1083 to 0.1102)
J
90520-31024
2.80 to 2.85
(0.1102 to 0.1122)
K
90520-31025
2.85 to 2.90
(0.1122 to 0.1142)
L
90520-31033
2.90 to 2.95
(0.1142 to 0.1161)
M
Using a snap ring expander, install the snap ring onto the counter gear.
| 17. INSPECT REVERSE GEAR THRUST CLEARANCE |
Using a feeler gauge, measure the reverse gear thrust clearance.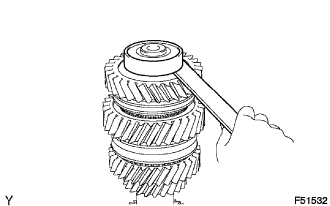
- Standard clearance:
- 0.12 to 0.28 mm (0.0047 to 0.0110 in.)
| 18. INSPECT 1ST GEAR THRUST CLEARANCE |
Using a dial indicator, measure the 1st gear thrust clearance.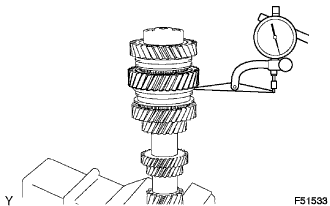
- Standard clearance:
- 0.10 to 0.42 mm (0.0039 to 0.0165 in.)
| 19. INSPECT 2ND GEAR THRUST CLEARANCE |
Using a dial indicator, measure the 2nd gear thrust clearance.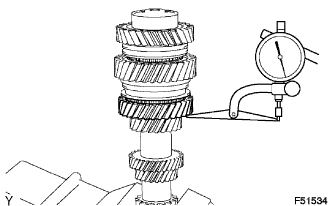
- Standard clearance:
- 0.10 to 0.42 mm (0.0039 to 0.0165 in.)
| 20. INSPECT REVERSE GEAR RADIAL CLEARANCE |
Using a dial indicator, measure the reverse gear radial clearance.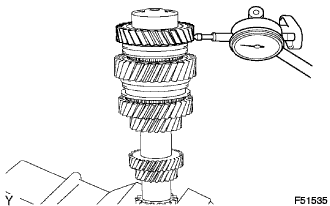
- Standard clearance:
- 0.015 to 0.065 mm (0.0006 to 0.0026 in.)
| 21. INSPECT 1ST GEAR RADIAL CLEARANCE |
Using a dial indicator, measure the 1st gear radial clearance.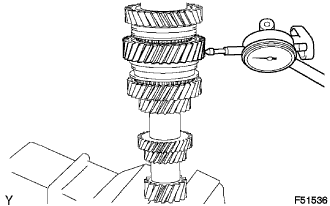
- Standard clearance:
- 0.015 to 0.067 mm (0.0006 to 0.0026 in.)
| 22. INSPECT 2ND GEAR RADIAL CLEARANCE |
Using a dial indicator, measure the 2nd gear radial clearance.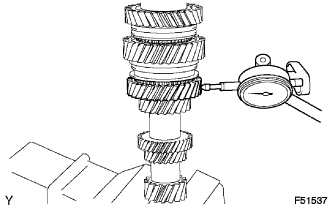
- Standard clearance:
- 0.015 to 0.067 mm (0.0006 to 0.0026 in.)