REMOVAL
Removal / installation
| 1. DISCHARGE FUEL SYSTEM PRESSURE |

- HINT:
- Click here
| 2. DISCONNECT CABLE FROM NEGATIVE BATTERY TERMINAL |
- CAUTION:
- Wait for 90 seconds after disconnecting the cable to prevent airbag deployment (Click here).
| 3. REMOVE REAR SEAT CUSHION ASSEMBLY |
Detach the 2 front hooks of the seat cushion from the vehicle body.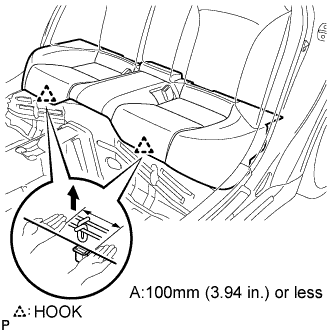

- NOTICE:
- Follow the instructions below carefully as the cushion frame deforms easily.
Choose a hook to detach first. Place your hands near the hook as shown in the illustration. Then lift the seat cushion to detach the hook.
Repeat for the other hook.
Detach the 2 rear hooks of the seat cushion from the seatback.
Remove the seat cushion.
| 4. REMOVE NO. 2 REAR FLOOR SERVICE HOLE COVER |
Remove the No. 2 rear floor service hole cover and disconnect the fuel suction tube connector.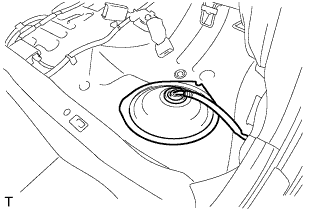
| 5. REMOVE FUEL SUCTION WITH PUMP AND GAUGE TUBE ASSEMBLY |
Disconnect the connector from the fuel suction with pump and gauge assembly.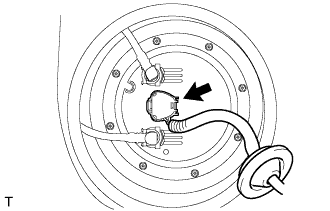
Disconnect fuel pump tube.
- NOTICE:
- Before beginning this procedure, check for foreign matter on the joint clips. Clean if necessary.
Remove the 2 tube joint clips, fuel tank main tube and fuel tank return vent tube.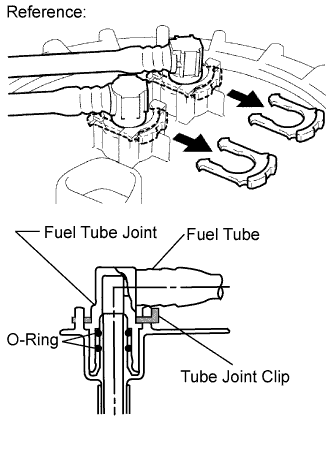
- NOTICE:
- Keep the O-ring free of foreign matter, as it becomes contaminated easily.
- Do not use any tools in this procedure.
- Do not forcefully bend or twist the tube.
- Put the tube in a plastic bag to prevent damage and contamination.
- If the fuel suction plate and tube are stuck together, pinch the tube and turn it carefully to disconnect it.
- Be careful not to damage any clips. If a clip is damaged, replace it.
- Keep the O-ring free of foreign matter, as it becomes contaminated easily.
Remove the 8 bolts and the fuel tank vent tube set plate.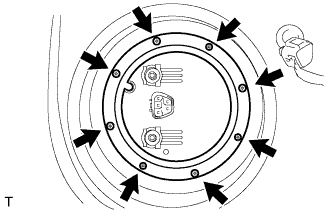
- HINT:
- While holding the fuel suction tube by hand, remove the fuel tank vent tube set plate.
Disconnect the fuel tube.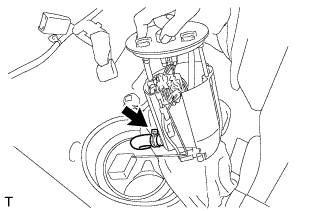
Remove the fuel suction tube from the fuel tank.
- HINT:
- Make sure that the fuel sender gauge arm does not bend.
- Do not damage the No. 2 fuel hose.
- Make sure that the fuel sender gauge arm does not bend.
| 6. REMOVE FUEL SENDER GAUGE ASSEMBLY (for LH Side) |
Disconnect the fuel sender gauge connector.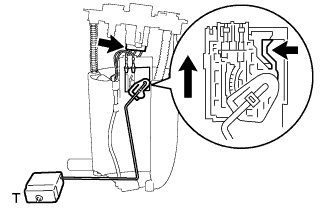
Press down on the sender gauge claw labeled A. Then slide the sender gauge upward.
| 7. REMOVE REAR FLOOR SERVICE HOLE COVER |
Remove the rear floor service hole cover.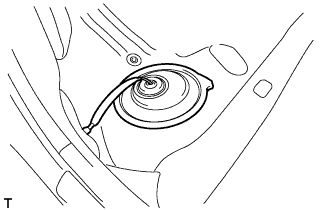
| 8. REMOVE FUEL SENDER GAUGE ASSEMBLY (for RH Side) |
Disconnect the fuel sender gauge connector.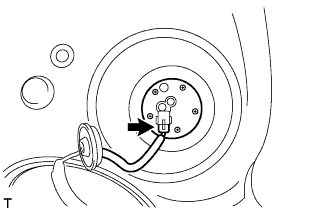
Remove the 5 bolts and fuel sender gauge.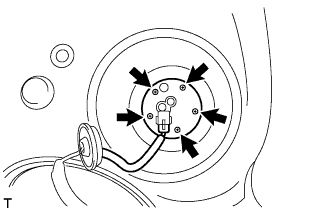
Remove the fuel sender gauge from the fuel tank.
- NOTICE:
- Be careful not to bend the arm of the fuel sender gauge.