| Last Modified: 11-27-2007 | 1.6 A | |
| Service Category: Vehicle Interior | Section: Seat Belt | |
| Model Year: 2008 | Model: LX570 | Doc ID: RM0000039ES004X |
| Title: SEAT BELT: REAR NO. 1 SEAT OUTER BELT ASSEMBLY: REMOVAL (2008 LX570) | ||
REMOVAL
HINT:
- Use the same procedures for the LH side and RH side.
- The procedures listed below are for the LH side.
1. DISCONNECT CABLE FROM NEGATIVE BATTERY TERMINAL
CAUTION:
Wait at least 90 seconds after disconnecting the cable from the negative (-) battery terminal to disable the SRS system.
NOTICE:
-
w/ Navigation System:
After the engine switch is turned off, the HDD navigation system requires approximately 6 minutes to record various types of memory and settings. As a result, after turning the engine switch off, wait 6 minutes or more before disconnecting the cable from the negative (-) battery terminal.
-
When disconnecting the cable, some systems need to be initialized after the cable is reconnected
 .
.
2. REMOVE REAR NO. 2 SEAT ASSEMBLY
(a) w/ Automatic Folding-up Function:
Remove the rear No. 2 seat assembly
.
(b) w/ Manual Folding-up Function:
Remove the rear No. 2 seat assembly
.
3. REMOVE REAR FLOOR MAT REAR SUPPORT PLATE
4. REMOVE REAR STEP COVER
5. REMOVE REAR DOOR SCUFF PLATE
6. REMOVE NO. 1 LUGGAGE COMPARTMENT TRIM HOOK
7. REMOVE REAR SEAT COVER CAP (w/ Manual Folding-up Function)
8. REMOVE FRONT QUARTER TRIM PANEL ASSEMBLY
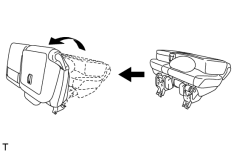
HINT:
When removing the front quarter trim panel, operate the reclining adjuster release handle and move the No. 1 rear seat to the position shown in the illustration.
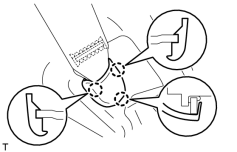
(a) Detach the 3 claws and remove the cover.
|
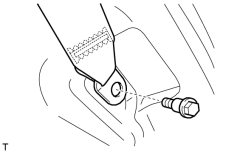
(b) Remove the bolt and disconnect the rear seat outer belt floor anchor. |
|
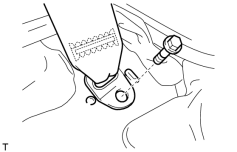
(c) for LH side: (1) Remove the bolt and disconnect the rear No. 2 seat outer belt floor anchor LH. |
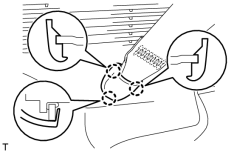
|
(d) for RH side: (1) Detach the 3 claws and remove the cover. (2) Remove the bolt and disconnect the rear No. 2 seat outer belt floor anchor RH. |
(e) w/ Manual Folding-up Function:
(1) Remove the screw, clip and bolt.
(2) Detach the 19 clips and 2 claws.
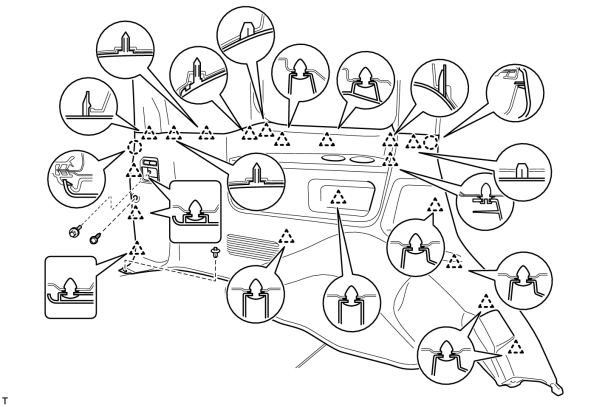
(3) Disconnect the thermistor connector, power outlet socket connector and rear seat lock control lever cable, and then remove the quarter trim panel.
(f) w/ Automatic Folding-up Function:
(1) Remove the screw and clip.
(2) Detach the 19 clips and 2 claws.
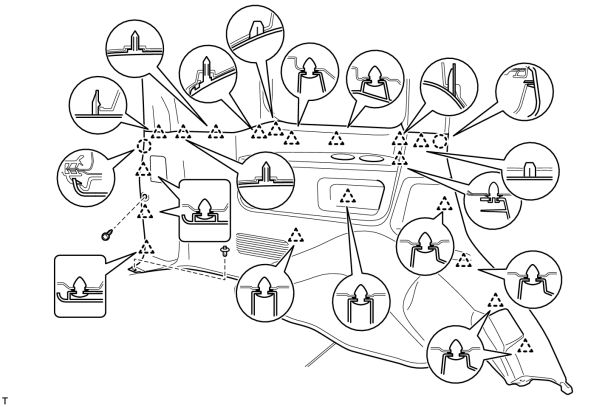
(3) Disconnect the thermistor connector and power outlet socket connector, and then remove the quarter trim panel.
9. REMOVE REAR FRONT QUARTER TRIM GARNISH
10. REMOVE REAR NO. 1 SEAT OUTER BELT ASSEMBLY
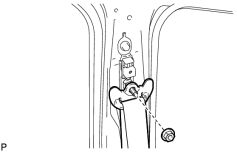
(a) Remove the nut and seat belt shoulder anchor.
|
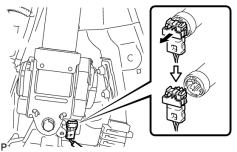
(b) Disconnect the pretensioner connector as shown in the illustration |
|
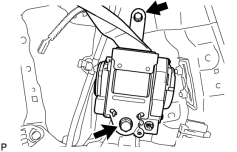
(c) Remove the 2 bolts and rear No. 1 seat outer belt. |
11. REMOVE REAR SHOULDER BELT ANCHOR PLATE SUB-ASSEMBLY
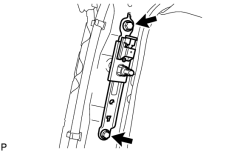
(a) Remove the 2 bolts and anchor plate.

|

|