INSTALLATION
Removal / installation
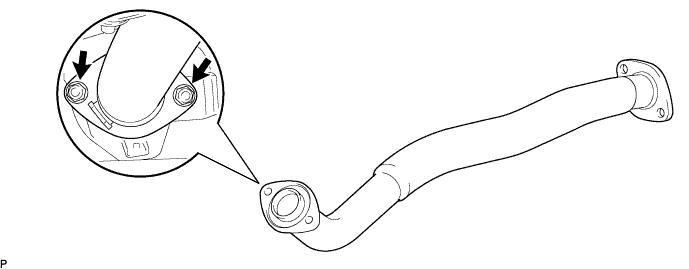
| 1. INSTALL EXHAUST PIPE ASSEMBLY FRONT |

Install the exhaust pipe front and a new gasket with 2 new nuts.
- Torque:
- 56 N*m{ 571 kgf*cm , 41 ft.*lbf }

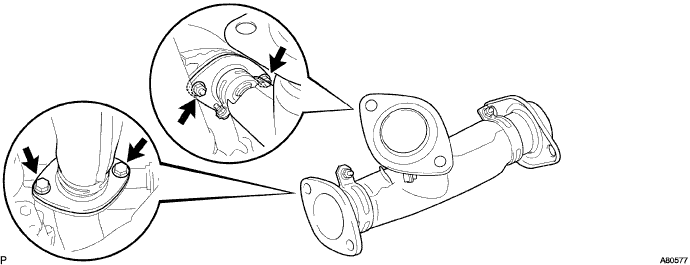
| 2. INSTALL EXHAUST PIPE SUB-ASSEMBLY FRONT NO.3 |
Install 2 new gaskets and the exhaust pipe front No.3 with the 2 bolts and 2 new nuts.
- Torque:
- 56 N*m{ 571 kgf*cm , 41 ft.*lbf }
| 3. INSTALL EXHAUST PIPE ASSEMBLY CENTER |
Inspect the compression spring.
Using vernier calipers, measure the free length of the compression spring.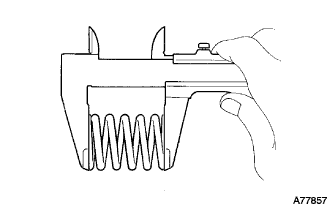
- Minimum length:
- 41.5 mm (1.634 in.)
- HINT:
- If the free length is less than the minimum, replace the compression spring.
Fully insert a new gasket to the exhaust pipe sub-assembly front No.3.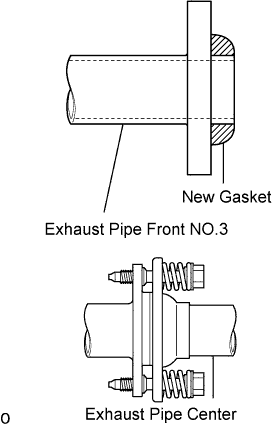
Using a plastic hammer, uniformly strike the gasket so that the gasket and exhaust pipe front NO.3.
- NOTICE:
- Be careful with the installation direction of the gasket.
- Do not reuse the gasket.
- To ensure a proper seal, do not use the exhaust pipe to press the gasket onto the exhaust pipe front NO.3.
- Be careful with the installation direction of the gasket.
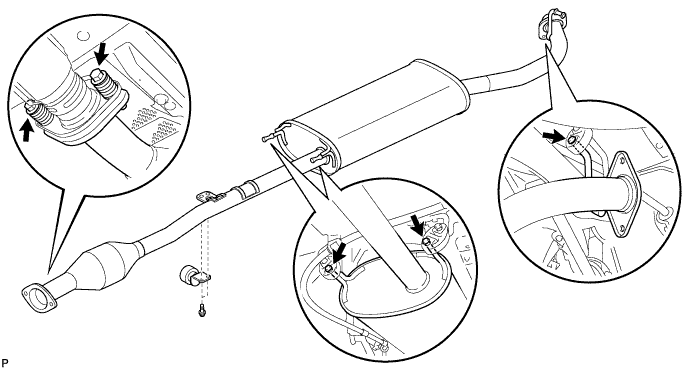
Install the damper with the 2 bolts.
- Torque:
- 19 N*m{ 194 kgf*cm , 14 ft.*lbf }
Connect the exhaust pipe center to connect the exhaust pipe supports.
Tighten the 2 bolts and 2 compression springs.
- Torque:
- 48 N*m{ 490 kgf*cm , 35 ft.*lbf }
| 4. INSTALL EXHAUST TAIL PIPE BAFFLE SUB-ASSEMBLY |
Align the keyway of the tall pipe baffle with the protruding part of the exhaust pipe tail as shown in the illustration.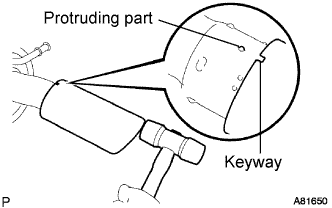
Using a plastic hammer, uniformly tap in the baffle.
| 5. INSTALL EXHAUST PIPE ASSEMBLY TAIL |
Inspect the compression spring.
Using vernier calipers, measure the free length of the compression spring.
- Minimum length:
- 40.5 mm (1.594 in.)
- HINT:
- If the free length is less than the minimum, replace the compression spring.
Fully insert a new gasket to the exhaust pipe center.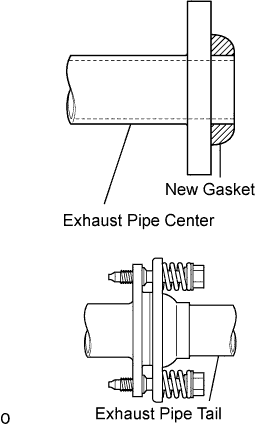
Using a plastic hammer, uniformly strike the gasket so that the gasket and front exhaust pipe center are properly fit.
- NOTICE:
- Be careful with the installation direction of the gasket.
- Do not reuse the gasket.
- To ensure a proper seal, do not use the exhaust pipe tail to press the gasket onto the exhaust pipe center.
- Be careful with the installation direction of the gasket.
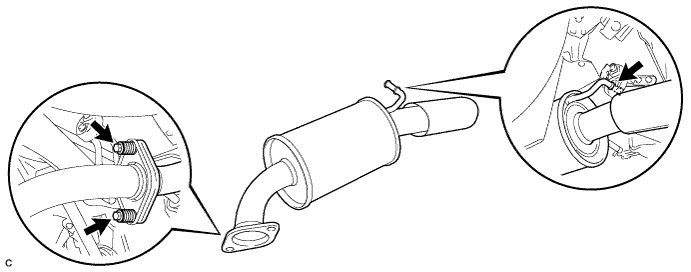
Connect the exhaust pipe tail to the exhaust pipe supports.
Tighten the 2 bolts and 2 compression springs.
- Torque:
- 48 N*m{ 490 kgf*cm , 35 ft.*lbf }
| 6. INSTALL OXYGEN SENSOR (for Bank2) |
Measure the resistance between terminals 1 (HT) and 2 (+B).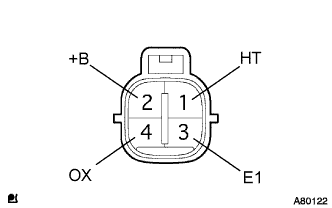
- Standard resistance:
Condition
Specified Condition
20°C (68°F)
11 to 16 Ω
| 7. INSTALL OXYGEN SENSOR (for Bank1) |
Measure the resistance between terminals 1 (HT) and 2 (+B).
- Standard resistance:
Condition
Specified Condition
20°C (68°F)
11 to 16 Ω
| 8. CHECK FOR EXHAUST GAS LEAKS |
| 9. INSTALL ENGINE UNDER COVER NO.2 |
| 10. INSTALL ENGINE UNDER COVER NO.1 |