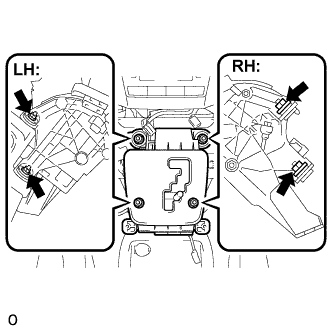
REMOVAL
Removal / installation
| 1. DISCONNECT CABLE FROM NEGATIVE BATTERY TERMINAL |

| 2. REMOVE SHIFT LEVER KNOB |
Remove the shift lever knob.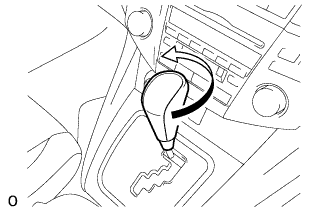

| 3. REMOVE CONSOLE PANEL UPPER FRONT |
Disengage the 4 clips and remove the console panel upper front.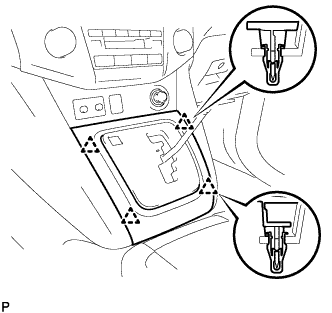
| 4. REMOVE INSTRUMENT PANEL FINISH PANEL LOWER |
Disengage the 2 clips.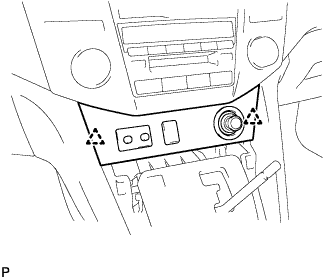
Disconnect the connectors and remove the instrument panel finish panel lower.
| 5. REMOVE FRONT DOOR SCUFF PLATE LH |
Disengage the 6 claws and 4 clips, and remove the front door scuff plate.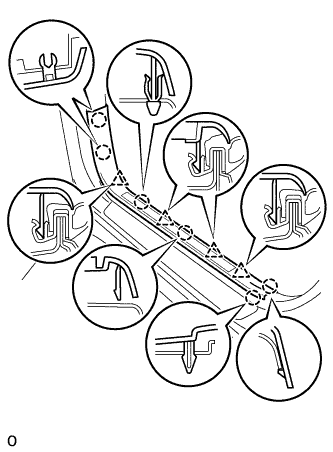
Disconnect the connector. (w/ illumination scuff plate)
| 6. REMOVE FRONT DOOR SCUFF PLATE RH |
- HINT:
- Use the same procedures for the RH side and the LH side.
| 7. REMOVE COWL SIDE TRIM SUB-ASSEMBLY RH |
- HINT:
- Use the same procedures for the RH side and the LH side.
| 8. REMOVE COWL SIDE TRIM SUB-ASSEMBLY LH |
Remove the 2 clips and the cowl side trim sub-assembly LH.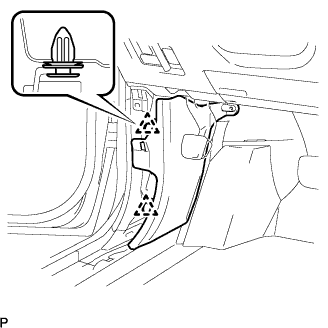
| 9. REMOVE INSTRUMENT PANEL FINISH PANEL SUB-ASSEMBLY LOWER |
Using a screwdriver, open the instrument panel finish panel sub-assembly lower cover.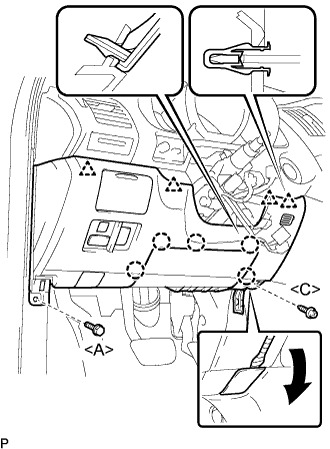
- HINT:
- Tape the screwdriver tip before use.
Remove the bolt <A> and the screw <C>.
Disconnect the hood lock control cable assembly.
Disengage the 5 claws and the 4 clips.
Disconnect the connectors and then remove the instrument panel finish panel sub-assembly lower.
| 10. REMOVE INSTRUMENT PANEL UNDER COVER SUB-ASSEMBLY NO.2 |
Using a screwdriver, push the 3 claws in the direction indicated by the arrow to disengage and remove the guide on the front of the vehicle.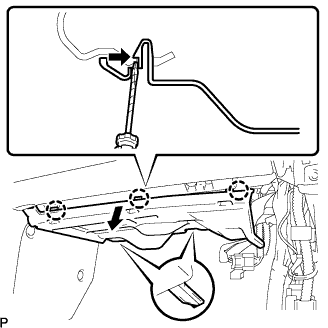
- HINT:
- Tape the screwdriver tip before use.
Disconnect the connectors and remove the instrument panel No.2 under cover sub-assembly.
| 11. REMOVE GLOVE COMPARTMENT DOOR ASSEMBLY |
Remove the 2 bolts <A> and the 2 screws <C>.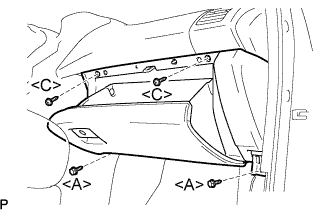
Pull the glove compartment door assembly to the rear to remove it.
Disconnect the connector.
| 12. REMOVE FLOOR CARPET COVER CENTER RH |
- HINT:
- Use the same procedures for the RH side and the LH side.
| 13. REMOVE FLOOR CARPET COVER CENTER LH |
Remove the 2 clips from the floor carpet cover center LH.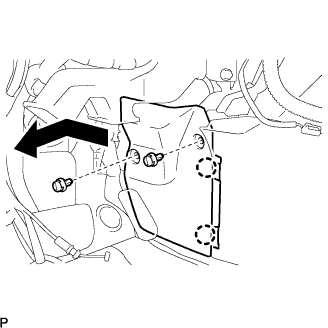
Depress the edge of the floor carpet cover center LH around the claws to disengage the 2 claws below the floor carpet cover center LH.
Slide the floor carpet cover center LH to the front of the vehicle, and disengage the 2 claws from the instrument panel finish panel lower center at the floor carpet center LH.
Remove the floor carpet cover center LH.
| 14. REMOVE INSTRUMENT PANEL FINISH PANEL LOWER CENTER |
Remove the 7 screws <C>.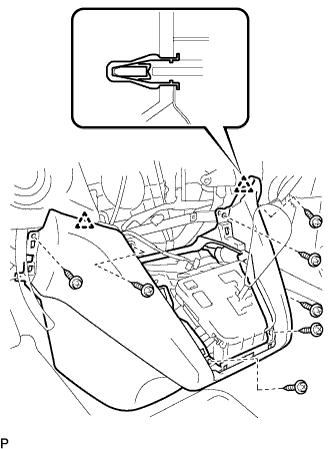
Disengage the 2 clips and remove the instrument panel finish panel lower center.
| 15. SEPARATE TRANSMISSION CONTROL CABLE ASSEMBLY |
Using a screwdriver, disconnect the cable end from the shift lever assembly.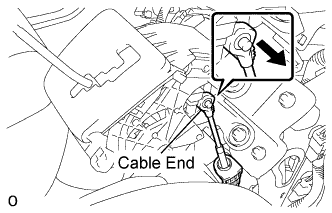
Pull out the stopper cap of the transmission control cable assembly.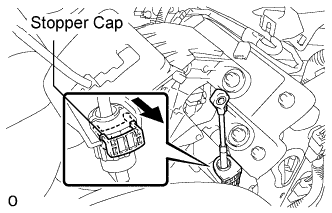
Turn the socket of the transmission control cable counterclockwise and remove the stopper cap.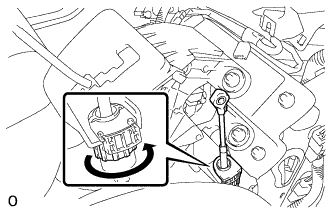
- NOTICE:
- Do not push in the stopper cap.
| 16. REMOVE SHIFT LEVER |
Disconnect the pattern select switch connector, the shift lock control computer connector and the indicator light wire connector.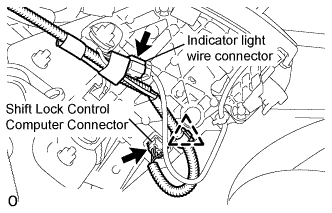
Remove the 4 nuts and disconnect the shift lever assembly from the vehicle.