DISASSEMBLY
Removal / installation
| 1. REMOVE REAR DRIVE SHAFT INBOARD JOINT BOOT NO.2 CLAMP |

Using a screwdriver, remove the inboard joint boot No.2 clamp as shown in the illustration.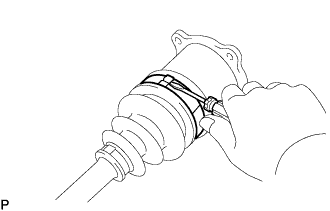

| 2. REMOVE REAR DRIVE SHAFT INBOARD JOINT BOOT CLAMP |
Using a screwdriver, remove the inboard joint boot clamp as shown in the illustration.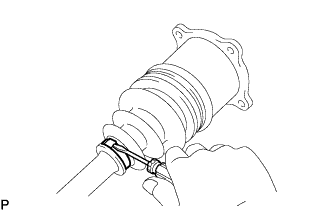
| 3. SEPARATE REAR DRIVE SHAFT INBOARD JOINT BOOT |
Separate the rear drive shaft inboard joint boot from the inboard joint assembly.
| 4. REMOVE REAR DRIVE SHAFT INBOARD JOINT ASSEMBLY |
Remove the grease from the inboard joint.
Put matchmarks on the inboard joint assembly and outboard joint shaft.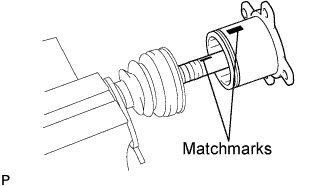
- NOTICE:
- Do not use a punch for the marks.
Remove the rear drive shaft inboard joint assembly.
- NOTICE:
- Be careful not to drop the inboard joint assembly.
Put matchmarks on the outboard joint shaft, inner race and cage.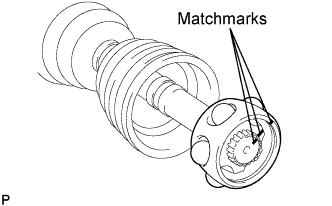
- NOTICE:
- Do not use a punch for the marks.
Remove the 6 balls.
- NOTICE:
- Be careful not to drop the balls.
Slide the cage to the outboard joint side.
Using a snap ring expander, remove the rear drive shaft snap ring.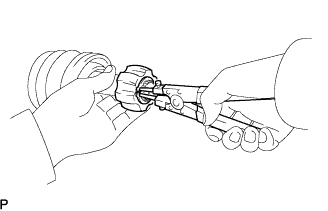
Hold the outboard joint shaft assembly between aluminium plates in a vise.
- NOTICE:
- Do not overtighten the vise.
Using a brass bar and hammer, remove the inner race.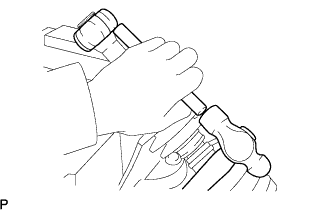
Remove the cage.
Remove the inboard joint boot No.2 clamp and inboard joint boot clamp.
| 5. REMOVE REAR DRIVE SHAFT OUTBOARD JOINT BOOT NO.2 CLAMP |
Using a screwdriver, remove the outboard joint boot No.2 clamp as shown in the illustration.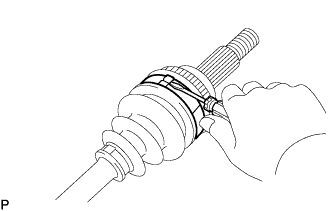
| 6. REMOVE REAR DRIVE SHAFT OUTBOARD JOINT BOOT CLAMP |
Using a screwdriver, remove the outboard joint boot clamp as shown in the illustration.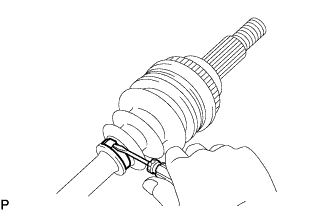
| 7. REMOVE REAR DRIVE SHAFT OUTBOARD JOINT BOOT |
Remove the outboard joint boot from the rear drive shaft outboard joint shaft assembly.
Remove the grease from the outboard joint.