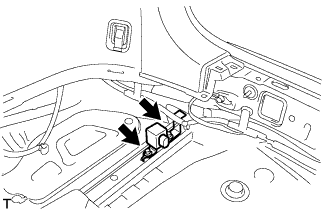
REMOVAL
Removal / installation
| 1. DISCONNECT CABLE FROM BATTERY NEGATIVE TERMINAL |
| 2. REMOVE DECK BOARD SUB-ASSEMBLY |

Disengage the 5 clips and turn up the front side of the deck board.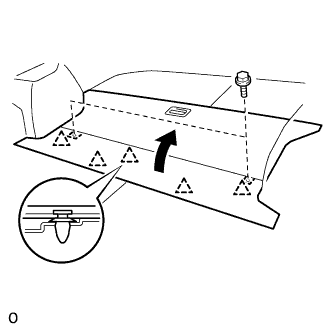

Remove the 2 bolts and deck board sub-assembly.
| 3. REMOVE DECK FLOOR BOX REAR |
Using a clip remover, remove the 2 clips and deck floor box rear.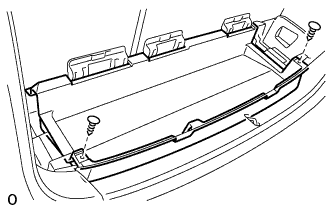
| 4. REMOVE REAR FLOOR FINISH PLATE |
Using a clip remover, remove the 2 clips.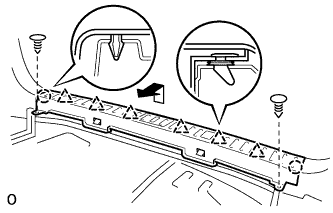
Disengage the 2 claws and 6 clips, and remove the rear floor finish plate.
| 5. REMOVE DECK FLOOR BOX FRONT |
Using a clip remover, remove the 2 clips and deck floor box front.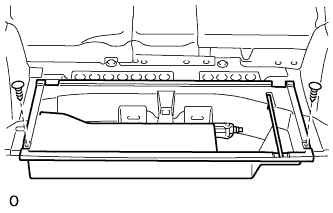
| 6. REMOVE DECK BOARD SUB-ASSEMBLY NO.2 |
Remove the 4 blots, 2 nuts and deck No.2 board sub-assembly.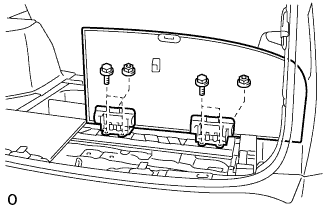
| 7. REMOVE DECK BOARD SUB-ASSEMBLY NO.3 |
Remove the 2 bolts, 2 nuts and deck No.3 board sub-assembly.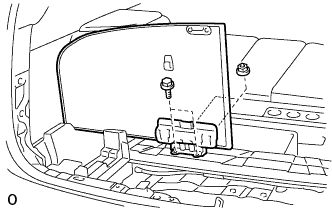
| 8. REMOVE DECK SIDE TRIM BOX RH |
| 9. REMOVE DECK SIDE TRIM BOX LH |
Remove the clip (A).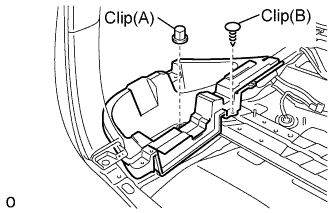
Using a clip remover, remove the clip (B) and deck side trim box.
| 10. REMOVE REAR CIRCUIT BREAKER SENSOR |
Remove the rear circuit breaker sensor (LH).
Move the outer section to the wire harness side as illustrated, then disconnect the rear circuit breaker sensor (LH).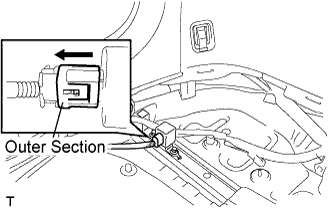
Remove the 2 bolts and rear circuit breaker sensor (LH).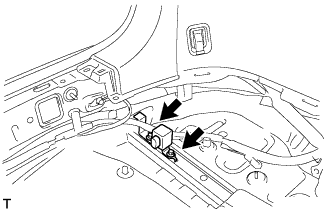
Remove the rear circuit breaker sensor (RH).
Move the outer section to the wire harness side as illustrated, then disconnect the rear circuit breaker sensor (RH).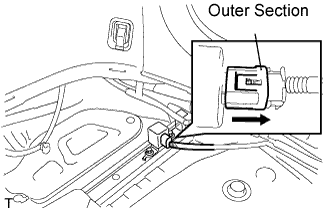
Remove the 2 bolts and rear circuit breaker sensor (RH).