REMOVAL
Removal / installation
| 1. DISCONNECT CABLE FROM NEGATIVE BATTERY TERMINAL |

- CAUTION:
- Wait at least 90 seconds after disconnecting the cable from the negative (-) battery terminal to prevent airbag and seat belt pretensioner activation (Click here).
| 2. REMOVE REAR WIPER ARM AND BLADE ASSEMBLY |
Remove the nut, rear wiper arm and blade assembly.
| 3. REMOVE BACK DOOR TRIM BOARD (w/ Power Back Door) |
Disengage the 3 claws and remove the back door trim board.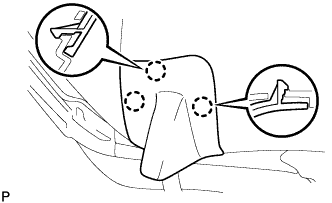

| 4. REMOVE BACK WINDOW PANEL TRIM UPPER (w/ Power Back Door) |
Disengage the 2 claws and the 7 clips, and remove the back window panel trim upper.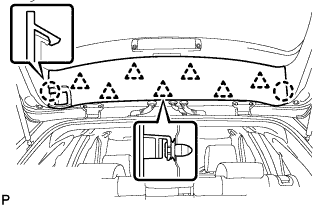
| 5. REMOVE BACK WINDOW PANEL TRIM UPPER (w/o Power Back Door) |
Disengage the 2 claws and the 7 clips, and remove the back window panel trim upper.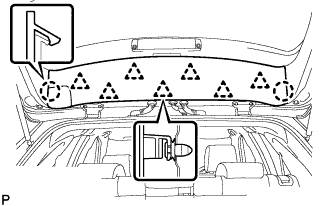
| 6. REMOVE BACK DOOR TRIM PANEL ASSEMBLY UPPER |
Disengage the 10 clips and remove the back door trim panel assembly upper.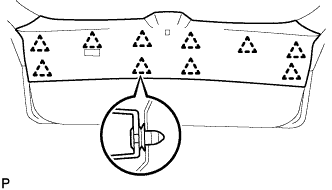
| 7. REMOVE BACK DOOR TRIM PANEL ASSEMBLY |
Disengage the 8 clips and remove the back door trim panel assembly.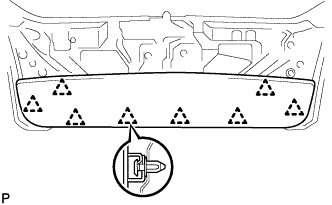
| 8. REMOVE BACK DOOR TRIM COVER RH |
Disengage the 3 clips and remove the back door trim cover RH.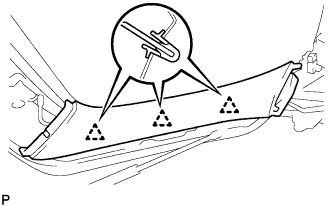
- HINT:
- If a clip remains on the door, remove the clip from the body and install it to the back door trim cover RH.
| 9. REMOVE BACK DOOR TRIM COVER LH |
Disengage the 3 clips and remove the back door trim cover LH.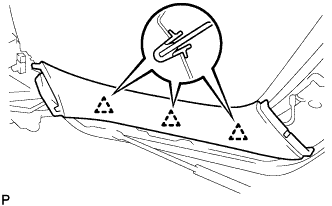
- HINT:
- If a clip remains on the door, remove the clip from the body and install it to the back door trim cover LH.
| 10. REMOVE REAR SPOILER SUB-ASSEMBLY |
Disconnect the center stop light connector.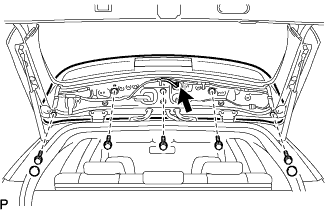
Remove the 2 grommets and 5 bolts.
Remove the 3 clips and rear spoiler sub-assembly.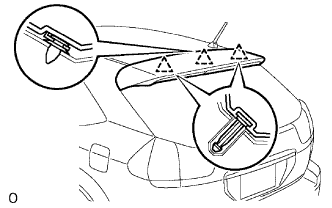
| 11. REMOVE REAR WIPER MOTOR ASSEMBLY |
Disconnect the connector.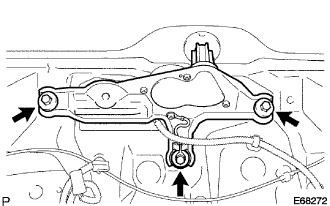
Remove the 3 bolts and the rear wiper motor.
| 12. REMOVE REAR COMBINATION LIGHT ASSEMBLY LH |
Disconnect the connector.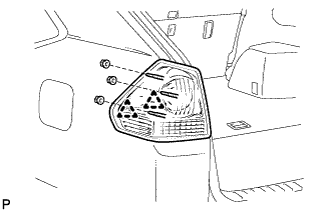
Remove the 3 nuts.
Disengage the 2 pins and remove the rear combination light assembly.
| 13. REMOVE REAR COMBINATION LIGHT ASSEMBLY RH |
| 14. REMOVE BACK DOOR GLASS |
Disconnect the connector.
Pass a piano wire between the vehicle body and glass from the interior, as shown in the illustration.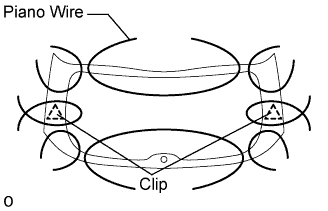
Tie both wire ends to wooden blocks or similar objects.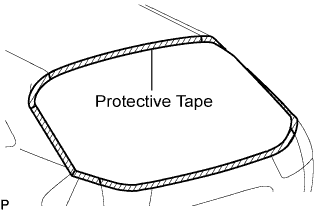
- NOTICE:
- When separating the glass, take care not to damage the paint and interior and exterior ornaments.
- HINT:
- Apply protective tape to the outer surface to prevent the surface from being scratched.
Cut off the adhesive by pulling the piano wire around the glass.
- NOTICE:
- If the back door glass will be reused, be careful not to damage the clip attached to the glass when you cut off the adhesive.
Using a suction cup, remove the glass.
- NOTICE:
- Leave as much adhesive on the vehicle body as possible when removing the glass.
| 15. CLEAN BACK DOOR GLASS |
Using a scraper, remove the damaged stoppers, dam and adhesive sticking to the glass.
Clean the outer circumference of the glass with white gasoline.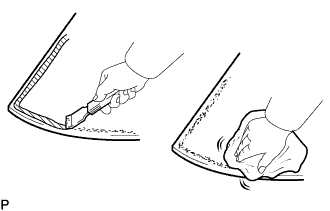
- NOTICE:
- Do not touch the glass surface after cleaning it.
- Be careful not to damage the glass.
- Even if using a new glass, clean the glass with white gasoline.
- Do not touch the glass surface after cleaning it.