INSTALLATION
Removal / installation
| 1. TEMPORARILY TIGHTEN REAR SUSPENSION NO.2 ARM |

Install the rear suspension arm No.2 (inner side) to the rear suspension member sub-assembly with the camber adjust cam and toe adjust cam, and temporarily tighten the nut.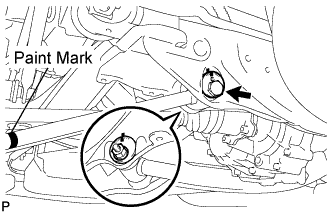

- HINT:
- Ensure that the paint mark faces to the rear side of the vehicle.
Connect the rear suspension arm No.2 (outer side) to the rear axle carrier with the bolt and nut.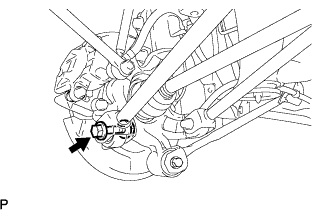
- NOTICE:
- When temporarily tightening the bolt, keep the nut from rotating.
| 2. STABILIZE SUSPENSION |
Jack up the rear axle carrier, placing a wooden block to avoid damage. Apply load to the suspension so that the rear drive shaft assembly is horizontally positioned.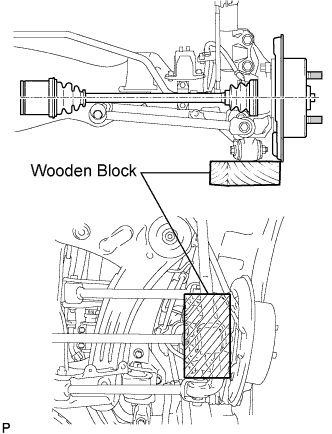
| 3. FULLY TIGHTEN REAR SUSPENSION NO.2 ARM |
Put matchmarks on the adjust cams and rear suspension member sub-assembly.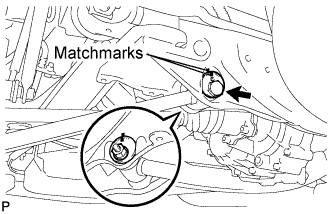
Fully tighten the nut.
- Torque:
- 100 N*m{ 1,020 kgf*cm , 74 ft.*lbf }
Fully tighten the nut.
- Torque:
- 112 N*m{ 1,140 kgf*cm , 83 ft.*lbf }
| 4. INSTALL REAR WHEEL |
- Torque:
- 103 N*m{ 1,050 kgf*cm , 76 ft.*lbf }
| 5. INSPECT AND ADJUST REAR WHEEL ALIGNMENT |