DISASSEMBLY
Removal / installation
| 1. FIX POWER STEERING LINK ASSEMBLY |

Using SST, secure the power steering link assembly.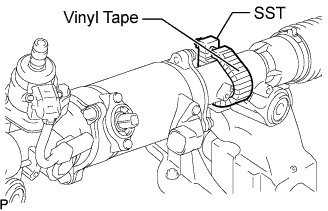

- SST
- 09612-00012
- HINT:
- Tape the SST before use.
| 2. REMOVE TIE ROD ASSEMBLY LH |
Put matchmarks on the tie rod assembly LH and the steering rack end sub-assembly.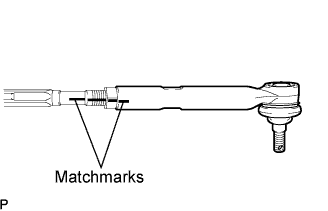
Loosen the lock nut, and remove the tie rod assembly LH and the lock nut.
| 3. REMOVE TIE ROD ASSEMBLY RH |
- HINT:
- Perform the same procedure as for the LH side.
| 4. REMOVE STEERING RACK BOOT CLIP |
Using pliers, remove the 2 steering rack boot clips.
| 5. REMOVE STEERING RACK BOOT NO.2 CLAMP |
Using pliers and a screwdriver, remove the steering rack boot No.2 clamp as shown in the illustration.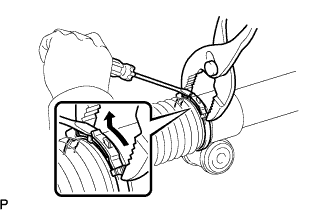
- NOTICE:
- Be careful not to damage the steering rack boot No.2.
| 6. REMOVE STEERING RACK BOOT NO.1 CLAMP |
- HINT:
- Perform the same procedure as for the steering rack boot No.2 clamp.
| 7. REMOVE STEERING RACK BOOT NO.2 |
Remove the steering rack boot No.2.
| 8. REMOVE STEERING RACK BOOT NO.1 |
- HINT:
- Perform the same procedure as for the steering rack boot No.2.
| 9. REMOVE STEERING RACK END SUB-ASSEMBLY |
Using a screwdriver and a hammer, unstake the RH and LH claw washers.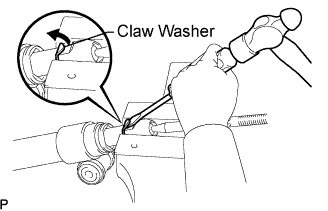
- NOTICE:
- Avoid any impact to the steering rack.
Using SST, remove the steering rack end sub-assembly (LH side) and the claw washer.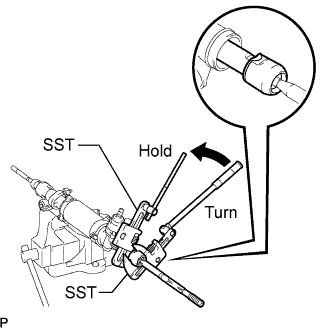
- SST
- 09922-10010
- NOTICE:
- Use SST 09922-10010 following the direction shown in the illustration.
Using SST, remove the steering rack end sub-assembly (RH side) and the claw washer.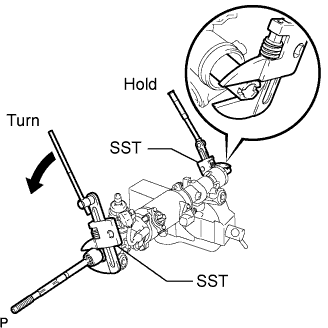
- SST
- 09922-10010
- NOTICE:
- Use SST 09922-10010 following the direction shown in the illustration.
- HINT:
- Using SST, hold the rack and remove the steering rack end sub-assembly.