DISASSEMBLY
Removal / installation
| 1. REMOVE AUXILIARY CATCH RELEASE LEVER ASSEMBLY |

Remove the 3 bolts, auxiliary catch release lever assembly and hood auxiliary catch hook assembly as a unit.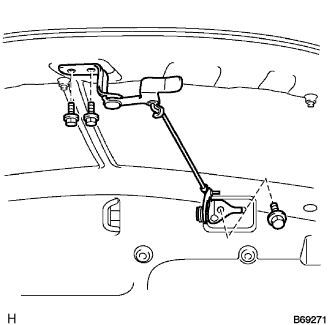

Remove the auxiliary catch release lever assembly from the hood auxiliary catch hook assembly.
| 2. REMOVE RADIATOR GRILLE |
Remove the 5 nuts, clip and radiator grille.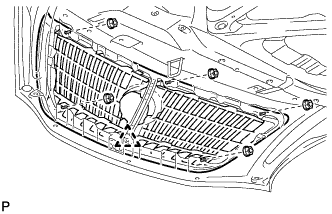
| 3. REMOVE HOOD INSULATOR |
Remove the 8 clips and hood insulator.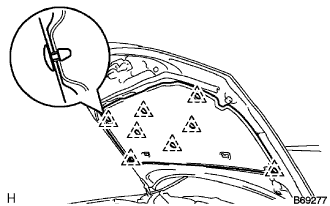
| 4. REMOVE HOOD SUPPORT ROD |
- NOTICE:
- While supporting the hood sub-assembly by hand, remove the hood support rod.
- Do not touch the extendable portion of the rod to prevent foreign objects from attaching to the rod surface.
- Do not push sideways on the rod because the rod may bend.
- While supporting the hood sub-assembly by hand, remove the hood support rod.
Using a screwdriver, remove the clip and hood support rod from the hood sub-assembly.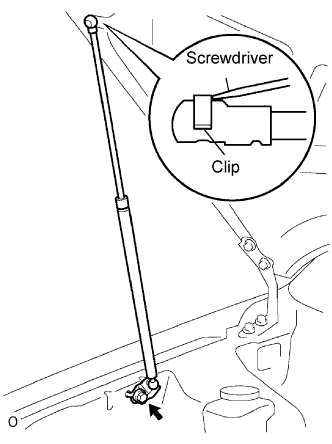
Remove the bolt and the hood support rod.
| 5. REMOVE HOOD TO RADIATOR SUPPORT SEAL |
| 6. REMOVE HOOD TO FRONT FENDER SEAL LH |
| 7. REMOVE HOOD TO FRONT FENDER SEAL RH |
| 8. REMOVE HOOD SUB-ASSEMBLY |
Remove the 2 bolts.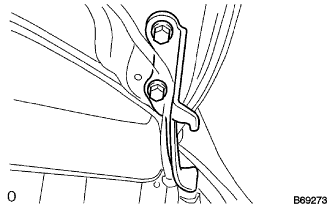
- HINT:
- Use the same procedure for removal on the RH side.
Remove the hood sub-assembly.
| 9. REMOVE HOOD HINGE ASSEMBLY LH |
Remove the 2 bolts and hood hinge assembly LH.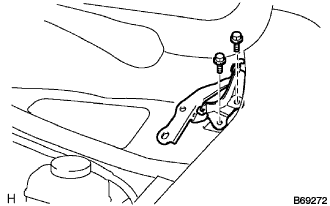
| 10. REMOVE HOOD HINGE ASSEMBLY RH |
Remove the 2 bolts and hood hinge assembly RH.
| 11. REMOVE COOL AIR INTAKE DUCT SEAL |
Remove the 4 clips and cool air intake duct seal.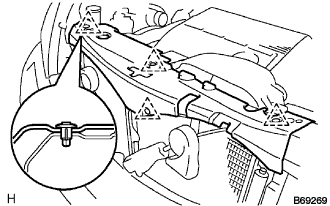
| 12. REMOVE HOOD LOCK CONTROL CABLE COVER |
Remove the 2 screws and disengage the 2 claws and remove the hood lock control cable cover.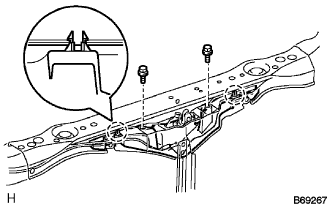
| 13. REMOVE HOOD LOCK ASSEMBLY |
Using a screwdriver wrapped with protective tape, remove the nut cap.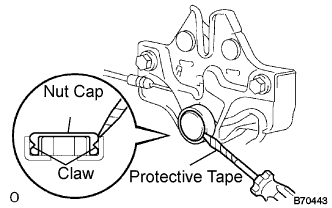
Remove the 3 bolts and separate the hood lock assembly.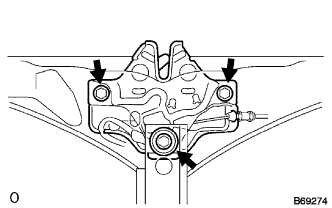
Disconnect the connector and cable.
Remove the hood lock assembly.
| 14. REMOVE CUSHION RUBBER |