ADJUSTMENT
Removal / installation
| 1. INSPECT HOOD |

Check that the clearance is within the standard range.
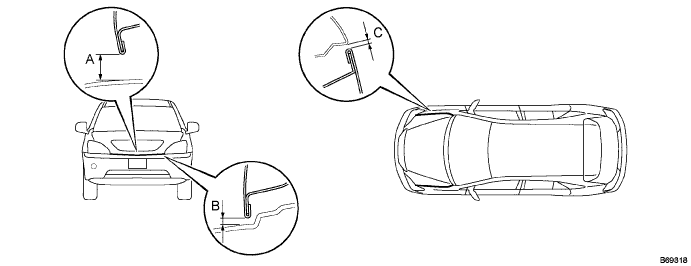

Standard range: A
6.0 +- 1.5 mm (0.236 +- 0.059 in.)
B
6.0 +- 1.5 mm (0.236 +- 0.059 in.)
C
4.0 +- 1.5 mm (0.157 +- 0.059 in.)
| 2. ADJUST HOOD |
Horizontally and vertically adjust the hood.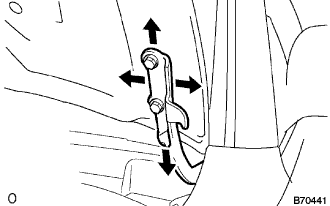
Loosen the 4 hood hinge mounting bolts on the hood side.
Adjust the clearance by moving the hood, so that it will be in the standard range.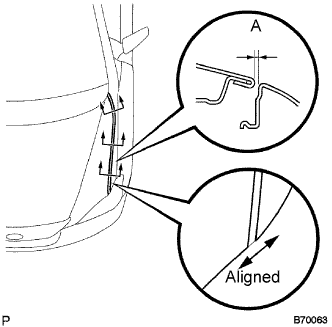
- Standard range A:
- 4.0 +- 1.5 mm (0.157 +- 0.059 in.)
Tighten the hood side hinge bolts after the adjustment.
- Torque:
- 13 N*m{ 133 kgf*cm , 10 ft.*lbf }
Adjust the height of the hood front end using the cushion rubber.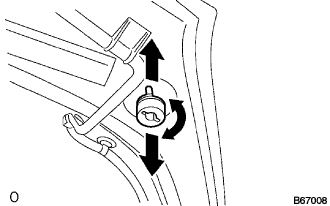
Adjust the cushion rubber so that the hood and the fender will be aligned.
- HINT:
- The cushion rubber moves up and down when turned.
Adjust the hood lock.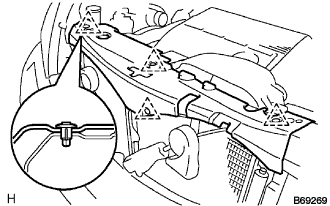
Remove the 4 clips and cool air intake duct seal.
Remove the 2 screws, disengage the 2 claws and remove the hood lock control cable cover.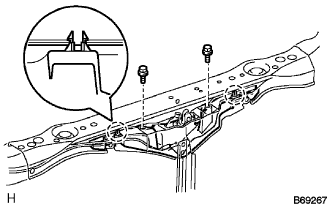
- HINT:
- If the cover is damaged, replace it with a new cover.
Using a screwdriver wrapped with protective tape, remove the nut cap.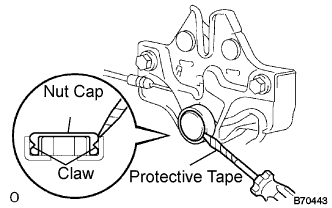
- NOTICE:
- Removing the nut cap damages the claw inside the nut cap. Therefore, the use of a new nut cap is necessary for installation.
Loosen the 3 bolts.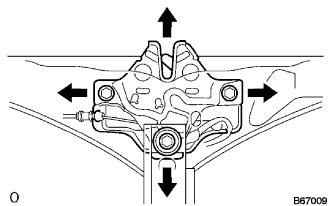
Adjust the hood lock position by moving the striker, so that the striker can enter smoothly.
- Torque:
- 8.0 N*m{ 82 kgf*cm , 71 in.*lbf }
- HINT:
- Perform this procedure after replacement of the centering bolt with the supplied one.