REASSEMBLY
Removal / installation
| 1. INSTALL DOOR PULL HANDLE |
| 2. INSTALL POWER BACK DOOR CONTROL SWITCH ASSEMBLY (w/ Power Back Door) |
| 3. INSTALL POWER BACK DOOR WARNING BUZZER (w/ Power Back Door) |
| 4. INSTALL LICENSE PLATE LIGHT ASSEMBLY |

Install the license plate light assembly with the 2 claws.
Connect the connector.
| 5. INSTALL TELEVISION CAMERA (w/ Back Guide Monitor System) |
Engage the 2 claws and install the television camera.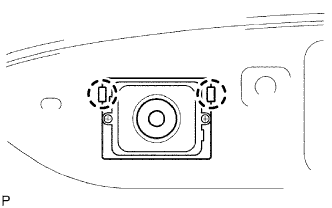

Engage the clamp and connect the connector.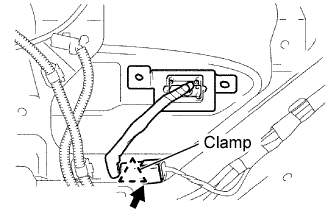
| 6. INSTALL BACK DOOR OPENER SWITCH ASSEMBLY |
| 7. INSTALL BACK DOOR GARNISH |
Install the 5 bolts, clip and garnish.
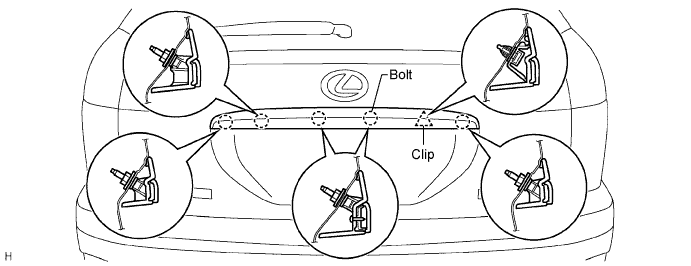
- Torque:
- 9.8 N*m{ 100 kgf*cm , 87 in.*lbf }
Connect the back door opener switch connector.
| 8. INSTALL POWER BACK DOOR SENSOR ASSEMBLY LH (w/ Power Back Door) |
Install a new clip to the power back door sensor assembly LH.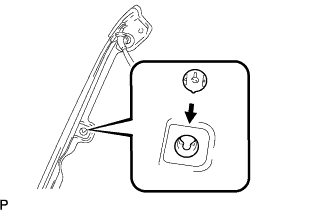
Using a "torx" socket wrench (T30), install the power back door sensor assembly LH with the 3 screws and the clip.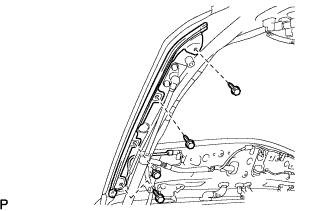
- Torque:
- 3.5 N*m{ 36 kgf*cm , 31 in.*lbf }
Connect the connector.
| 9. INSTALL POWER BACK DOOR SENSOR ASSEMBLY RH (w/ Power Back Door) |
Install a new clip to the power back door sensor assembly RH.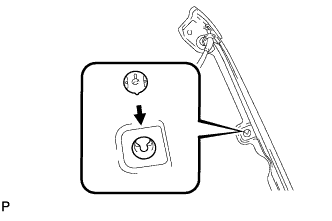
Using a "torx" socket wrench (T30), install the power back door sensor assembly RH with the 3 screws and the clip.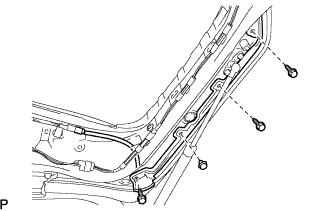
- Torque:
- 3.5 N*m{ 36 kgf*cm , 31 in.*lbf }
Connect the connector.
| 10. INSTALL BACK DOOR LOCK ASSEMBLY (w/ Power Back Door) |
Apply body grease to the sliding parts on the back door lock assembly.
Install the back door lock assembly with the 4 bolts.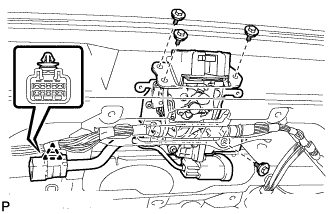
- Torque:
- 12.5 N*m{ 127 kgf*cm , 9 ft.*lbf }
Install the clamp.
Connect each connector and the link rod.
| 11. INSTALL BACK DOOR LOCK ASSEMBLY (w/o Power Back Door) |
Apply body grease to the sliding parts on the back door lock assembly.
Install the back door lock assembly with the 3 bolts.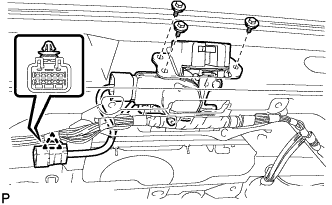
- Torque:
- 12.5 N*m{ 127 kgf*cm , 9 ft.*lbf }
Install the clamp.
Connect the connector and the link rod.
| 12. INSTALL BACK DOOR LOCK COVER |
| 13. INSTALL BACK DOOR TRIM SPACER (LH Side) |
| 14. INSTALL BACK DOOR TRIM SPACER (RH Side) |
| 15. INSTALL REAR SPOILER SUB-ASSEMBLY |
Install the rear spoiler sub-assembly with the 3 clips.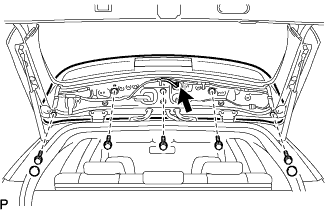
Install the 5 bolts and 2 grommets.
- Torque:
- 9.8 N*m{ 100 kgf*cm , 87 in.*lbf }
Connect the center stop light connector.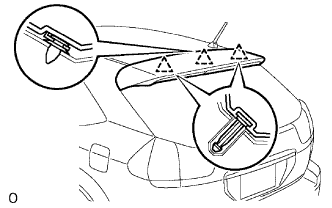
| 16. INSTALL BACK DOOR TRIM COVER LH |
| 17. INSTALL BACK DOOR TRIM COVER RH |
| 18. INSTALL BACK-UP LIGHT ASSEMBLY LH |
Connect each connector.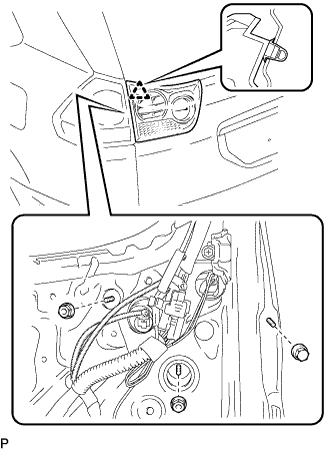
Install the back-up light assembly with the 3 nuts and the clip.
| 19. INSTALL BACK-UP LIGHT ASSEMBLY RH |
Connect each connector.
Install the back-up light assembly with the 3 nuts and the clip.
| 20. INSTALL REAR WIPER MOTOR ASSEMBLY |
Install the rear wiper motor with the 3 bolts.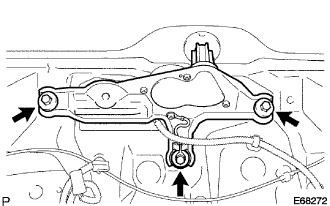
- Torque:
- 5.5 N*m{ 56 kgf*cm , 49 in.*lbf }
Connect the connector.
| 21. INSTALL BACK DOOR TRIM PANEL ASSEMBLY |
| 22. INSTALL BACK DOOR TRIM PANEL ASSEMBLY UPPER |
| 23. INSTALL BACK WINDOW PANEL TRIM UPPER (w/ Power Back Door) |
| 24. INSTALL BACK DOOR TRIM BOARD (w/ Power Back Door) |
| 25. INSTALL BACK WINDOW PANEL TRIM UPPER (w/o Power Back Door) |
| 26. INSTALL REAR NO.1 WIPER LINK PIVOT WASHER |
Install the rear No.1 wiper link pivot washer with the position mark facing downward as shown in the illustration.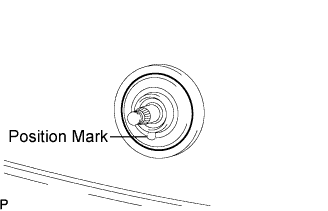
| 27. INSTALL REAR NO.1 WIPER LINK PIVOT NUT |
Using a socket wrench 27 mm (1.06 in.), install the rear No.1 wiper link pivot nut.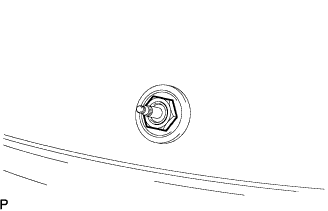
- NOTICE:
- Be careful not to damage the glass.
| 28. INSTALL REAR WIPER SHAFT COVER |
Install the rear wiper shaft cover.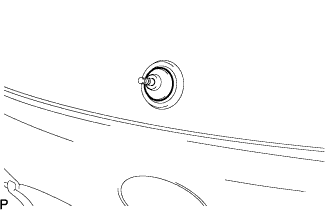
| 29. INSTALL REAR WIPER ARM AND BLADE ASSEMBLY |
Operate the rear wiper and stop the rear wiper motor at the automatic stop position.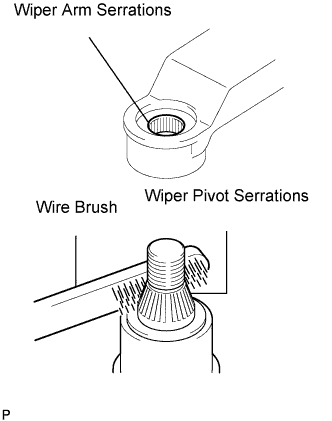
Clean the wiper arm serrations.
Clean the wiper pivot serrations with a wire brush (when reinstalling).
Install the rear wiper arm and blade assembly with the nut at the position as shown in the illustration.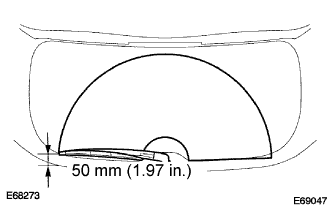
- Torque:
- 5.5 N*m{ 56 kgf*cm , 49 in.*lbf }
| 30. INSTALL REAR WIPER ARM COVER |
Install the rear wiper arm cover.
Operate the rear wiper while spraying water or washer fluid on the windshield.
Make sure that the wipers function properly and there is no interference with the vehicle body.
| 31. BACK DOOR CLOSER SYSTEM INITIALIZATION (w/ Power Back Door) |
| 32. POWER BACK DOOR SYSTEM INITIALIZATION (w/ Power Back Door) |
| 33. ELECTRICAL BACK DOOR OUTSIDE HANDLE SYSTEM INITIALIZATION |
| 34. ADJUST CAMERA OPTICAL AXIS (w/ Back Guide Monitor System) |