ON-VEHICLE INSPECTION
Inspection
| CHECK ENGINE OIL LEVEL |

Warm up the engine and then wait for 5 minutes after turning the engine off, the oil level should be between the low level and full level marks of the dipstick.
If low, check for leakage and add oil up to the full level mark.- NOTICE:
- Do not fill with engine oil above the full level mark.
| CHECK ENGINE OIL QUALITY |
Check for deterioration, traces of water, discoloring, or thinning.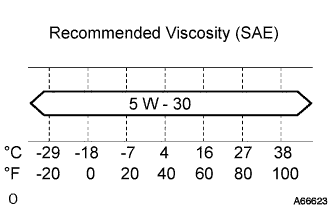

If the quality is visibly poor, replace the oil.- Oil grade:
- API grade "SL" Energy-Conserving or ILSAC multigrade engine oil. Recommended viscosity is as shown in the illustration.
| REMOVE ENGINE UNDER COVER NO.1 |
Remove the 6 bolts, 2 screws, 2 clips and engine under cover.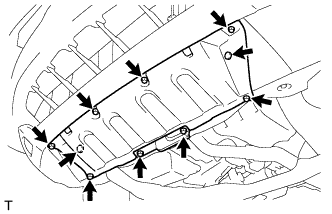
| SEPARATE FRONT FENDER SPLASH SHIELD SUB-ASSEMBLY RH |
Remove the screw, and then open the front fender splash shield sub-assembly RH.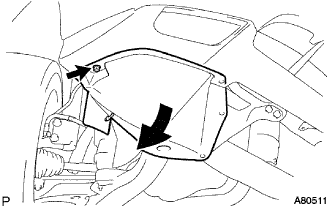
| REMOVE FRONT FENDER APRON SEAL RH |
Remove the clip and 2 bolts, and then remove the front fender apron seal RH.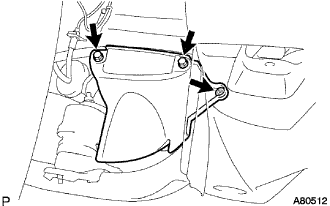
| REMOVE ENGINE OIL PRESSURE SWITCH ASSEMBLY |
Disconnect the oil pressure switch connector.
Using a 24 mm deep socket wrench, remove the oil pressure switch.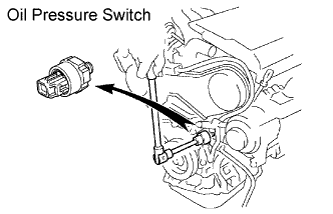
| INSTALL OIL PRESSURE GAUGE |
Install the oil pressure gauge.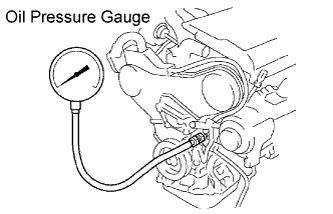
| WARM UP ENGINE |
| CHECK OIL PRESSURE |
- Specification oil pressure:
Item
Oil Pressure
Idle
29 kPa (0.3 kgf/cm2, 4.3 psi) or more
3,000 rpm
245 to 539 kPa (2.5 to 5.5 kgf/cm2, 36 to 78 psi)
| REMOVE OIL PRESSURE GAUGE |
| INSTALL ENGINE OIL PRESSURE SWITCH ASSEMBLY |
Apply adhesive to 2 or 3 threads of the oil pressure switch.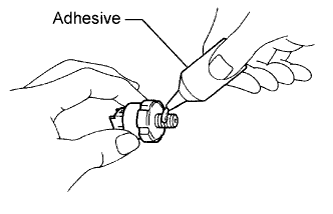
- Adhesive:
- Part No.08833-00080, THREE BOND 1344, LOCTITE 242 or equivalent
Using a 24 mm deep socket wrench, install the oil pressure switch.
- Torque:
- 15 N*m{ 153 kgf*cm , 11 ft.*lbf }
- NOTICE:
- Do not start the engine within 1 hour of installation.
Connect the oil pressure switch connector.
| CHECK FOR ENGINE OIL LEAKS |
| INSTALL FRONT FENDER APRON SEAL RH |
Install the front fender apron seal RH with the clip and 2 bolts.
| INSTALL FRONT FENDER SPLASH SHIELD SUB-ASSEMBLY RH |
Install the front fender splash shield sub-assembly RH with the screw.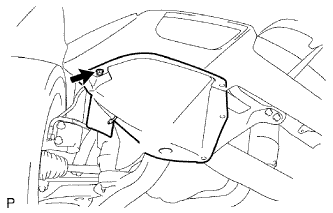
| INSTALL ENGINE UNDER COVER NO.1 |
Install the 6 bolts, 2 screws, 2 clips and engine under cover.