INSTALLATION
Removal / installation
| 1. INSTALL REAR POWER OUTLET SOCKET COVER |

Engage the 2 claws and install the rear power outlet socket cover.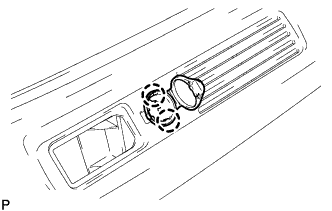

| 2. INSTALL REAR POWER POINT SOCKET |
Place the rear power point socket with the notch on the rear power outlet socket cover and push in the rear power point socket as hard as possible to install it.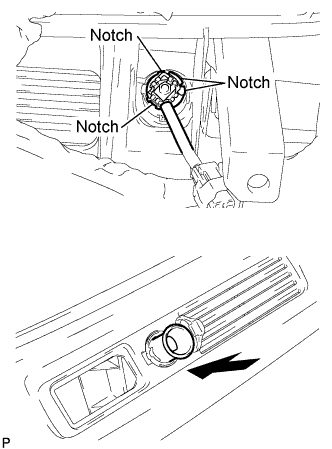
| 3. INSTALL ROOF SIDE GARNISH ASSEMBLY INNER LH |
Engage the 7 clips and install the roof side garnish assembly inner.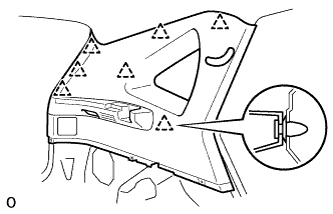
Install the 3 clips.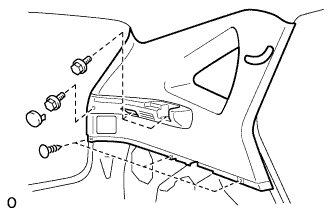
Install the 3 bolts and tonneau cover holder cap.
Engage the 4 claws and install the seat belt bezel.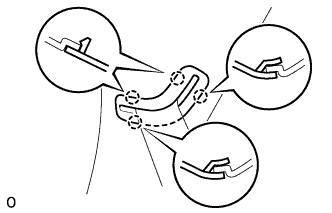
| 4. INSTALL NO.1 TONNEAU COVER HOLDER CAP |
| 5. INSTALL NO.2 ROOM LIGHT ASSEMBLY |
Connect the connector.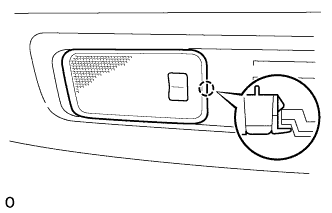
Engage the claw and install the room light assembly No.2.
| 6. INSTALL DECK TRIM SIDE PANEL ASSEMBLY LH |
Engage the 2 clips and install the deck trim side panel assembly.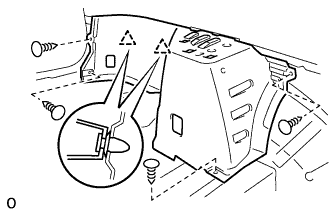
Install the 4 clips.
| 7. INSTALL ROPE HOOK |
Install the 2 rope hooks with the 2 bolts.
- Torque:
- 8.0 N*m{ 80 kgf*cm , 71 in.*lbf }
- HINT:
- Use the same procedure to install the other side.
| 8. INSTALL REAR SEAT SIDE COVER LH |
Engage the 4 clips and install the rear seat side cover.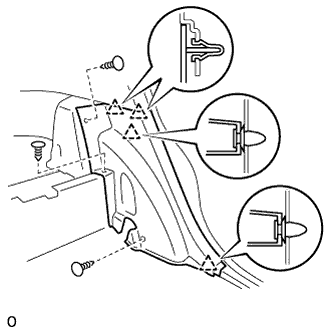
Install the 3 clips.
| 9. INSTALL REAR NO.1 SEAT BELT ASSEMBLY OUTER LH |
Install the rear No.1 seat outer belt assembly with the bolt.
- Torque:
- 42 N*m{ 428 kgf*cm , 31 ft.*lbf }
| 10. INSTALL DECK SIDE TRIM COVER LH |
Engage the 5 claws and install the deck side trim cover.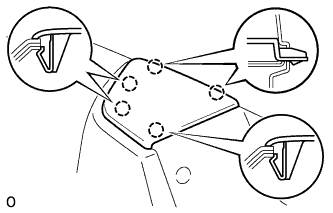
| 11. INSTALL REAR FLOOR FINISH SIDE PLATE LH |
Engage the 2 clips and install the rear floor finish side plate.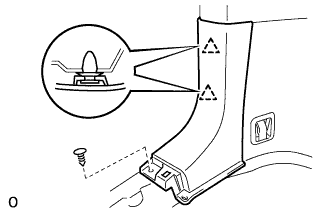
Install the clip.
| 12. INSTALL REAR FLOOR FINISH PLATE |
Engage the 2 claws and 6 clips, and install the rear floor finish plate.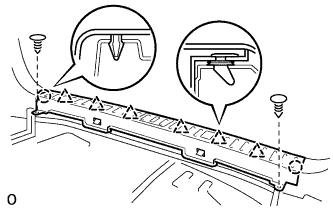
Install the 2 clips.
| 13. INSTALL DECK SIDE TRIM BOX LH |
Install the deck side trim box with the 2 clips.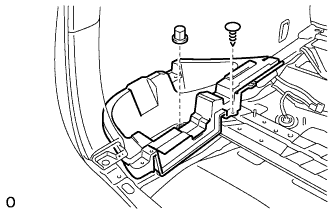
| 14. INSTALL DECK SIDE TRIM BOX RH |
| 15. INSTALL JACK CARRIER ASSEMBLY |
Install the jack carrier assembly, jack assembly and jack carrier support.
| 16. INSTALL BACK DOOR WEATHERSTRIP |
| 17. INSTALL NO.3 DECK BOARD SUB-ASSEMBLY |
Install the deck No.3 board sub-assembly with the 2 bolts and 2 nuts.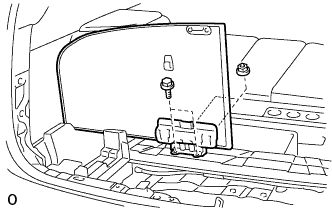
| 18. INSTALL NO.2 DECK BOARD SUB-ASSEMBLY |
Install the deck No.2 board sub-assembly with the 4 bolts and 2 nuts.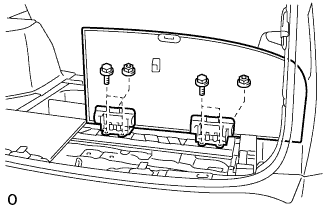
| 19. INSTALL DECK FLOOR BOX REAR |
Install the deck floor box rear with the 2 clips.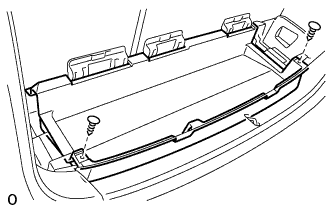
| 20. INSTALL DECK FLOOR BOX FRONT |
Install the deck floor box front with the 2 clips.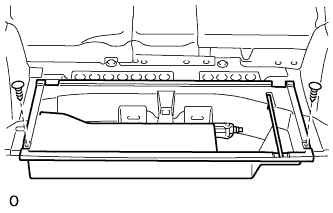
| 21. INSTALL DECK BOARD SUB-ASSEMBLY |
Install the deck board sub-assembly with the 2 bolt.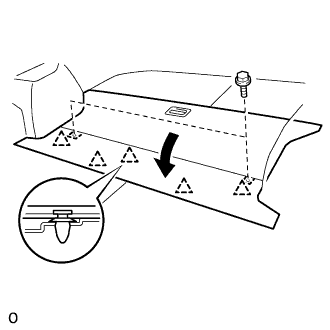
Engage the 5 clips.
| 22. INSTALL TONNEAU COVER ASSEMBLY |
| 23. INSTALL REAR DOOR OPENING TRIM WEATHERSTRIP LH |
| 24. INSTALL REAR DOOR SCUFF PLATE LH |
Connect the connector. (w/ illumination scuff plate)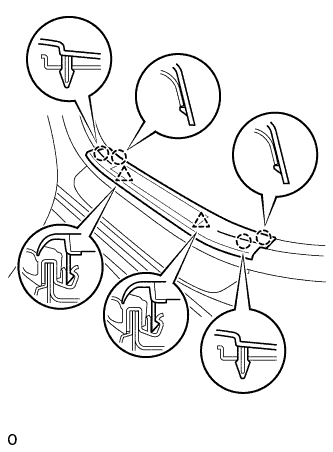
Engage the 4 claws and 2 clips, and install the rear door scuff plate.