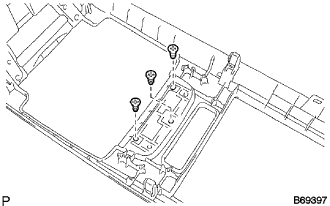
DISASSEMBLY
Removal / installation
| 1. REMOVE CONSOLE BOX CUP HOLDER |

Remove the console box cup holder.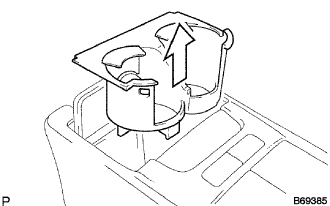

| 2. REMOVE BOX NO.1 SIDE PANEL |
Disengage the 8 claws and remove the box No.1 side panel.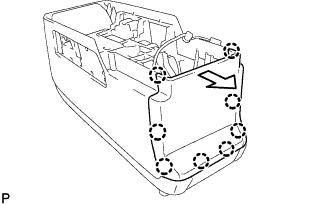
| 3. REMOVE REAR CONSOLE BOX LOWER |
Remove the 6 screws.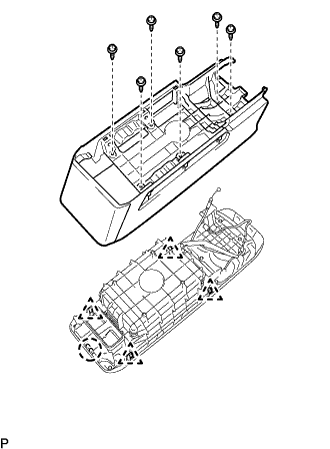
Disengage the 4 clips and the claw, and remove the rear console box lower.
| 4. REMOVE CONSOLE BOX LIGHT SUB-ASSEMBLY |
Disconnect each of the clamp and connectors, and remove the console box light sub-assembly.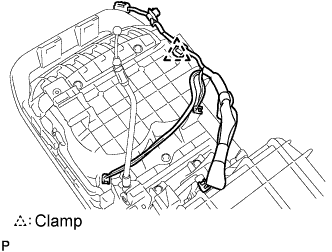
| 5. REMOVE CONSOLE BOX ILLUMINATION LIGHT ASSEMBLY |
Disengage the 2 claws and remove the console box illumination light assembly.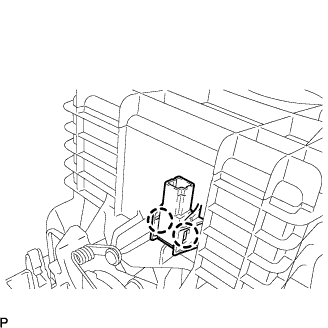
| 6. REMOVE REAR CONSOLE BOX HOLDER CUP |
Remove the 5 screws and the rear console holder cup.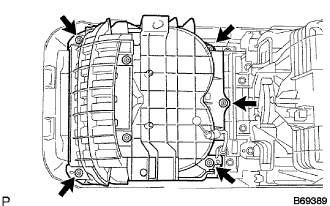
| 7. REMOVE CONSOLE UPPER PANEL GARNISH FRONT |
Remove the 4 screws and the console upper panel garnish front.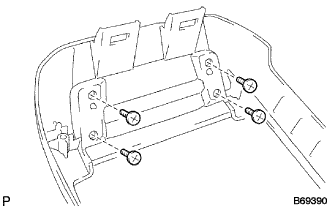
| 8. REMOVE CONSOLE BOX REGISTER ASSEMBLY |
Remove the 6 screws and the console box register assembly.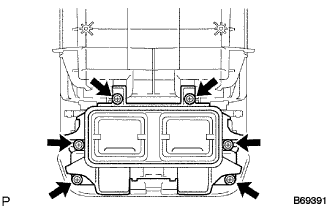
| 9. REMOVE CONSOLE BOX SUB-ASSEMBLY UPPER |
Remove the 4 screws.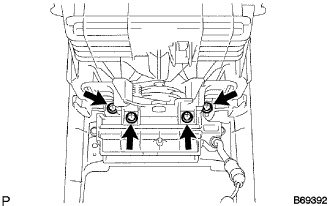
Remove the 2 screws.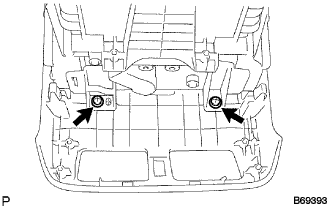
Disengage the 2 claws.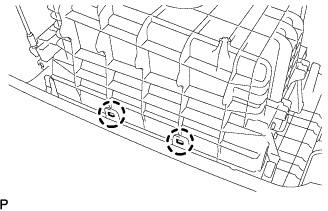
Disengage the 2 claws and remove the console box sub-assembly upper.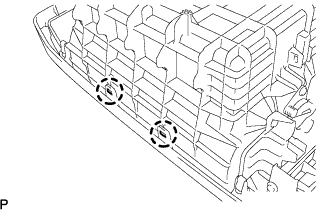
| 10. REMOVE CONSOLE COMPARTMENT DOOR LOCK |
Remove the 2 screws and the console compartment door lock.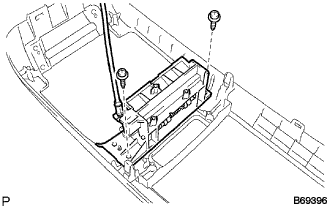
| 11. REMOVE CONSOLE UPPER PANEL GARNISH REAR |
Remove the 3 screws and the console upper panel garnish rear.