REMOVAL
Removal / installation
| 1. SEPARATE CABLE FROM NEGATIVE BATTERY TERMINAL |
| 2. REMOVE SERVICE PLUG GRIP |

- CAUTION:
- Remove the service plug to interrupt a high voltage circuit at the time of the check.
- Keep the removed service plug in your pocket to prevent other technicians from reconnecting it while you are servicing the vehicle.
- All the high voltage wiring connectors are colored in orange.
- Remove the service plug to interrupt a high voltage circuit at the time of the check.
Remove the 2 clips, then open the battery service hole cover.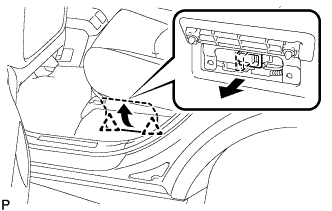

Wear insulation glove, and remove the service plug grip, after sliding up the lever of the service plug grip.
- CAUTION:
- Keep the removed service plug in your pocket to prevent other technicians from reconnecting it while you are servicing the vehicle.
- After removing the service plug grip, do not touch the high voltage connectors and terminals for 5 minutes.
- Keep the removed service plug in your pocket to prevent other technicians from reconnecting it while you are servicing the vehicle.
- NOTICE:
- After removing the service plug grip, do not operate the ignition switch as it may damage the hybrid vehicle control ECU.
| 3. REMOVE DECK BOARD SUB-ASSEMBLY |
Disengage the 5 clips and turn up the front side of the deck board.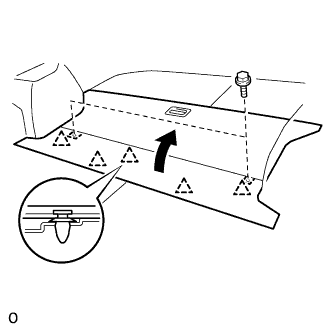
Remove the 2 bolts and deck board sub-assembly.
| 4. REMOVE DECK FLOOR BOX REAR |
Using a clip remover, remove the 2 clips and deck floor box rear.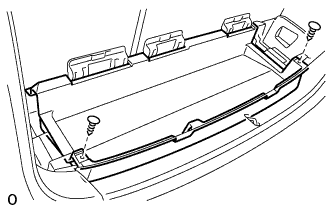
| 5. REMOVE REAR FLOOR FINISH PLATE |
Using a clip remover, remove the 2 clips.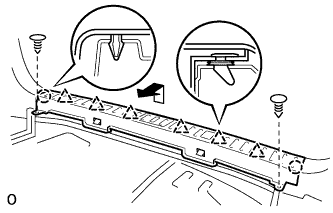
Disengage the 2 claws and 6 clips, and remove the rear floor finish plate.
| 6. REMOVE DECK FLOOR BOX FRONT |
Using a clip remover, remove the 2 clips and deck floor box front.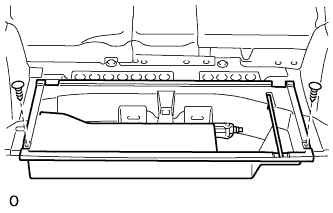
| 7. REMOVE DECK BOARD SUB-ASSEMBLY NO.2 |
Remove the 4 blots, 2 nuts and deck No.2 board sub-assembly.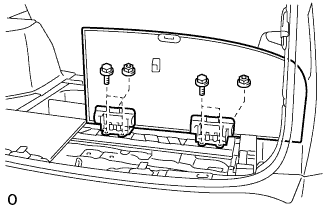
| 8. REMOVE DECK BOARD SUB-ASSEMBLY NO.3 |
Remove the 2 bolts, 2 nuts and deck No.3 board sub-assembly.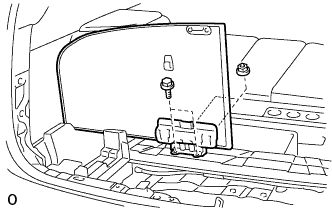
| 9. REMOVE JACK CARRIER SUPPORT |
| 10. REMOVE JACK ASSEMBLY |
| 11. REMOVE JACK CARRIER ASSEMBLY |
| 12. REMOVE DECK SIDE TRIM BOX LH |
Remove the clip (A).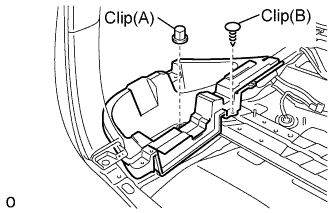
Using a clip remover, remove the clip (B) and deck side trim box.
| 13. REMOVE DECK SIDE TRIM BOX RH |
- HINT:
- Perform the same procedure as for the LH side.
| 14. REMOVE DECK BOARD CHECK NO.1 |
Remove the 4 nuts and deck board check No.1.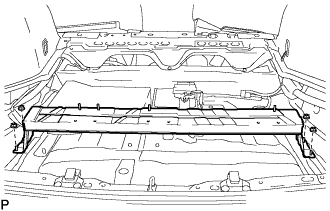
| 15. REMOVE POWER STEERING CONVERTER COVER |
Separate the wire harness clamp from the power steering converter cover.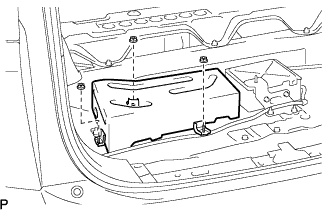
Remove the 3 nuts and the power steering converter cover.
| 16. REMOVE DC-DC CONVERTER ASSEMBLY |
- CAUTION:
- Be sure to wear insulated gloves.
Disconnect the 3 connectors from the DC-DC converter assembly.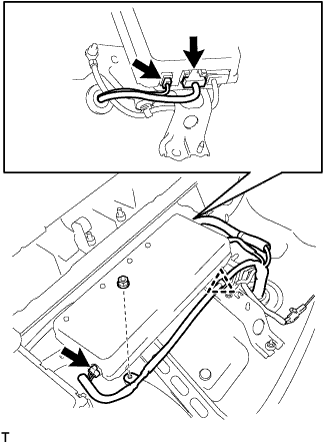
Remove the nut and separate the wire harness clamp.
Remove the 4 nuts and DC-DC converter assembly.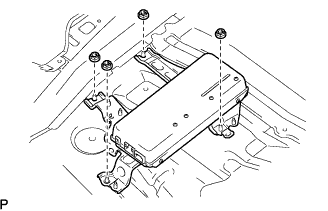
| 17. REMOVE EARTH WIRE |
Separate the earth wire clamp from the DC-DC converter assembly.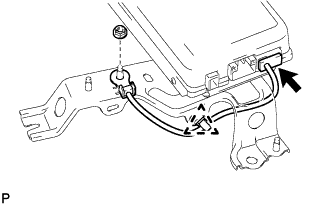
Disconnect the earth wire connector from the DC-DC converter assembly.
Remove the nut and the earth wire from the DC-DC converter assembly.