DTC CHECK / CLEAR
Troubleshooting
| START DIAGNOSTIC MODE |
There are 2 methods to start diagnostic mode. Start the mode by using one of them.
- HINT:
- Illustrations may differ from the actual vehicle depending on the device settings and options. Therefore, some detailed areas may not be shown exactly the same as on the actual vehicle.
- After the ignition switch is turned on, check that the map is displayed before starting the diagnostic mode. Otherwise, some items cannot be checked.
- Illustrations may differ from the actual vehicle depending on the device settings and options. Therefore, some detailed areas may not be shown exactly the same as on the actual vehicle.
Method 1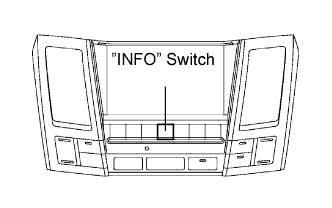

Start the engine.
While pressing and holding "INFO" switch, operate the light control switch, OFF → TAIL → OFF → TAIL → OFF → TAIL → OFF.
The diagnostic mode starts and the service check screen ("System Check Mode") will be displayed. Service inspection starts automatically and the result will be displayed.
Method 2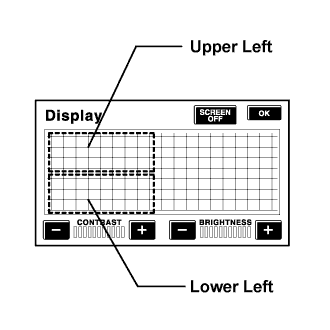
Start the engine.
Switch to the "Display quality adjustment" screen.
From the display quality adjustment screen, touch the corners of the screen in the following order: upper left→ lower left → upper left → lower left → upper left → lower left.
The diagnostic mode starts and "Service Check" screen will be displayed. Service inspection starts automatically and the result will be displayed.
Diagnosis MENU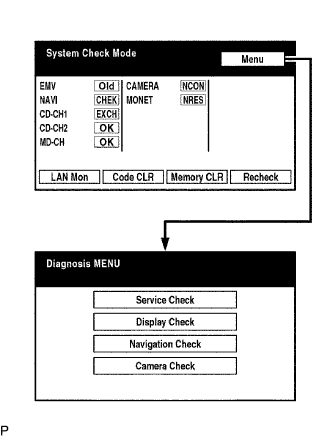
Diagnostic screen will be displayed by pressing the menu switch on the service check screen.
Read the system check result.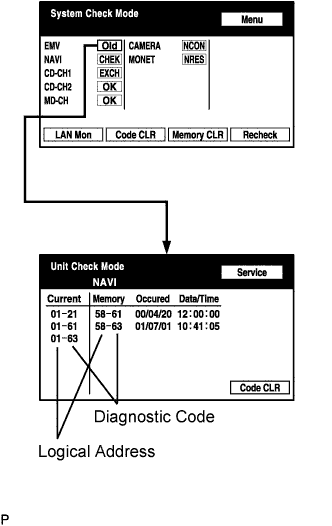
If all check results are "EXCH," "CHEK" or "Old," touch the display to check the contents on the "Unit Check Mode" screen and record them on the customer problem analysis check sheet.
- HINT:
- If all check results are "OK," go to communication DTC check (go to step PROCEDURE 1).
- If a device name is not known, its physical address is displayed.
- If all check results are "OK," go to communication DTC check (go to step PROCEDURE 1).
If "EXCH", "CHEK" and "Old" as well as "OK" exist, press the service switch to return to the "System Check Mode". Then, check the "Unit Check Mode" screen and record them on the customer problem analysis check sheet.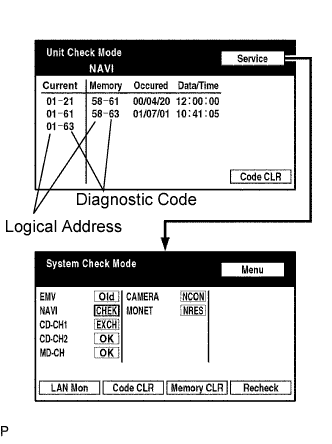
Read the communication diagnostic check result (PROCEDURE 1).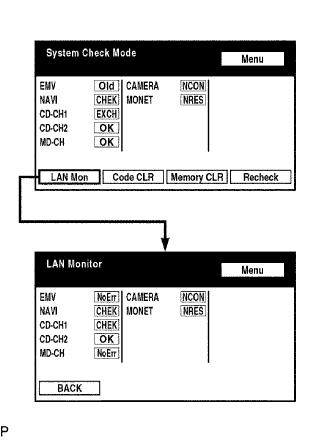
Return to the "System Check Mode", and press "LAN Mon" switch to enter the LAN monitor screen.
If the result is "CHEK" or "Old," touch the result switch to check the contents on the individual communication diagnostic screen and record them on the customer problem analysis check sheet.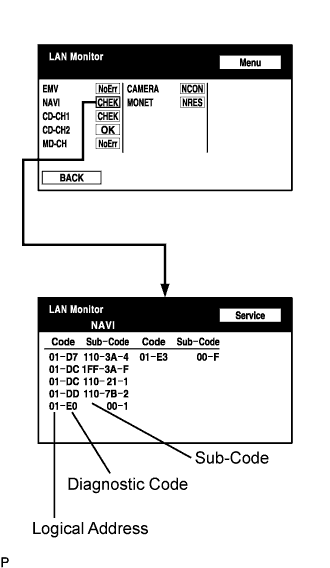
- HINT:
- If all check results are "No Err," the system judges that no DTC exists.
- The sub-code (relevant device) will be indicated by its physical address.
- If all check results are "No Err," the system judges that no DTC exists.
If check results of other devices are "CHEK," press the "Service" switch to return to the original "LAN Monitor" screen. Then, check the individual communication diagnostic screen for the next device and record the result on the customer problem analysis check sheet.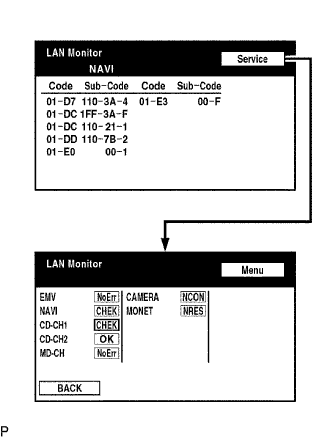
| FINISH DIAGNOSTIC MODE |
There are 2 methods to end diagnostic mode.
Method 1
Turn the ignition switch off.
Method 2
Press and hold the "Display" switch for 3 seconds.
| DTC CLEAR/RECHECK |
Clear DTC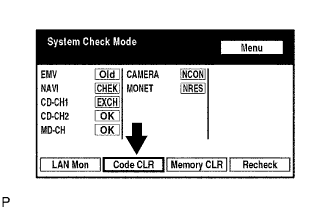
Press the "Code CLR" switch for 3 seconds.
Check result is cleared.
Recheck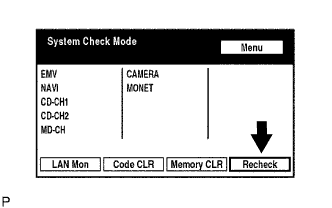
Press the "Recheck" switch.
Confirm that all diagnostic codes are "OK" when the check results are displayed.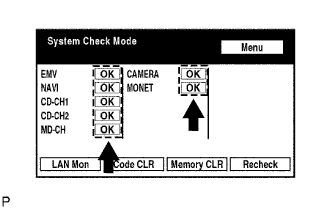
If a code other than "OK" is displayed, troubleshoot again.
Press the "LAN Mon" switch to change to "LAN Monitor" mode.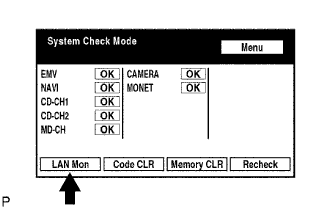
Confirm that all diagnostic codes are "No Err".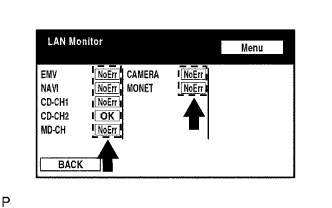
If a code other than "No Err" is displayed, troubleshoot again.